Friday, October 30, 2009

Flannel Top

Oops, I got the pictures in the reverse order again. Oh well. Here's how the rows ended up for my quilt for the Hope Squared Project. It's big enough now that I had to photograph it on the kitchen floor. Guess I should have removed Reilly's toy first!


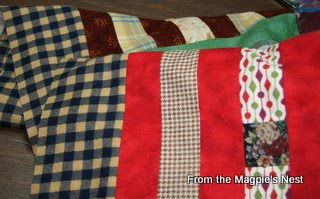
Here's a close-up of the bottom half of the quilt:


And the top half:
I'm shooting for a 54" x 72" quilt. I figure that ought to be big enough for an adolescent girl even though it's not bed size. Right now it's wide enough, I just need to add a bit more length.

I finally put out the rest of the Halloween decorations last night. I've just about decided to leave a handful of them out year round because I like them so well. As it is they'll probably be on display through Thanksgiving!


Thursday, October 29, 2009

Flannel Rows

In this post I'm going to show you the individual rows I created from the flannel parts and scraps. (I don't think I mentioned previously that I had in mind for this to be a horizontal row quilt right from the beginning.) As of yesterday I have the body of the quilt top assembled but you'll have to wait to see that in another post. (Aren't I cruel?!) I think I have loaded these pictures in the order in which the rows were created. They didn't necessarily end up in the quilt top in this order.

Row one:

Row two:

Row three:

And row four:

You should be able to click on each picture to get a larger image of it and a better look at the blocks.

Today I expect to be creating borders for the top and bottom edges of the quilt to get the length I want it to have. After that it will be a matter of finding something in my stash that will work for backing, looking to see whether I have sufficient batting in my closet or whether someone will have to go out and get some for me, and clearing off the dining table so I can sandwich the layers. The latter is no small feat, let me tell you! It's not a big table but it currently has layers of its' own that I will have to put somewhere else!


Tuesday, October 27, 2009

Liberated Stars

I'm still working on the flannel quilt for the Hope Squared Project as part of Margaret's Hope Chest. Most recently I've been making liberated stars. This block is great for flannels. Because flannel is bulkier and tends to stretch it's not a good choice for precise piecing. Liberated stars are not precise!


The biggest problem I'm having is getting enough contrast between my colors and prints. My palette is limited and I am determined to use what I have, not buy more. The star below began with one of the Broken Dishes blocks I made from the off-cuts of my heart blocks.


I currently have three rows complete. I also have enough 4 Patch units to make three narrow rows. I still need about 15" to achieve the length I'm shooting for.


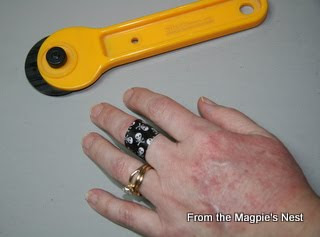
And for the first time in the 20 years I've been using rotary cutters I finally managed to cut myself yesterday. Do you like my skull & crossbones band aids? ;- ) (You can also see the remnants of that eczema outbreak I complained of a while back.)


It's not a bad cut. Maybe a little more than a paper cut. It sure didn't want to quit bleeding though! I sort of brushed my finger with the edge of the blade when I didn't cover the blade between trimming bits. I was only functioning on half a brain yesterday, otherwise this probably wouldn't have happened.

Now I have to get busy creating rows for those last 15 inches...

Sunday, October 25, 2009

Flannel Parts

While I'm waiting for all my new fabrics for baby quilts to arrive I thought I would do something with the leftovers from my own flannel quilt. Over on Quiltdivajulie's blog I read about the Hope Squared Project sponsored by Margaret's Hope Chest. Hope Squared is an effort to collect 400 newly minted quilts to distribute to homeless children currently enrolled in the Grand Rapids, MI public school system. Having grown up in Michigan, spending summers not far from Grand Rapids, I felt compelled to contribute to the effort.

Yesterday I gathered up the scraps from my quilt and pulled some additional yardage I've had on hand that I thought might work with them. I fussy cut a sampler print into chunks, made some heart blocks, got a couple of odd sized Broken Dishes blocks out of the off-cuts of the hearts, and created three dozen 4 Patch blocks. (Those are some Halloween ribbons I picked up last month tacked to the left side of my design wall. Still haven't figured out what to do with them exactly.)

I feel like I still have a long way to go before I'll be able to put together a quilt of any size. Those patches for 4 Patch blocks sure make great leaders and enders though! (The 4 Patch blocks you see pinned to the wall are actually two stacks of ten and one stack of five.) The hardest part is trying to decide which fabrics to cut up for patches and which ones to leave in longer strips for strata or borders later on.


There's a fairly short deadline for this project: November 15. I think that will help to keep me from stalling out on it. Well, that and the purpose of the project. The trick is to stay focused. My own flannel quilt may not get tied very soon after all!

Friday, October 23, 2009

Stunning News

Here we have my two granddaughters with one of their uncles. You may be able to tell that this was taken very recently. ;- ) Miss M is now four and a half years old and her little sister is just over two.

Their mother, my Darling Daughter, has been suffering through the worst pregnancy she's ever had. We've been thinking the source of her difficulties must be the boy they've been hoping to add to their family.

Tuesday she had her first ultrasound. It's not a boy. It's twin girls. TWINS!! My tiny little bird-boned daughter is trying to carry twins! Eeek!

Needless to say, there's been a flurry of phone calls and emails and a mad scramble to come up with a whole new set of potential names (not that there's any real hurry in that department). They were pretty well settled on a boy's name. DD claimed they were all out of ideas for another girl's name anyway. (You know how it is, having to find names both parents can agree on.) Inbetween researching baby girl names on the internet I've been visiting online fabric retailers. Went a little nuts to be honest. One order has already arrived - turns out that vendor is not far from where we live. Some of what I ordered was intended for preemie quilts - for other people's premature babies - because I have nicely depleted my inventory of flannels for that purpose. Now I will have to make preemie quilts for my own daughter's babies. There's no way her petite little frame will carry two babies to term. I understand twins typically come about 6 weeks early anyway. Yikes!

To further complicate matters, DD and SonInLaw are trying to buy their first house and SIL is scheduled to leave on a 6 month deployment in mid-November. He will not be around for the birth; he'll be somewhere on the other side of the world. Hoo boy.

Before my world was turned upside down by all this news I did manage to get my flannel Lincoln Logs quilt sandwiched and pin basted.

I even slept under it last night, with the batting hanging out all around the edges and everything. What I need to do now is figure out what color and type of thread to tie it with so I can get that finished up for good. And then there's the quilt for little sister's big girl bed and receiving blankets to make and, and, and...

Monday, October 19, 2009

Are We There Yet?

First off, the Iraqi Bundles of Love project is coming to a close. You should take a moment to go read IBOL Guy's current post. It will make you feel good.

Second, I want to congratulate Renee S. who is the lucky winner of my Pink Artist needlebook. (I'm going to do my best to get it into the mail to her sometime this week.) And, woohoo, I won a print from Alma Stoller!

Now, back to the back for my Lincoln Logs flannel quilt. You may remember that I'd put a light plaid on all four sides but didn't like the way it looked. I took off two of those strips and cut the remaining two down to half their original size. The next thing I did was to add the dark blue floral you see here on the two sides. That was another piece of fabric I've been hanging onto for years in the hopes of including it in a quilt for myself someday.

Today I added what I thought would be the final strips/borders. This red plaid went on all four sides. But when I measured it against the top it was too short in both width and length. I was disappointed, but not terribly surprised because my measuring has been less than precise.

I only lacked half an inch in one direction. Since there was plenty of the plaid left I simply took off one of the borders and replaced it with a slightly wider one. On the two sides, however, I put in a little more effort. I cut two 2.5" strips (which had to be pieced to get the necessary length of course) and added them to each side. Now I get this cool vertical stripe effect every once in a while along those two sides.

My hope is to be able to take the top, the back, batting and some pins to a local VFW hall tomorrow to get the layers sandwiched. Originally I had planned to have this machine quilted, maybe in a clamshell or Baptist fan type pattern. Now I think I'd rather have it tied. It seems more appropriate somehow. And I can do it inbetween making blocks for DGD's quilt. ;- )


Friday, October 16, 2009

Borders On, Borders Off

Just because I found fabric for the background of the blocks for DGD's quilt doesn't mean that's the quilt I'm working on. ;- )

No, instead I've pulled out my Lincoln Logs friendship top and have been working on that.


It could be that I was inspired by the season or the weather - it's cooler and wetter now - because this is a flannel quilt top. (I last worked on it almost exactly two years ago.) At any rate, I thought I wanted it bigger so I added borders to all four sides.


Then yesterday I started building the back. I've had this flannel print in my stash for many years and have been looking forward to using it in a special quilt. Those buildings are outhouses. {grin!}


I left the outhouse yardage whole and just added strips of other flannels around it. For the photo below I folded the big piece back on itself; it's not really this long and skinny.


I also added another strip of a light plaid all the way around before I quit working yesterday. I wasn't completely happy with it though.

This morning I decided that the borders I'd put on the top weren't working. I took them off. After trying the quilt top on the bed in various directions I decided to just add borders to two of the sides, thus making the top nearly square. I used different fabrics this time and I like it much better.


When I had that done I reluctantly came to the conclusion that the last round of strips I'd added to the back would also have to come off. {sigh} I removed the top and bottom strips but then decided to just cut the side strips down to half their original width.

This still needs to be a bit bigger in both width and length. I have a plan in mind...
Stay tuned to see what happens!

Wednesday, October 14, 2009

Flitting About

It's been an eventful week so far. At least it seems so to me, whose life is not what one would call eventful most of the time.

Monday I went out to look again for background fabric for DGD's quilt, not realizing that it was Columbus Day. I couldn't figure out why in the world there was so much traffic! And the store I went to was busy and smelled strongly of perfume. Not a good thing. But I did find this print I think will work. I bought enough so that I can use it exclusively if I so choose.


Yesterday I went out again, this time to deliver the preemie quilts I've been making. Oh, and I made one more on Monday:


It's a good thing I made as many as I did because apparently some of the ladies didn't follow instructions and donated quilts that can't be used. Too bad.

Today I have to go out again (!) to replenish my vitamins and supplements. Might as well pick up some actual food while I'm at it.

My SIL sent me a surprise package that arrived over the weekend:

Fun halloween prints! There was a skull and cross-bones charm too, I just didn't get it into the picture. It's all I can do to keep myself from making a Halloween preemie quilt. (Do you think that would be inappropriate? ;- ))

Tomorrow is the last day to get your name in the hat for the Pink Artists Prize Wheel. Every $10 you donate will give you two chances to win one of the original works of art and goes to support the Susan G. Komen search for the cure for breast cancer.

Be Bold - go donate!


Saturday, October 10, 2009

New Homes for Orphans

Orphan blocks that is!

I got the word earlier in the week that preemie quilts would be collected at the next guild meeting. I'd set a personal goal of making and donating at least 12 quilts for premature babies this year. At the end of September I was right on track with nine blankets completed and six of those already donated. So I got out my bags of scrappy blocks and started playing around.


All of these quilts were made from the six inch Shoo Fly, Bow Tie, and Churn Dash blocks I was making a few months ago from my older yardage and scraps. I began by separating the Shoo Fly blocks into piles according to their background values: dark, medium, or light. I knew a strippy set would be fairly easy to pull together quickly and here it is:

It's a little dark, and not at all "sweet," but hopefully someone will be glad to have it. The next one definitely has a more juvenile feel to it, primarily due to the Precious Moments critters I fussy-cut from the large striped print.


I'd had my fill of the Shoo Fly block at this point and got out the Bow Ties for the next effort. Proportionally they seem a little big for such a small quilt top but we're not out to win ribbons here. I really like them set in rings this way. The borders at the top and bottom were added to achieve the necessary length while keeping the top visually balanced.


Finally I got out the Churn Dash blocks to see what I could do with them. This top may have taken the most time to create. I had a hard time finding a subset of blocks that would play well together. I still wasn't convinced until I found this rose print in my stash. Somehow it seems to make the whole thing work.

The quilting that holds the pieced tops to the flannel backs is very simple in all of these quilts. You should be able to click on the pictures to get larger images; you might even be able to see the quilting lines. It's all straight lines that didn't require marking. On the strippy quilt I stitched a giant zig-zag pattern down the narrow lattice strips between the columns of blocks. All the quilts have a double row of topstitching around the perimeters in place of binding.

I have time to make a couple more of these little quilts - the meeting isn't until Tuesday - but I'm not sure I will make any more right now. There are other projects tugging at the edges of my mind. I'm just delighted to be sewing again.

Wednesday, October 7, 2009

Thrifty Goodness

I went to the thrift shop this morning. It was exciting because I was able to have a nice long browse without becoming horribly ill (and I'm feeling remarkably well even now). There was a lot to see too; all their Halloween merchandise was put out recently and hadn't been picked over too much yet. I found this painted bucket that is just the right size to house one of my potted plants for the season.

It's a grinning cat's face in case you're having a hard time deciphering the image.
One of his eyes is obscured by the plant leaf.

I brought home several small treasures but the most interesting is a set of 5 china salad or dessert plates. I wasn't really looking for such things and almost missed them entirely. Then when I saw that they were priced as a set, not singly, I really had to work to convince myself it was okay to buy the whole collection. I'm accustomed to spending $5.00 or less when I go to the thrift shop. The set of plates was $9.50... plus I had all my other goodies. I'm nothing if not a creature of habit. It's pretty silly how hard it can be to break out of those habits sometimes. So here's a shot of one of the plates:


There were no cups or saucers or anyting else that I could see. The plates are marked off center on the back with Foley China, a horizontal oval with the inscription EB&Co, and Made in England below that. There's also a tiny orange dot to the right of the oval. I don't know what I have here but I couldn't leave those birds at the store!

My first thought was to hang one plate on a wall where I could enjoy it everyday. Someday I'll have to show you the wall of bird prints I have in my dining area. I also have a small collection of decorative plates on another wall. I may eventually hang one of these on that wall. In the meantime I think I'm just going to let myself use them for my luch each day. :- )

Tuesday, October 6, 2009

Dude!


I just realized that we have only a little more than a week to get our donations in for the Pink Artists Drawing! All the money raised will go to the Susan G. Komen Foundation for breast cancer research. The cool part is that for your little $10 donation (or more if you're up to it) your name goes into the drawing two times for one of the awesome pieces of art that have been created just for this cause. You can see a sampling of the offerings over on Monica's blog. She has created a slideshow too - scroll down past the Donate button in the left-hand side bar (see how easy it is?!)

What are you waiting for? Hop on over there and click away!

Two Steps Forward, One Step Back

Doing the studio tour was an enlightening experience. It took me two days to get around to see them all. I picked up a couple of new ideas for storing or displaying things. What I found most interesting was the distinct line between artists who need a clean, clear space in order to create and those of us who work better when we have lots of visual cues. What some perceive to be mess is necessary stimulation for others. And some of us organize our visual stimuli more than others! I think I could benefit from a little more effort in that department. I doubt that will happen any time soon however. ;- )

I've been struggling to come up with a design for a twin size quilt for my second granddaughter. DD provided me with this yardage she thought would be fun to use, and it will be, but I have been well and thoroughly stuck.

Getting ready for the studio tour motivated me to put away a few things that have been laying about since the end of my last period of productivity and that has helped to clear the creative pathways. I now have a plan for this new quilt top. What I don't have is enough of the right type of print for the background of the blocks! Arrrggghh!

This is the one that I like the best for the background of the liberated stars I want to make:


These are the other pieces I have in my stash that would also work (the triangle print appears again in the upper left corner):

You should be able to click on the photo for a better look.

I've been all over the internet looking for something appropriate. I've called around to my local quilt shops. This type of print just doesn't seem to be available at the moment. So I've put the word out to my quilt guild members. We'll see whether they have anything they can spare. I might have enough on hand to get the blocks made but I'd feel a lot better if I had more to work with. I'm afraid to begin when I'm not sure I have enough to finish. Maverick or liberated is wonderful, but I want cohesiveness in the bargain!

Friday, October 2, 2009

Studio Tour Part Two

When we left off in part one of this tour (see post immediately below this one) we were on the west wall of my studio space, the window wall. Under that window I have one of these rolling drawer units. I use it to store my beading thread, the extra throat plate for my sewing machine, most of my machine threads, and assorted tools and notions. It's placed sideways to allow more room for the chair at the sewing machine. Fortunately it's not less convenient to get things out of it this way. It's also a handy place to store DVD's and my cell phone!


Further along that wall under the window I have a stack of bins in which you'll find the rest of my collection of recycled silk ties. Then there's a pile of containers of cotton scraps. I didn't get a picture of that particular corner of the room. In it I have an antique record cabinet that belonged to my grandfather topped with a TV and DVD player. Turning that corner we have the closet wall.

My orphan block boxes are on the shelf, and a bin with medium sized pieces of batting. There's other stuff stored up there as well but it's not germaine to this tour. The fabric you see here are flannels and other-than-cotton yardages. The laundry basket is full of dupioni silks. On the other side of the closet is my bead storage, and I hang tote bags on the back of the studio door.

Here's a straight-on shot of that end of the wall. No, I'm not trying to show off the pathetic collection of ribbons I've won; I wanted you to see that those are three separate units of mini drawers mounted on the wall. You know, the kind you find in the hardware section of any discount store. I cut up index cards to make little labels for each drawer. This is where I keep my beads and novelty buttons. The bin on the floor has my bulk buttons and sequins. I have a couple of old cutting mats and my mother's old blocking board (she was a knitter) stored behind the door too.

Here's what the top of the banquet table looks like when it's clean. This is an old picture!

This is what it looks like right now behind my sewing machine. There are birds and dolls all over the studio, including back here. The toucan is sitting on top of a Cadbury's tin in which I keep the tags from the ties I recycle. The yellow tin below that is where my rayon threads for decorative machine stitching are kept. The Diane Phalen tin is my portable sewing kit. Except I hardly go anywhere with it anymore. But it keeps the tools I use most often right at hand:


Fresh needles for the sewing machine, my hemostats, a bit of rubber for pulling stuck needles through thick layers, marking tools, Thread Heaven, the sheath for my Gingher scissors, even a pair of folding scissors.

And that concludes this tour of my studio space. Oh, except for one thing:


No studio is complete without the regulation fur-bearing creature!

Added 10-4: Here's the link to the list of the other bloggers participating in this studio tour. Sorry I didn't think to put that up sooner!

Studio Tour Part One

I have a suspicion Blogger won't let me load all the pictures I want to share with you in one post so I'm going to break this tour up into parts. We'll begin with an overall shot of my studio from the entry door.

This room was intended to be the master bedroom of our little bungalow home. (I need more room for my artwork than I do for sleeping!) I have created an island in the middle of the room with a six foot banquet table, an antique baking table, a short file cabinet and my ironing board. My Pfaff sewing machine is on the banquet table behind the baking table and file cabinet. My cutting mat is on the baking table, barely visible in this photo. Whenever I'm not working on a project that surface collects stuff like a powerful magnet. Generally the fabrics for the projects I'm working on get piled on top of the filing cabinet. There are also stacks of fabrics for prospective projects.

Here's a close-up of the baking table. The square drawer in the upper left is full of rick rack and other trims. The little drawers hold my extra rotary cutters and blades and other miscellaneous hand tools. In the long flat drawers I keep plastic bags in assorted sizes and pattern papers. The drawer with the rounded bottom hold yarns. I store my holiday dish towels in the cubby behind the door.

On the floor in front of the baking/cutting table is a rug my mother designed and hooked.

If you turn around from the cutting table you'll face my design wall. On the right is the door to the hallway, on the left is the door to my bathroom.

Turn that corner (to the left again) and you have my desk wall. The desk is flanked by a pair of bookcases, filled mostly with books. My radio/cd player tops the right hand bookcase. You can see I have lots of visual inspiration in my space. (The uninitiated would call it clutter.)

I have tried to load these pictures in such a way that you can click on them to get a larger image. Below is a close-up of the upper half of the bookcase to the left of the desk. The yellow and orange on the left side of the picture is actually a couple of leis my SIL brought me when he visited Hawaii briefly on his first deployment. They are hanging from the cord of a movable lamp I have clamped to my fabric bookcase. I wear them when I need to lighten up or if I'm feeling especially playful already.

Did you notice the sign that says Creative Minds are Rarely Tidy? ;- )

If we turn the next corner to the left we have more bookcases, but these hold my quilting cottons.

On top we have more eye candy and some actual storage bins. One stack of tins hold snaps and elastic and such, the others are empty. The plastic shoe boxes have my silk tie remnants and some craft goodies. The bigger plastic boxes hold my embroidery threads. The smaller tote on top contains the warm color families, the tote on the bottom has the cool color families and the neutrals. You can see a bit of the beaded curtain I have over the one window in the room in this photo too.

We'll cover the last wall and my sewing station in the next post.