Sunday, December 31, 2017

The Final SAL for 2017

After pillowcases and sampler stitching I finally felt able to return to my travel trailer series for The Sketchbook Project. The last time you saw it I believe it looked like this:


Then one day I had a brainstorm and did this:


I straightened up the window but ran afoul with the "logs" a bit. To use a British expression, I was pretty chuffed with the way the door turned out!

Next up was curtains in the window.


I used a star stitch (I don't remember what the official name of the stitch is at the moment) for the valance. The extra wide log was driving me nuts so I took out that one line of split stitches and replaced them. The logs are still wonky but I don't find it quite so offensive. It sort of goes with the lumpy wheel.


I just laid four long straight stitches, wove around the center a few times, and then couched each midpoint with a single stitch. I was shooting for the look of a wooden spoke wheel. It'll do. Here's my caravan riff on a cabin in the Old West:


In the original drawing there was a propane tank on the trailer's tongue. It felt like a stroke of genius when I had the idea to turn that into a storage barrel. 😉


I have at least two more trailers I'd like to attempt to complete the collection. The books are due in Brooklyn at the end of March so I should be able to pull it off.

It's a busy time of year for everyone but others in this stitch along may also have progress to share. We each work on our own needlework projects, and there's quite a variety. You can take the tour while you await the bells ringing or the fireworks going off or the ball dropping to welcome 2018. 😊

Thursday, December 28, 2017

December's Bee, Myself & I

At the end of November I shared that I've decided to do some more embroidery as my selfish sewing. Specifically, I've joined a Facebook group called A Year in Stitches. That's doing a good job of encouraging me to pick up the sampler to try out a new stitch or keep my skills sharp. And it has the added benefit of a bit of selfish stitching every day or every couple of days!

Last month my sampler looked like this:


Now it looks like this:


Well, there are a few stitches that have been added since this picture was taken but you get the idea. I finished framing the numeral one, started another square of daisies, fleshed out the garden above with more flowers and foliage, and embellished the paisley with some pistil stitches.

Here's a close-up of the flower garden. In my mind the purple flowers in the lower right corner are violets. I didn't realize the top of the square had been cut off when I took the picture. Sorry about that. I may eventually add a spider in, or dangling from, the web.


Not only does this sampler give me a place to practice my embroidery skills, it gives me an excuse to play with the hand dyed flosses I've been acquiring. Hubby did not take the hint I gave him about a special bundle of floss I was hoping to receive for Christmas. Lots of other lovely gifts, but I had to order that for myself after the fact. With any kind of luck it will be here for some New Year's Day stitching!

There was one unexpected gift on Christmas morning:


A pretty dusting of snow!


We do get snow occasionally around here, but to have it arrive in such a timely way was a surprise.

There will be another Stitch Along check-in on the last day of the year. I'm happy to report there has been some progress on the latest caravan. I hope you'll stop by to see what I've done on that front. 😊


Wednesday, December 20, 2017

The Holiday Effect

I have had no creative energy to speak of this month, for varying reasons. Just this morning I realized that one aspect of the problem is that my studio space has become the main Christmas preparation zone. This happens every year but for some reason it's having a greater impact this year. Or so it seems. In any event, there are no new quilt blocks or quilt tops to show you. There have been days when I haven't even done any needlework because I didn't have the right kind of project to hand. That was taken care of yesterday with the delivery of a couple new sets of stamped pillowcases to embroider. I found these on sale at CraftMore.com. This was the second time I've ordered from them and I have to say I've been impressed with their selection and service.


I have already selected the hand dyed flosses I will use on the giant daisy design and have begun the stitching.


Of course I'm not following the package directions. Instead of stem stitch I've outlined the central circle with chain stitch and am using split stitch for the petals of the flower. The plan is to use back stitch and chain stitches on the leaves and stems. Or maybe more split stitch, we'll see. I'm even toying with the idea of embellishing the center of the flower with some extra stitching.

And now for a happy dance: I was lucky enough to win Nancy's third day of give-away! I'll be receiving one month of the floss club free of charge. Merry Christmas to me! There are still a few days left in her advent give-away, and you can still put your name in the hat for the prizes that have not yet been awarded if you haven't done so already. 😊


Thursday, December 14, 2017

Scrap Happy in December

Not much actual sewing is taking place in The Magpie's Nest these days, partly due to the holiday season and partly due to the toxic exposures that come with the holiday season. I didn't think I would have anything for Scrap Happy Day this time around. Then one day this week I wanted to do some hand embroidery. Specifically, I wanted a place to practice feather stitching. I rummaged around and found some crazy piecing I'd done years ago, with the scraps from a doll quilt I'd made for my daughter. (Which gives you an idea how long ago this was pieced: my daughter has four daughters of her own now!) The doll quilt was something like 18" x 20."  This piece would finish at about 8" x 10."


I'm using - of course- some of Nancy's hand dyed floss.


By the way, there's still time for you to hop over and sign up for her advent give-aways. Two prizes have already been awarded but you've got ten more chances! Well... nine by the time you read this probably. She will ship internationally so don't think you can't enter if you're on another continent.

I discovered that I'm more comfortable working the feather stitch with the work upside down rather than right side up. Although I haven't quite wrapped my head around working the stitch from the bottom up as it were. If that's even possible!


I have no idea what else may happen to this bit of crazy patchwork. There are a couple of short seams to cover yet. After that I may create some false seam lines just to break up the longer patches a bit. I have no idea what I'll do with this once I've finished embellishing it either. Might make a fun journal cover...

Kate  over at Tall Tales from Chiconia has a whole list of folks who've been playing with their scraps if you need some inspiration or just some eye candy. 😉


Sunday, December 10, 2017

December SAL

Well, the caravans have been parked by the side of the road for the time being. 'Tis the season after all!

Instead of embroidering travel trailers I've been embroidering flowers on pillowcases. If you're a regular reader you may remember this set of pillowcases:


The pair have been completed, hemmed, and laundered. They were stitched entirely with Nancy's hand dyed flosses.


Before they were finished I'd ordered and received another set of stamped pillowcases to stitch up. I only used Nancy's floss for the pink petals and yellow French knots this time. 


The black, green, and deep red accents are done in DMC floss. The flowers were rendered in split stitch, the green scroll is back stitch. This was such a simple design that I knew I could complete both cases well before Christmas if I applied myself.


So I did!


This set was made with lace edging, eliminating the need to hem them. I now have three sets of pillowcases ready to donate to our local women's shelter in hopes of brightening their space and the lives of the women currently residing there.

Some time ago I signed up to receive a monthly shipment of 6 skeins of floss from Nancy. Look at the fabulous Christmas colors she sent this month!


They look better in person, trust me. Nancy is doing an advent of give-aways. There are 12 days to sign up, with a different present for each day, and then between the 13th and the 24th she will announce the winners, one a day. She's willing to ship internationally so be sure to go visit her blog while you're touring the rest of the Stitch Along!


Friday, December 1, 2017

The Tortoise Finishes Another Race

Slowly, slowly, I've been working on this blue Patience Corner quilt. The blocks were made by my friends in my local quilt guild. I set 36 of them 6 x 6.


Then I framed them up to make an 84" top. (I also moved one block to get that X in yellow through the center of the quilt!)


It sat for a while before James got around to quilting it. As usual, he did a lovely job for me. 😊


He used a simple overall design he calls 'water' through the body of the quilt, then these circles in the inner border and waves in the outer border. All freehand I might add!

It's too wet and windy to go outside for a proper photograph and I don't feel like wrestling with it to hang it in the studio for a portrait. Here it is draped over the long-arm, minutes after I finished sewing down the binding:


Since that picture was taken I've washed the quilt and now need to ink the label. My intention is to donate this to our local women's shelter. How they choose to use it is up to them. I've adapted the fast corner triangle technique Ami Simms advocated for hanging small art quilts to make labels for my bigger quilts.


For a quilt this size I cut a 5" square of my label fabric and fold it in half diagonally once. The raw edges of the label are then lined up with the raw edges in one corner of the quilt (before I apply the binding). I sew it in place with a narrower seam allowance than I will use for the binding. After the binding is applied by machine and then sewn down - which I do by hand as a personal preference - I celebrate by blind stitching the single folded edge of the label patch. The quilt is laundered before I inscribe the label with my Pigma Micron pens. As long as I don't try to rush the process, stretch and hold each section of the label with my left hand while I'm writing on it with my right, I don't have too much trouble writing on the fabric. You just have to go slowly and let the ink settle into the fibers. In addition to who made the quilt, where or why and when, I'm usually able to include simple laundering instructions on these labels. You know, something like "machine wash/dry, gentle cycles, low heat." And away we go!


Tuesday, November 28, 2017

Back to Selfish Stitching

Some time ago Granny Maud's Girl wanted to hold herself accountable for a project that would be for her own use and pleasure, not for someone else. She started Bee, Myself and I for that purpose. It's an on-again, off-again sort of quilt or stitch along, at least for me. I finished up a quilt top for myself in September and am waiting for it to be quilted. Nothing really grabbed my attention to replace my selfish sewing until I stumbled across the Year in Stitches group on Facebook. It seems to me there's been a general "take a stitch a day" effort among the embroidery crowd this year. Of course I'm late to the party. That seems to be my modus operandi. Nevertheless, this has created a new focus for my sampler stitching. It's also a satisfying substitute for pulling a print a day like I did for my year-long Diary Quilt project that came to an end almost exactly a year ago. 😊

You may (or may not!) remember that I set up a couple of strips of muslin with the intention of using them to hone my embroidery skills. They would also provide an excuse to use some of the hand dyed flosses I've been collecting from the Victorian Motto Sampler Shoppe. After the initial enthusiasm other projects took precedence, as happens, and the samplers languished. Then I found the Year in Stitches group. That has prompted me to change the format of my sampler stitching a bit.


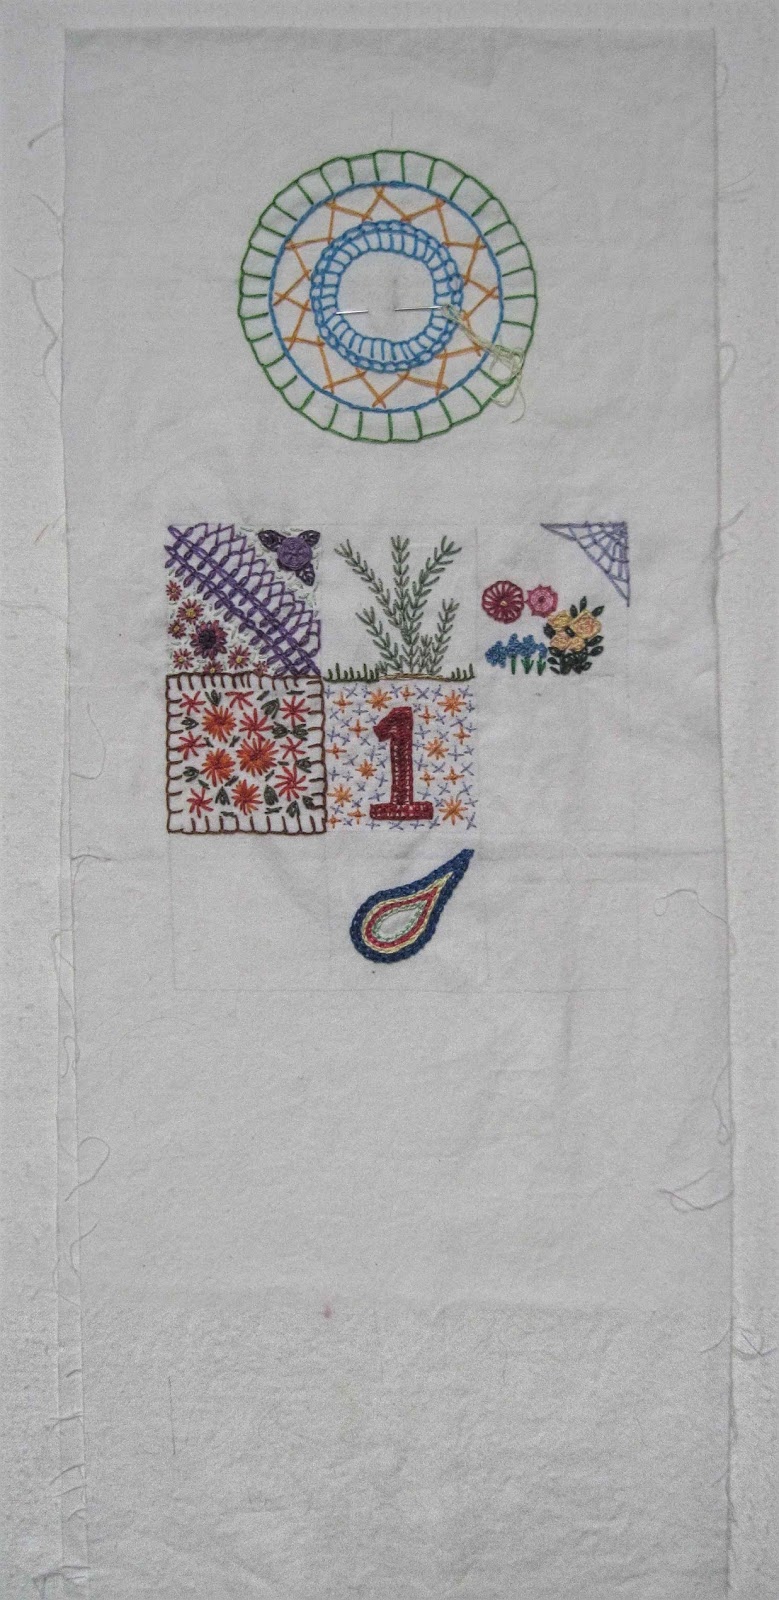
There are two of these 8.5" x 22" samplers in my project box. The other one has the Virgin of Guadeloupe at the top. I haven't touched her in months but her time will come. In the meantime, I've lightly drawn a grid of 2" squares within a six inch box on this piece. Originally I thought I would try to fill in a 2" square a day. It quickly became obvious that that plan was not realistic! It's taking an average of two days to completely fill a square. I'm also adding to this about every other day, not every day. Still, I'm pleased with the way it's progressing.

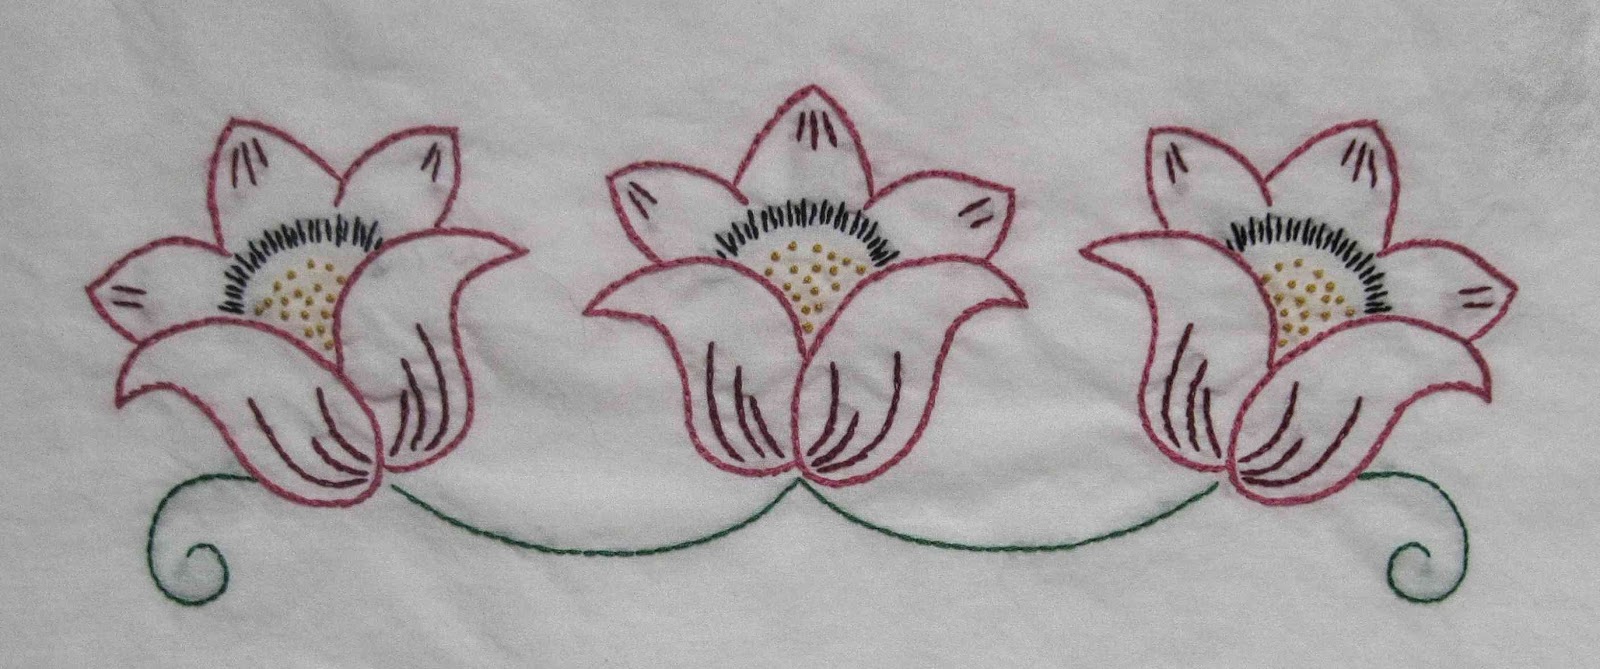
This is the first square I completely filled in.


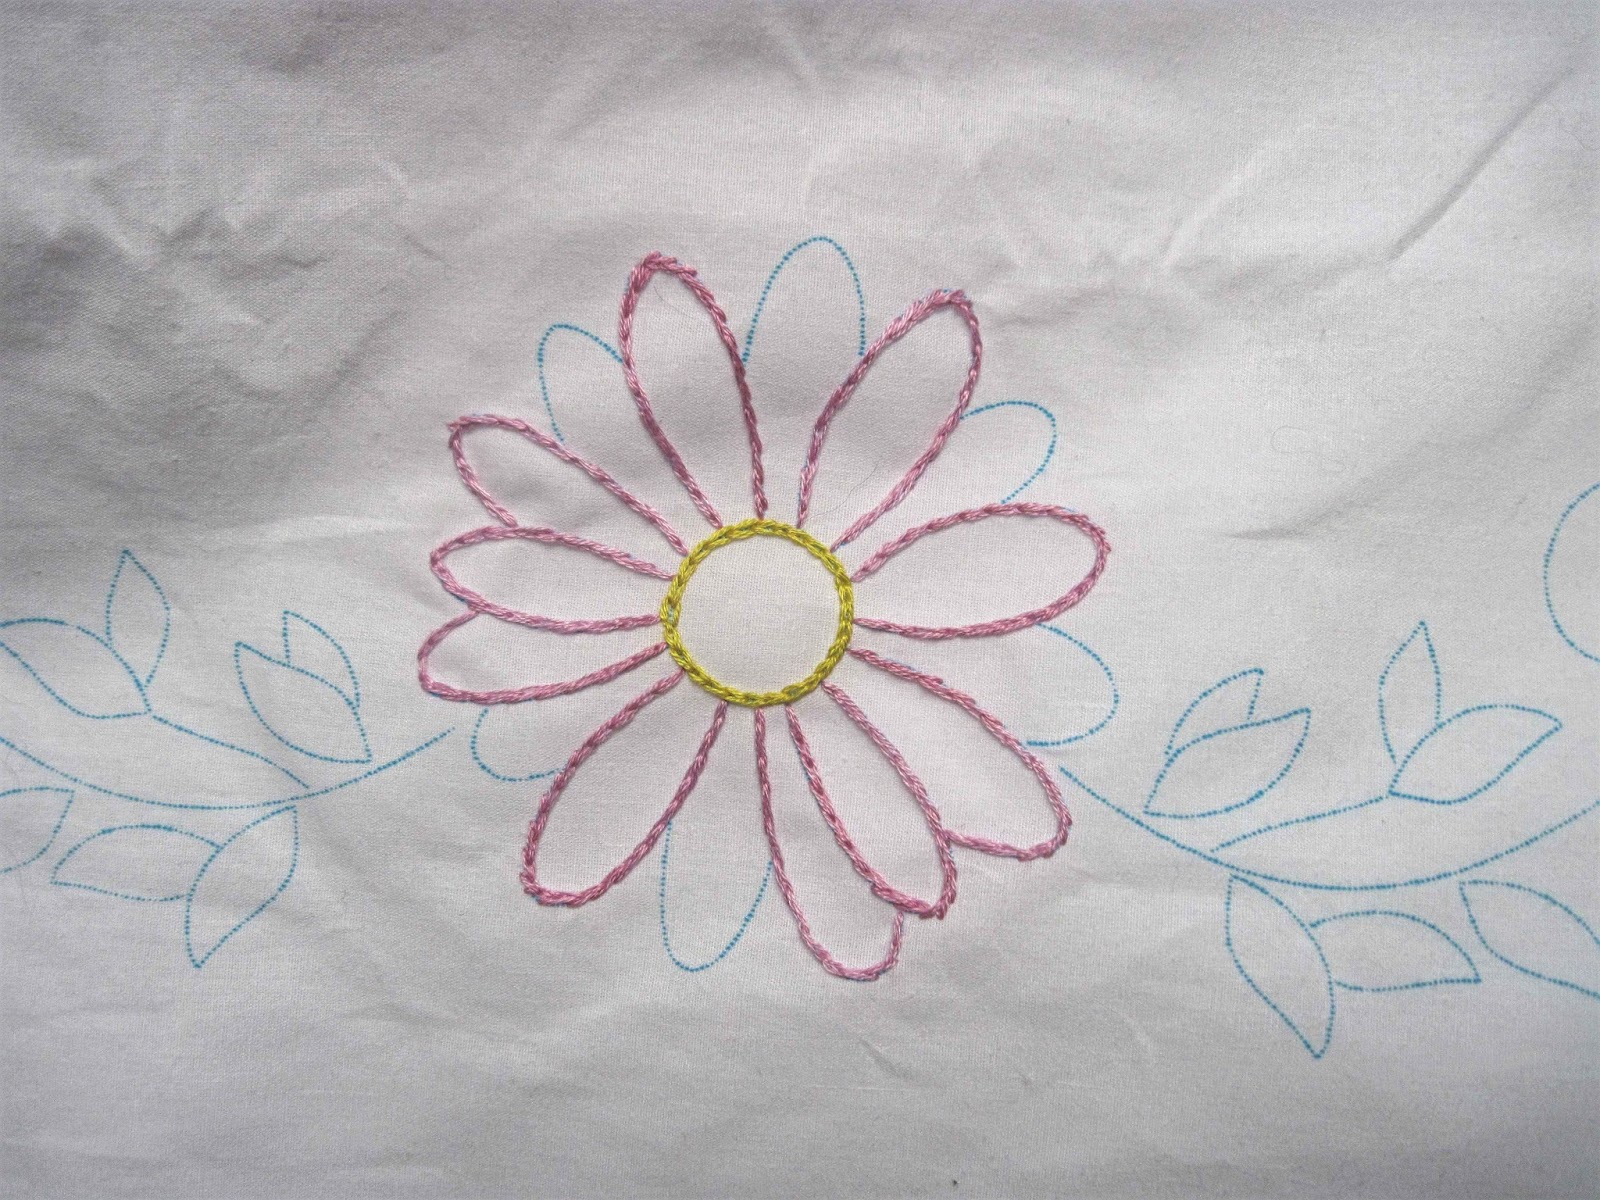
I'm stitching intuitively, making it up as I go along. The second square I filled in was not necessarily the next one I worked on. This really is a hit and miss process. For example, I outlined the square below with blanket stitches one night, tried the same stitch to make flowers the next time I worked on it (some of which I filled in with straight stitches in another color), and then filled in the remaining areas with leaves made of lazy daisy and fly stitches and the occasional elongated cross stitch another day.


Since this is meant to be a year-long project I knew there would be more than this one piece before my year was over. To that end I decided to label this sampler with a numeral one in the center square.


It stayed this way for several days. Then one night I used a single strand of floss and "drew" horizontal lines across the interior. That created a striped effect but it still didn't seem finished to me. I'm learning to utilize Pinterest to troll for ideas and inspiration. I found a stitch on someone's board that looked intriguing. I don't know what it's called but I was able to work it over the horizontal lines and it worked well to give more color and texture to my number one.


I love the way the subtle color variation shows up in this little element. Apparently the white background grates on my nerves because I felt compelled to fill this one in as much as I could too!

So that's three squares completed, three in process, and three blank at this point. I'm jumping the gun just a bit and posting this before the actual end of the month because I don't want my faithful readers to think I've completely dropped out of cyber space.  In fact, I may make it a point to post my Bee, Myself and I activities between the 28th and the end of the month from here on out, just because I think it might work better for me. 😉

Sunday, November 19, 2017

SAL in November

After a bit of a dry spell where needlework was concerned I'm suddenly back at it in a big way (relatively speaking of course!). I won't share all the details in this post. Suffice to say that I have a new focus for my Bee, Myself & I effort. If you're interested at all you'll want to watch for a post at the end of the month. 😉

In the meantime, I've finally been inspired to finish up my steampunk caravan for The Sketchbook Project. The last time you saw it, it looked like this:


A couple of you recognized the submarine quality of the silhouette. It was that element that motivated me to try for a steampunk look. In the process I've learned to utilize Pinterest for design inspiration. In case you are unfamiliar with steampunk, it's sort of Jules Verne and steam power and gears, a mash-up of the Victorian era and industrialization. There's an element of fantasy in it too, which is what appeals to me. To that end I have come up with the following.


I'm happier with the window in the door now. The couched thread is meant to be tubing, although I have no idea what the purpose of said tubing would be!


Nor do I have a purpose in mind for the gears and "pulley." I imagine the propeller could help decrease wind resistance (even if I might have it facing the wrong way for that).


Completing the steampunk caravan motivated me to start another one right away. I already had the lines drawn on a light green background but didn't have a specific direction in mind for this next one.

I don't seem to be capable of making truly square and straight windows!
I just picked up a warm chocolate brown and started chain stitching. Then I knew the door and awnings needed to be a rich red. It's now looking a little barn-like. It will be interesting to see where this takes me!

There's a wonderful group of stitchers participating in this stitch along now, with a variety of needlework projects in the works. You can take the tour by clicking on the names below. If you'd like the motivation of blogging about your work every three weeks you can contact Avis through her blog and she'll get you on the list. 😊

Saturday, November 18, 2017

The Dark Side of the Rainbow

We're coming up on the end of the Rainbow Scrap Challenge for 2017. I've made a handful of blocks out of my dark neutrals, which it the prompt for November if you aren't ready to start putting blocks together into quilt tops.


I honestly thought there were more than that! I wonder if I've put some away without photographing them? It's a distinct possibility. In which case they are somewhere in these piles:


The tallest pile, at the top of the picture, are my postage stamp stars on white backgrounds. That stack is 4" tall. I haven't counted the individual blocks yet. The pile of 16 Patch blocks is only an inch tall. In the foreground are my stars that have light neutral or dark grounds. That's not all of them; I think there are others in a bag in the Parts Dept. drawer.


Right now I'm finding this stack of stars overwhelming. I doubt there are enough 16 Patch blocks to go the distance on their own but I might be able to create a reasonably sized top using a combination of stars and 16 Patches. That was the plan back in January. A quick ruffle through the 16 Patch blocks shows me I'll probably have to make up a few blocks in specific colors if I want a balanced rainbow effect. 

I'm linking up with the other RSC bloggers, many of whom are actually building quilts out their scrappy rainbow blocks!

Wednesday, November 15, 2017

Scrap Happy in November

I always find it helpful to have a purpose for the sewing or creating I do. Some days it's enough just to cut up scraps or current favorite prints and make blocks for future use, but a specific purpose for those blocks is always more motivating. What's really exciting is when I can take the blocks I've made randomly and combine them into a quilt top to fulfill a need. I was fortunate to have such an occasion arise recently.

James, my quilter son, is also involved in local theatrical productions. He makes costumes and props, he acts, he helps out in whatever way he can. He was approached recently with a request for a quilt-in-progress that could be used as a prop for a play he is not otherwise involved in. He was willing to have a go at piecing one but knew I could probably furnish the cast with what they wanted much more quickly. As we understood it, they wanted a flimsy, a row of blocks ready to be added to the top, and maybe some loose blocks. They came to the right people!

To begin, I dug out my box of 12" orphan blocks. I found enough Ohio Stars to get the ball rolling. Then it dawned on me that I could frame up some of the 8" sawtooth stars I've been making out of scraps. A simple two inch frame turns them into 12" blocks (all finished sizes), thus making them easy to use as alternate blocks between the Ohio Stars.


We were told they wanted something about 36" x 48" for the prospective quilt top.


That's only twelve, 12" blocks! But then there was the separate row of blocks they requested, and maybe loose blocks as well.


And when the pieces come back from the play - hopefully not in too bad shape - I can complete the top for a donation quilt. So I kept framing up sawtooth stars and made a few more Ohio stars to boot.


They should have what they need for the play now, and somewhere down the line someone will be getting a scrappy new quilt. No new fabric was used in the creation of these blocks so I'm calling this my Scrap Happy effort for the month of November. 😊 Kate has a list of other quilter/bloggers who are using their scraps to make all sorts of fun things. Hop on over to see what everyone else has been up to!

Sunday, November 12, 2017

An Essay on Isolation

With the advent of the holiday season I find myself feeling more isolated than usual. If you've looked over this blog carefully you know that I suffer from extreme chemical sensitivities. That means the merest whiff of a product with any degree of petroleum or synthetic chemicals in it gives me, at the very least, a headache that lasts for 24 hours on average. More typically I will have not only the headache but also chills, become lightheaded, sometimes nauseous, and suffer an inability to think or process information. My reactions slow, and my temper flares. I’ve been known to unaccountably burst into tears. These reactions are most often short-lived, but they tend to be followed by depression. Consequently, negative reinforcement has made it preferable for me to stay home, inside my detoxified little house, and have very limited contact with people outside of my immediate family. Given that I am naturally a more solitary individual than most people seem to be this isn’t usually a hardship. However, it does take a toll over time, and the holidays can be especially difficult. Everyone else seems to be running around doing things and going places and here I sit, all but trapped within the walls of my home.

While I may be more comfortable in my solitude than others, I am also an artist who feeds on visual and tactile stimulation. Textiles or fibers are my medium of choice. Back in the day I was an active member of embroidery and quilt groups. I went to shows, galleries, and exhibits as often as I could. I loved to browse department stores and craft markets. Shopping, although not necessarily buying, was an effective way to fill my artistic well because I could touch as well as see the delights on offer. The experience of being among other people, even if I didn’t interact with them directly, was energizing. (Most of the time anyway. Everyone has bad shopping experiences!) All of this has been taken away from me - unless I want to pay a very high price for a very short excursion. The brevity of my endurance is just as frustrating as not going at all.

I am fortunate to live in a time when I can shop online. I can still purchase supplies, I can see what others are making, and I can converse with them after a fashion. The challenge for me is that I’m not technologically inclined. If it weren’t for my chemical sensitivities I probably wouldn’t use a computer for anything other than email. I’m not interested in going digital in any sense of the word. In that respect I’m a Luddite. In fact, I still have a flip phone, not a smart phone. While the computer makes it possible for me to stay more-or-less connected with the outside world it cannot replace the experience of seeing a quilt or painting in person, of handling a ceramic vase, or give me the ability to turn something over to see the back or bottom of a piece. It can be hard to get an accurate idea of the size of an object when you only see a picture of it, never mind the accuracy of color representation! The virtual feast offered by blogs and Pinterest, etc. is helpful but often unsatisfactory.


Occasionally, all of these factors combine and overwhelm me. Creativity comes to a halt. There isn’t energy or desire even for mindless piecing. I find that truly frightening. Fortunately, there have only been a handful of times when this state of being persisted. Books and movies seem to provide a useful escape. I just have to remember not to panic, to trust that “this too shall pass,” and ride the wave. I am grateful to have been blessed with the gift of faith. I may grouse and complain during difficult times but underneath it all I have confidence that God knows my suffering and will turn it to good purpose eventually. I just have to "hang in there baby!" 😉

Thursday, November 9, 2017

An Embroidered Diversion

Even though things have been quiet here on the cyber front I've been puttering around in the background. I won't cram it all into one post. At least one project deserves to be spotlighted. I just have to have to have enough brain power to do it justice. 

I've been itching to use some of the hand dyed flosses I've been acquiring from the Victorian Motto Sampler Shoppe. Yesterday I set up a small hoop with a quilting cotton that has a barely-there print on it. 


I've learned that a 4" hoop is the most comfortable fit in my small hands. I really wanted to fill this circle with embroidery but the first color I picked up was a dark green. That soon became leaves and stems for mysterious flowers.


They could be red hot pokers I suppose. I wasn't striving for reality particularly. But some time ago I downloaded an e-book by Ann Bernard about how to create flowers in embroidery. I brought that up and decided to have a go at her version of black-eyed Susans. 


The technique was simple and fun and seemed to be effective. However, if I were to do it over again I would use a lighter green for the foliage and/or a redder brown for the flower centers. Up close it looks okay but from a distance...


It's all so tiny! I'm striving to reserve judgement. I know the pitfalls of judging a work too soon. That path leads to UFO's. I'm thinking I might try to install a bird bath between and behind the two clumps of flowers but I'll have to screw up  my courage before I attempt that. Or maybe I'll try to put a tree in the background... or maybe this will sit and simmer while I work on something else altogether - but just until I decide what to do next, not to become a UFO!

There's yet another give away going on over in Nancy's shop. Pop over and leave a comment for a chance to win. :- ) 


Sunday, October 29, 2017

SAL Two in October

I'm sorry to report there have been no new caravans stitched up in the last three weeks. In truth, there has been very little needlework taking place at all. Most of my creative energies lately have gone into my patchwork. There's been a little progress on projects other than the caravan embroideries though.

Because of my extreme chemical sensitivities I no longer do the family shopping. Frequently I will go along and sit in the car while others are gathering the goods needed. On those occasions I will either take a book to read or my current needlepoint project. Somehow I can do needlepoint in the car but not embroidery. I find that interesting. In any event, I'd barely made a start on this Frank Lloyd Wright inspired design the last time you saw it. Now it looks like this:


This is the larger, cosmetic bag size case that's available in the Stitch & Zip line. This time I'm using the floss that was provided with the kit.

The other project that has seen progress is the pair of stamped pillowcases.


You can see I've nearly completed the top one. All it lacks are the French (or maybe Colonial) accent knots in the centers of the flower heads. I decided to leave those for last because I haven't entirely settled on what color to use.


I'm not sure it shows well in the photograph, but I'm using a yellow, an orange, and a rusty red for the flowers. These are all Nancy's hand dyed flosses. There's a subtle color change in the orange and red which is fun to see show up as I stitch.


Nancy is offering a couple of opportunities currently for followers to win whole sets of her hand dyed floss. Pop on over to have a look. If you sign up as a follower and leave a comment you could win some of this gorgeous stuff for your own projects!

Our next stitch along check in will be in three weeks, on 19 November. This SAL is different from others you may be aware of as we each work on our own projects rather than the same one across the board. So you'll see all kinds of needlework as you make the tour, which I heartily encourage you to do!