Saturday, February 29, 2020

Bee,Myself & I in February

You didn't really expect me to be back in under a week after completing two flimsies did you? You should know better than that by now. ๐Ÿ˜‰

Bee, Myself and I was instituted by Granny Maud's Girl as an excuse to work on a project for yourself that you might otherwise put off in favor of making something for someone else. I'm taking this opportunity to share with you a project I've begun for 2020. Actually, I started on it back at the end of October last year. This is just the first time I've shared it publicly.

Long-time readers may remember the diary quilt I created by cutting a strip a day for a year.

This is the flimsy. I can't find the picture of the completed quilt. ๐Ÿ˜’
I really liked having this ongoing project. It gave me a little something to sew, or at least cut, most every day. The strips worked well as leaders and enders too. However, I didn't want to do the same thing all over again.

Late last year I started making "families" of flying geese for a version of the Remixed Geese pattern and enjoyed that process.


They also work well as leaders and enders - the way I make them (the old fashioned way, by cutting a large square, quartering it, and using half-square triangles for the background patches). I have enough families of these geese now for a quilt top, I just haven't had the mental stamina to set the units together. But they helped me come up with the idea to make a family of geese for each week of the coming year. ๐Ÿ˜€

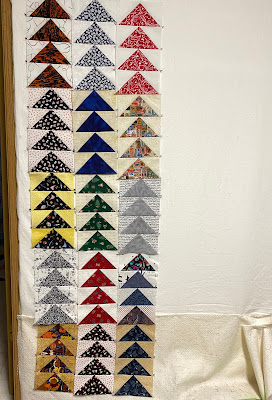
I started with Halloween (an especially favorite holiday of the year for me), followed by Dia de los Muertos. Most of the rest of the families represent projects I worked on during that week. This effort may go on for more than an exact year. I haven't been able to work out how many families I need or want or what size quilt I want in the end. I'm pretty sure I'll be setting them in long rows or columns though. I'm cutting 7.25" squares for the geese and 3.875" HST's for the backgrounds. That results in 6" x 3" flying geese units. The only other "rule" is to keep the background patches in light values and the geese dark. This is what I had at the end of last week:


The earliest family is the strip down in the lower left hand corner. I'm determined to keep them in chronological order one way or another. Unfortunately, this layout doesn't look very promising. I may do this instead:


But we have a long way to go before that decision really has to be made. In the meantime I had to find a way to keep the families corralled and in order. Hubby was given a pair of slippers at Christmas and happily, the box had not been recycled. It's the perfect size to accommodate the growing stack of stips of geese. I also have a little journal in which I'm recording the date and why I chose the prints I did for that week. I figure that will help me sort the families out if they get mixed up along the way.

And as they say on TV, "But wait! There's more!"


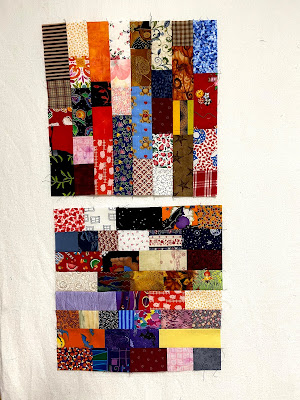
I have begun yet another flying geese quilt top. Same size geese, and no specific design plan yet. All I know for sure is that I'll need 240 of these units to begin with. Makes for great mindless sewing. ๐Ÿ˜Š


Friday, February 21, 2020

Two Flimsies in One Week!

Y'all know about my Parts Department. You may also remember I started making postage stamp stars for the Rainbow Scrap Challenge a couple of years ago. Some of those have already gone into quilts but I had a fair stack left still. At one point I made some scrappy 16 patch blocks to go with the rainbow stars. I wasn't sure I had enough to actually do anything with them but last Saturday seemed like a good day to find out. Taadaa!


These are 8" blocks so the flimsy measures about 48" wide by 56" long. I'm not going to even attempt a border to make this any wider or longer. It will make a fun quilt for a small child or a cheerful lap quilt for a Hospice client. I even have enough of some yardage I bought on clearance to make the back. ๐Ÿ˜ŠThe 16 patch blocks are nearly all gone now. There are plenty of postage stamp stars left but they won't make a rainbow anymore.

On another front, I've been plugging away at some red and white blocks to go on either side of this Christmas panel by SusanWinget that I showed last month.


I'd decided to make this quilt in a horizontal format rather than vertical. I began with more sawtooth stars but with fussy cut center patches this time.


I added the Seesaw blocks to make it more interesting and to use up more of the small scale Christmas prints that had been around forever. Here's the freshly completed flimsy:


After quilting it will finish at about 80" wide by 60" high. There's yet another older Christmas print in red that will be the back for this one. ๐Ÿ˜€Next up, probably another Halloween quilt!

Sunday, February 16, 2020

Stitching Along in February

If it weren't for this SAL I probably wouldn't have done any stitching since our last check in three weeks ago. I've been busy piecing lately. This Stitch Along is great for getting one back on track. Everyone works on their own projects. I started on a pre-stamped dish towel from Mary Corbet last month. I believe this is where it was then:


I thought I'd done the large leaves as well. Must have stitched those after I took the picture! In any event, this is what it looks like now:


And a close up shot:


Again, I apologize for the shadow. Still trying to get the hang of the camera in the phone. I miss the bulk and weight of my old digital camera.

This time I used stacked fly stitches to create the flower petals. (I used the fishbone stitch for the petals of the orange flower.) I also used them for what I'm calling the fern branches. The flower has French knots inside of a couple of concentric circles of stem stitches. It reminds me of a purple coneflower in the way the French knots stand up above the surface of the towel. Of course I'm using Nancy Turner's hand dyed flosses for this embroidery. ๐Ÿ˜‰

You'll find a variety of needlework projects and techniques among the members of this group. If you'd like to have the accountability this SAL provides just let Avis know. We're a friendly, supportive bunch of people and we'd love to have you join us. ๐Ÿ˜ŠWelcome back Jenny!

Avis, Claire, Gun, Carole, Constanze, Christina, Kathy, Margaret, Cindy, 
Heidi, Jackie, Sunny,Hayley, Megan, Deborah, MaryMargaret, Renee, 
Carmela, Jocelyn, Sharon, Daisy, Anne, ConnieAJ, Jenny

Saturday, February 15, 2020

Scrap Happy in February - Fabric and Yarn!

I've been puttering in my scraps, making the odd block.

8" stars and 6" Shoofly and star

I've sewn up a couple of 12" Lego blocks too:


While I was putting Ship blocks into my latest Parts Dept. quilt I was also making more 6" Ships.


For the time being these blocks will just go into the Parts Department. Actually, I'm kind of itching to make another quilt out of the Parts Department. ๐Ÿ˜Š

Last Scrap Happy Day Bekki shared some hearts she had knitted out of yarn scraps. My sister is a knitter so I sent her a link to Bekki's blog post. Look what Sis sent me for Valentine's Day!


The purple heart is particularly soft. Must be a cashmere wool or something. I'm tempted to keep it at hand just to fondle in odd moments. The variegated yarns make for fun hearts.


You can see the reverse side of the yellow heart in the first photo.

Sis took the opportunity to experiment with different techniques for creating heart shapes as well as some stitch varieties. The big pink heart features a different stitch type on either side.


Sorry about the shadow. Knitters probably know what they're looking at. ๐Ÿ˜‰

Kate and Gun are the hostesses for this monthly scrap round up. It began with quilters using up their fabric scraps but has expanded to include other makers using other scrap materials.To see what they've been up to just click on their names below. And if you have scrap materials you've turned into something useful or fun let Kate know so she can add your name to the list!


Tuesday, February 11, 2020

A Tiny Sketchbook

Those who have been visiting The Magpie's Nest for years may remember that I've participated in The Sketchbook Project a couple of times. I don't draw, but fill my sketchbooks with fabric, stitches, and words. Once the sketchbooks are filled up (whether or not they are full) they get sent back to the Brooklyn Art Library to become part of their permanent collection. Some of the sketchbooks have gone on tour around the country. The Tiny Sketchbook Project was introduced to facilitate taking sketchbooks over the pond to Europe a couple of years ago. I was very tempted to try one of the little sketchbooks but life kept it from happening. I was delighted when they offered a second round. ๐Ÿ˜€

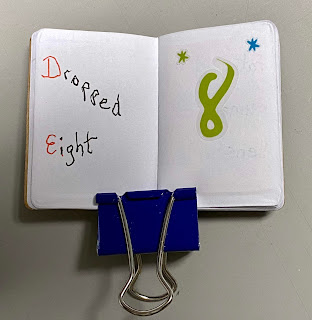
Themes are suggested but artists are free to go wherever their muse takes them. I decided to write a Tall Tale in the form of an abcdery. Like this:


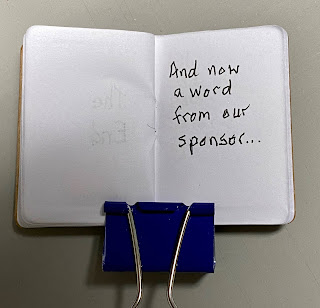
At this point my book was barely half full. So, I composed another abcdery.


I just realized I left out Q! That was meant to be 'Quality.' Phooey.


There you have it. ๐Ÿ˜Now to get it in the mail. (Deadlines are wonderful things.)

Wednesday, February 5, 2020

Flimsy Finish

I hadn't realized it's been almost a week since my last post. No wonder I couldn't remember what my last post was about! I'm still trying to make peace with my new phone/camera, which is another factor in the delay. Progress is being made but it's frustrating. I'm not technologically inclined. That which is meant to be intuitive either isn't for me or is so obvious that I overlook it.

So, when last we met I was in the process of building a quilt out of my Parts Department.


I found another remnant to use for the sashing down the sides. There was even enough to make sashes between the Shoofly blocks I used down either side. First one side...


And then the other:


I had to audition several prints to find something to use for the outer border. I never expected it would be a stripe!


Mitering the corners wasn't going to happen although I did briefly consider cornerstone blocks. The border strips are only 3.5" wide so I discarded that idea. At this stage the top measures about 58" x 75," plenty big enough for a youngster to snuggle under.

From the side, so you can see more of the whole.


I made an effort to keep this from becoming a directional quilt with a definite right-side-up or down. Mostly I succeeded. The back has a couple of directional prints pieced into it however. I think I used six different prints to get a back large enough for long arm quilting. I didn't think to take any pictures though, sorry. The front of this eventual-quilt was more fun to piece than the back, I have to say.

I have other projects I need to catch you up on. Hopefully this process will get easier or more comfortable for me soon. ๐Ÿ˜