Friday, April 21, 2023

Prep Work

 I've been coming across more short pieces of yardage in my stash lately. Not quite scraps, but not enough to go very far in any one project. Remnants, in fact. So I've tried to be ruthless in culling them from the collection. I didn't think to count or measure them in any way before I began cutting them up. I'm quite proud of myself for turning so many of them into patches for future scrap blocks.

This photo doesn't give you a very accurate concept of how many scrap patches I've cut. Trust me, it's a lot! Those two stacks on the left are about four inches tall each. They are quarter-square triangles and square patches for 12" variable/sawtooth star blocks. In the middle, from top to bottom, are patches for star points for those 12" blocks, then a stack of patches for 6" Shoo-fly blocks, then 6" Hole in the Barn Door blocks. A quick count reveals that there will be eleven Barn Door blocks made out of that stack of patches. On the upper right I have more quarter-square triangles for flying geese (backgrounds to be cut later). The rectangular pile are bodies for cat blocks. 

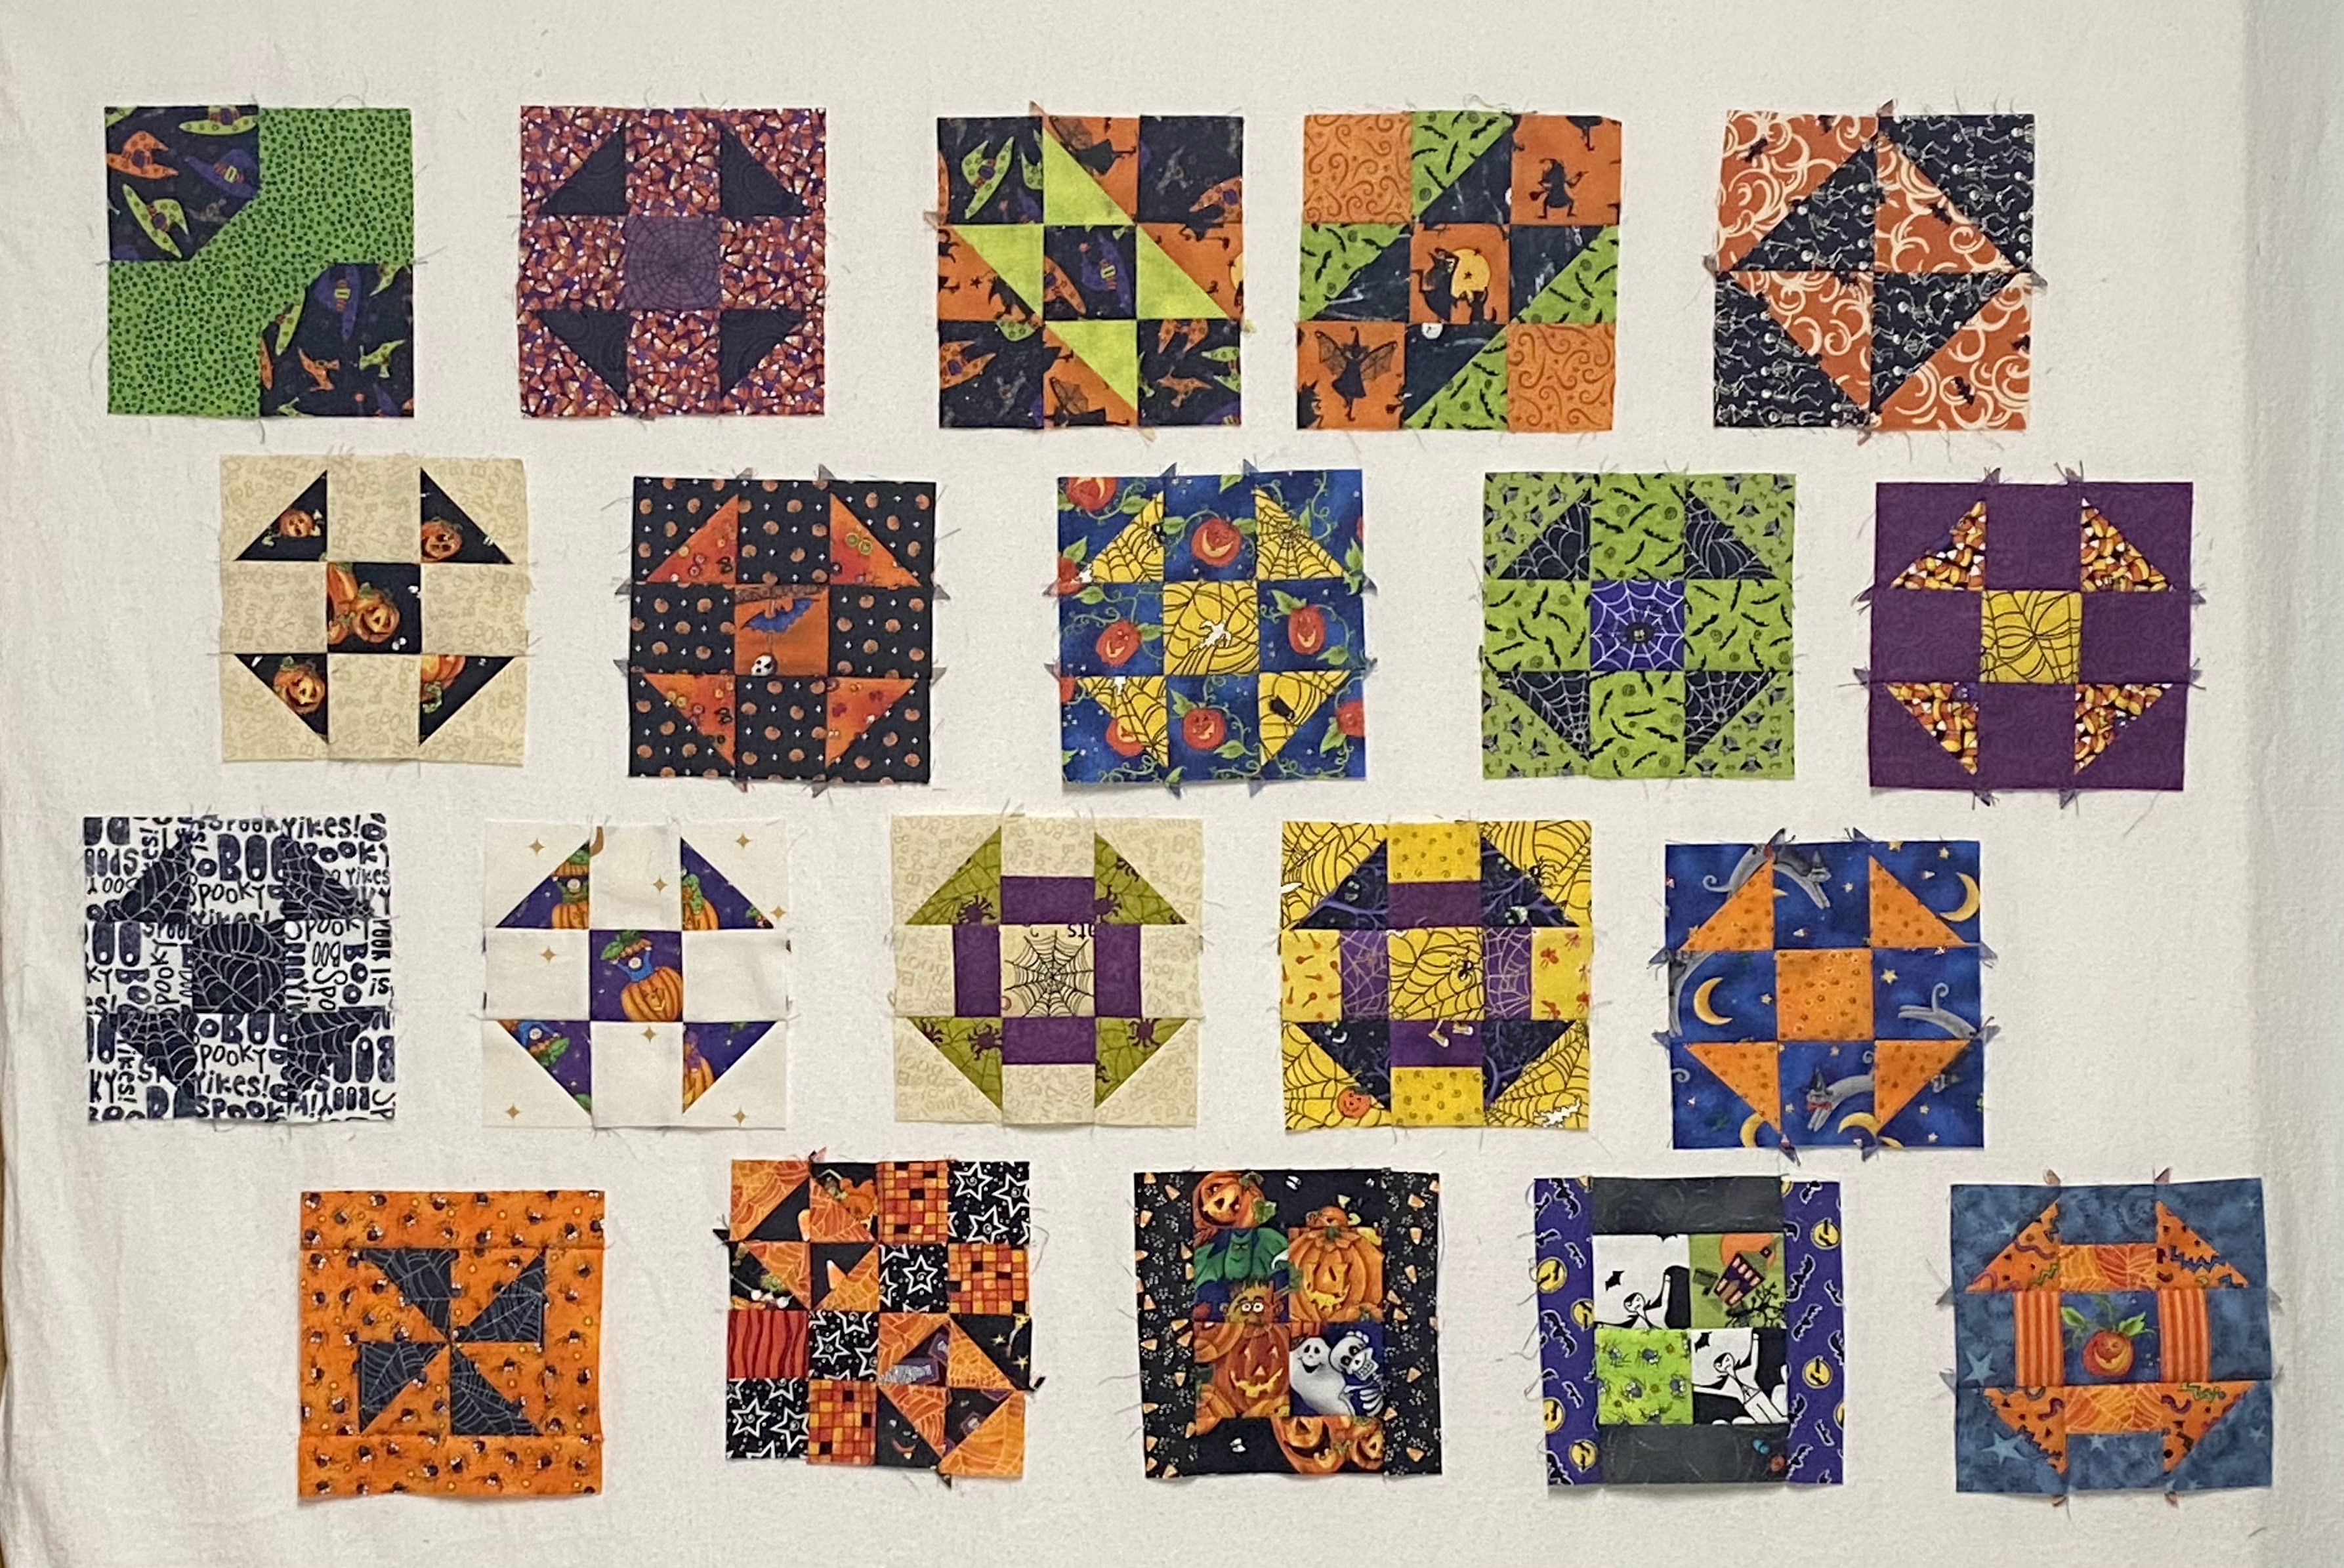
These blocks were made from scrap patches I already had on hand.

It was the stars I made for the Halloween quilt in my Scrap Happy Day post that gave me the idea to cut patches for more 12" stars. They do eat up the fabric quickly. My plan is to go through the 6" blocks in the Parts Dept. to use as the centers of the stars. After pressing each piece of fabric I cut the largest patches first, the quarter-square triangles and 3.5" squares first, then pieces for a cat, and from there whatever else I could fit. Some prints were more appropriate for backgrounds than star points and vice versa. The trick now will be to pair up blocks from the Parts Dept. with these patches to get those stars made. 😁


Saturday, April 15, 2023

Scrap Happy in April

 It may be April but I'm not done with Halloween yet! When I completed the last quilt top I still had some 6" blocks left over. Not to mention smaller scrap patches. I used those patches to make more 6" blocks. 

My plan was to use these blocks in the middle of stars that would finish at 12" square. Twenty blocks would give me a kid's size quilt. This also gave me an opportunity to use up more of the remnants of older prints from my stash. I ended up cutting quite a few of those remnants right down to nothing!

At first I thought I would just set the stars side by side. However, when I had them all built and on the design wall they cried out for sashing. There weren't any purples left in my stash in the right hue to make the stars float. Finding something else to use was a challenge, I have to say. In the end I came up with a couple more remnants - because one wouldn't quite go the distance. That's two more older prints used up!

Sorry about the lighting. The top of the photo gets washed out by my overhead lights.

I had the most of this lighter print. I remember it being a difficult print to use in the past. This seemed to be an ideal application for it.

Then I had to find something to fill in the gaps. There was enough of this slightly darker print to use in the four corners of the quilt top.

I also used a trick I learned many, many years ago to get my purples to go the distance. In that star above the background is actually the back side of the fabric. Here's the front:

Too pink for this quilt top! But the back was perfect. 😊

I'm going to stop the top at this point (no borders, just binding). It will finish at about 54" wide by 68" long. I may have to purchase fabric for binding, but otherwise this has been nothing but scraps and remnants. It's very satisfying to be able to create a useful new product out of nothing but scrap materials. That's the premise behind this blog hop that Kate and Gun host each month on the 15th. Kate is in Australia, Gun is in Sweden, and bloggers from the rest of the world participate regularly. Lynn is rejoining us this month, and we're pleased to have Tierney joining us as well!

KateGun, Eva, Lynda,
Birthe, Turid, Susan, Cathy,  Tracy, 
JanMoira, SandraChrisAlys,
ClaireJeanJon, DawnJuleGwen,
Sunny, Kjerstin, Sue LVera, Edith
NanetteAnn, Dawn 2, Carol, Preeti,
DebbieroseNóilinVivKarrin,
Amo, AlissaLynn and Tierney


Wednesday, April 5, 2023

Batty for Halloween

 I have not been having the best of times lately. However, I have been able to put more of my Halloween print scraps to good use. I had a 12" x 12" storage box full to the brim with bits and remnants, mostly of the more juvenile and/or whimsical type of prints. I'm pleased to report that I've reduced that quantity by as much as 80%! Of course, more scrap patches and strips were created in the process. That seems to be the way of scraps. 

I began with an odd assortment of blocks from the Parts Department.

There were a handful of 6" blocks, a couple that would finish at 12," but most of them were 9" blocks. There were some smaller parts too, which I was able to build up to nine or twelve inch blocks. Not to mention the scraps and remnants to make additional blocks.

I figured I'd frame up the 9" blocks to 12 inches. That was accomplished with strips and squares that finished at three inches. Because of the nature of the prints I knew this would be a child's quilt so I only planned for twenty blocks. A horizontal format seemed to work the best for arranging the blocks. 

It was really fun to fussy cut some of the images I found in my prints. I worried a bit over whether I would have enough of something appropriate to use as a final, outer border to frame up this busy top. 

A Moda Marble Swirls in jet black was perfect, and I had just enough for the narrow border and the binding. This quilt will finish at about 64" wide by 52" high. I even used up some old yardage to make the back. 😁 Now it's time to see what I can do with the smaller patches that remain...