My scrappy ships are all fitted out, ready to set sail.

For their maiden voyage I've decided they will sail the south Pacific, heading for the islands.

That means they will be sailing over assorted marine life (including mermaids!).


My scrappy ships are all fitted out, ready to set sail.
For their maiden voyage I've decided they will sail the south Pacific, heading for the islands.
That means they will be sailing over assorted marine life (including mermaids!).
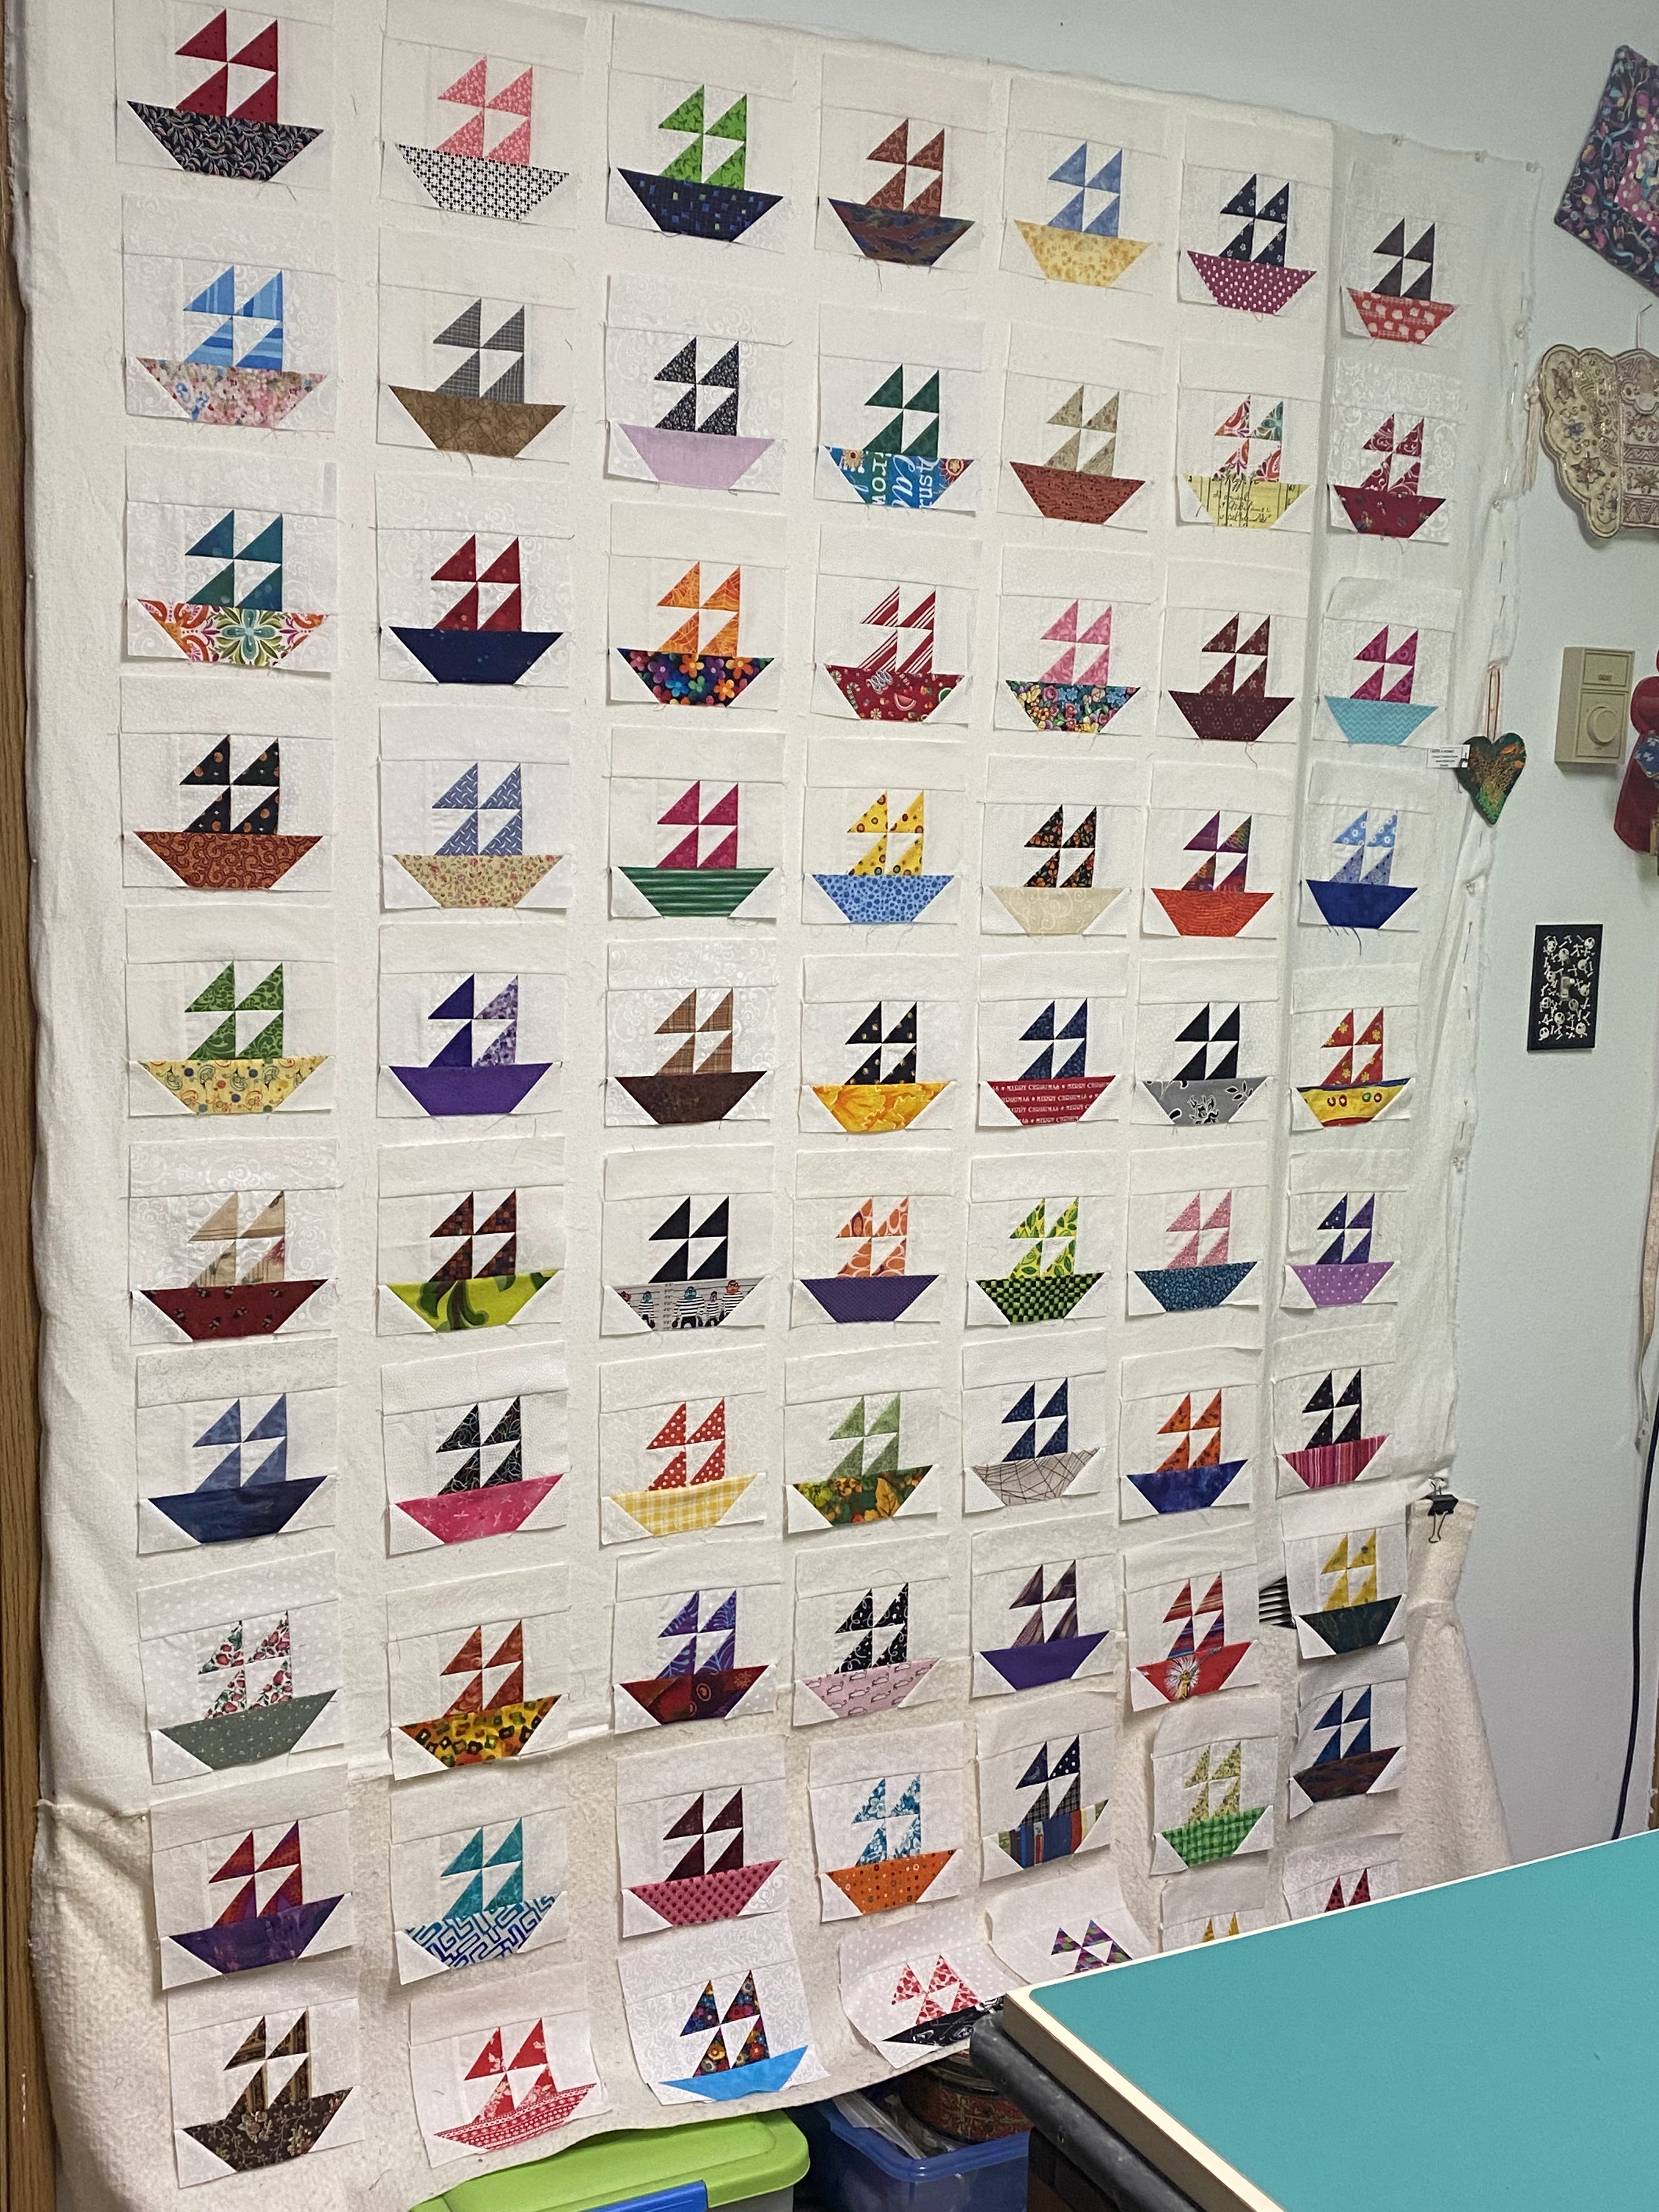
I rigged up 70 of the 113 ships with sashing, seven columns of ten ships each.

Barely. The final vertical length was made up of the off-cuts from previous strips. Several were about 5" long but I also had to piece in a 1.5" bit. This is all I have left of that batik:
 |
| A strip 1.5" wide and a 2.5" square. |
But the quilt was not as wide as I had figured or wanted it to be. I'd miscalculated somewhere along the way. And those long sides looked pretty unfinished to me. Of course more of that print was not available (at least, not where I looked for it). I started shopping around for some other batik to use, this time for borders and binding. I found a couple of possible options online but that's always a risky venture. I had another look through my stash and came up with yardage I'd discarded for sashing. It now seems perfect for those outer borders and binding. 😁

It has nearly the same colors in it and provides a finishing touch without being distracting. There's even enough to make the borders 3" wide so the quilt top will finish at about 60" wide and 80" long. (Binding only will finish the top and bottom edges.) Once I get those border strips in place it will be time to figure out what to do about a back...⛵️
It only took a little figuring to realize I had enough (more than enough!) Ship blocks to create a new quilt top. Given that my ships are made out of scrap patches they include every color of the rainbow. I didn't want to use more white around the blocks because this quilt may end up with a young person. White is not easy to keep clean, I don't care how careful you are.

I have discovered that I can build columns of blocks with sashing and stagger the blocks for a more interesting setting than the traditional grid format. The challenge with these scrappy ships was to find something that would work with the wide range of colors and print styles. There didn't seem to be anything of sufficient quantity among my regular cotton prints to do the job. However, I found a couple of batiks to audition. I've avoided combining batiks and quilting cottons in my quilts in the past - that's just my version of OCD at work. This project will give me the opportunity to free myself from that particular chain.

The 15th of each month is the day my friends Kate and Gun invite us to show something we've made out of scrap materials. This month I've only increased the inventory in my Parts Department (scrappy blocks waiting to be put to good use). However, it looks like time to start work on a new quilt top out of the Parts Department!
I've made these Bear Paws out of 4.5" squares and HST's that finish at 2". They are 6" (finished) each. Whether or not I choose to set them in the traditional Bear's Paws block remains to be seen. I like to use them as individual paws to create borders.

You can see that a couple of Ships sailed into the Magpie's Nest this month too. Of course there are more 6" Hole in the Barn Door blocks as well. 😁 I counted up the Ships I have in dry dock. There are 110. You'd think that would be enough to do something with!
I've also made some 8" star blocks. Most of them have whole-cloth center patches.
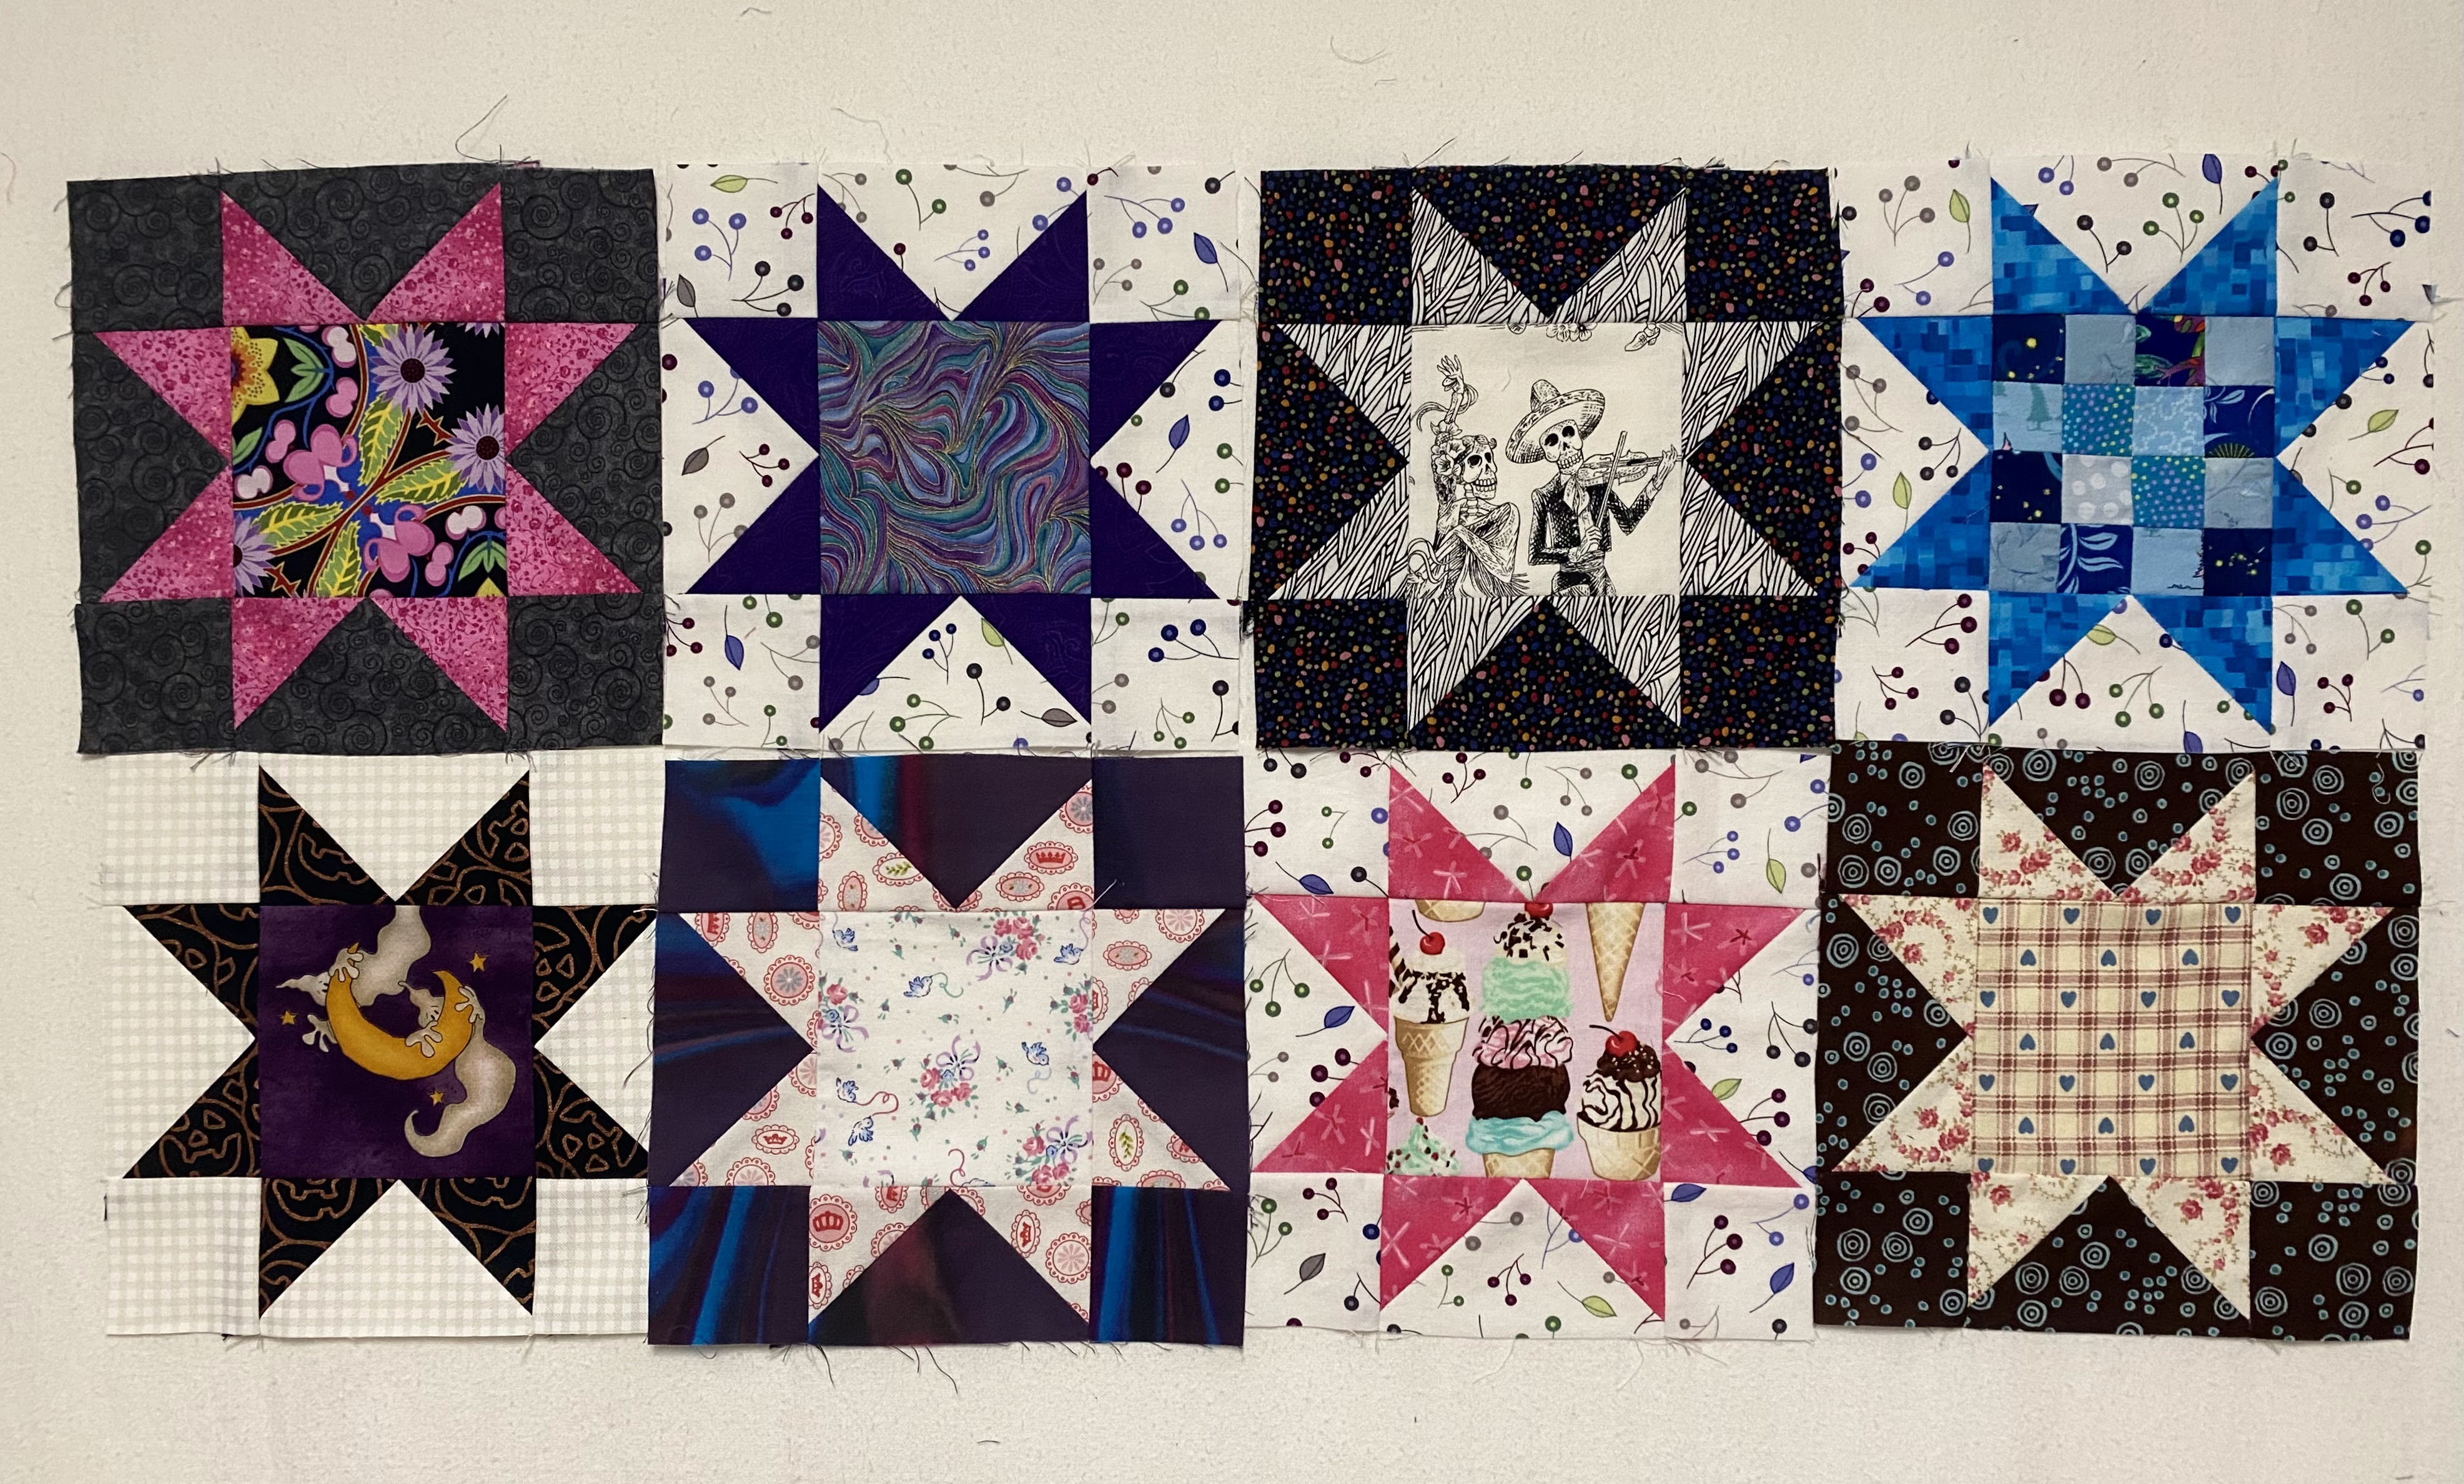
However, I also managed to make up more postage stamp units to go into stars in the future:

Kate, Gun, Eva, Lynda, Susan Birthe, Turid, Cathy,
Tracy, Jill, Jan, Moira, Sandra, Chris, Alys,
Claire, Jean, Jon, Dawn, Jule, Gwen,
Bekki, Sunny, Kjerstin, Sue L, Vera,
Nanette, Ann, Dawn 2, Bear, Viv,
Preeti, Edith, Debbierose, Carol
I felt the urge to pick up needle and embroidery thread again the other day. I cut an ATC size piece of batting (3.5"h x 2.5"w) and pawed through my tiny scraps. I chose only three. I used my variegated #12 perle cotton threads to secure them to the batting. Next I found a scrap of lace, then a strip of baby rick-rack. The feather stitching sort of took on a life of it's own. After I added the button with the yellow embroidery floss I decided to add some yellow French knots among the feather stitching. Blanket stitches finish off the perimeter. 😊

Oh, and a silver dove sequin! The feather stitching shows up better in person (of course). I like the subtlety and the texture those stitches created.
Just a couple of hours of work - pleasure, really. I'm very pleased with the end result. Not so happy at how my hand and wrist hurt afterward however. {sigh}
Back in 2014 or so I was still attending quilt guild meetings, at least on occasion. It was my turn to present a request for friendship blocks. I made up kits of batik patches in a variety of colors and asked those who wanted to participate to use those patches and their own white-on-white print to make either a 6" Shoo-fly or Friendship Star block for me. I also asked them to sign their names in the center square patch. The rule at the time was they had a year in which to make up the blocks. After that I was free to go ahead and create my quilt top.
I have pulled out those blocks and tried to find a setting arrangement for them more often than I can remember. I may even have posted about them here in years past. I had a pretty good idea what I wanted to do when I sewed them into these columns.

I even had these batiks set aside to complete the job.

But then the process got interrupted from one cause or another (or two or three). And I couldn't quite figure out how to accomplish my vision. Like I said earlier, the columns have come out more than once since then. Last week I finally admitted defeat and committed to a simple, straightforward approach.

I used two of the batiks I'd set aside but decided against the light blue for this step. The top was only 48" wide at this point. Six inch flying geese would get me the width I was after and would also give me a chance to use more of my favorite batiks.

I added a little bit of the background blue across the top and bottom edges to extend the length a little more too.

I'll be binding it in the same blue. I had another batik in sufficient quantity for the back - almost.

Here you only see half of the width of the back but you get the idea. I pieced together some of my scrappy batik Hole in the Barn Door blocks and that light blue I didn't use on the front to extend the length of the back.
Maybe one of these days I'll get out my very first set of friendship blocks - which constitute probably my oldest UFO - and see what I can do with them. 😊