Showing posts with label BeeMyselfandI. Show all posts

Saturday, January 9, 2021

Winter Scroll

About the time Anne Brooke proposed the #12pagesofChristmas book in a tin project (see my SAL post) I knew my Summer scroll was coming to an end. The 12 Pages project wasn't yet clearly outlined. I thought I might like to do a Halloween/Days of the Dead version of the book project but that didn't happen. I'd still like to tackle that at some point. Instead, I began another stitch wrap/scroll. While I started it in late autumn technically, I'm referring to it as my Winter scroll because most of it will cover the winter months here in the Northern Hemisphere. This time I'm using a long, narrow strip of batting for the foundation. The Summer Scroll was stitched on a strip of muslin. 

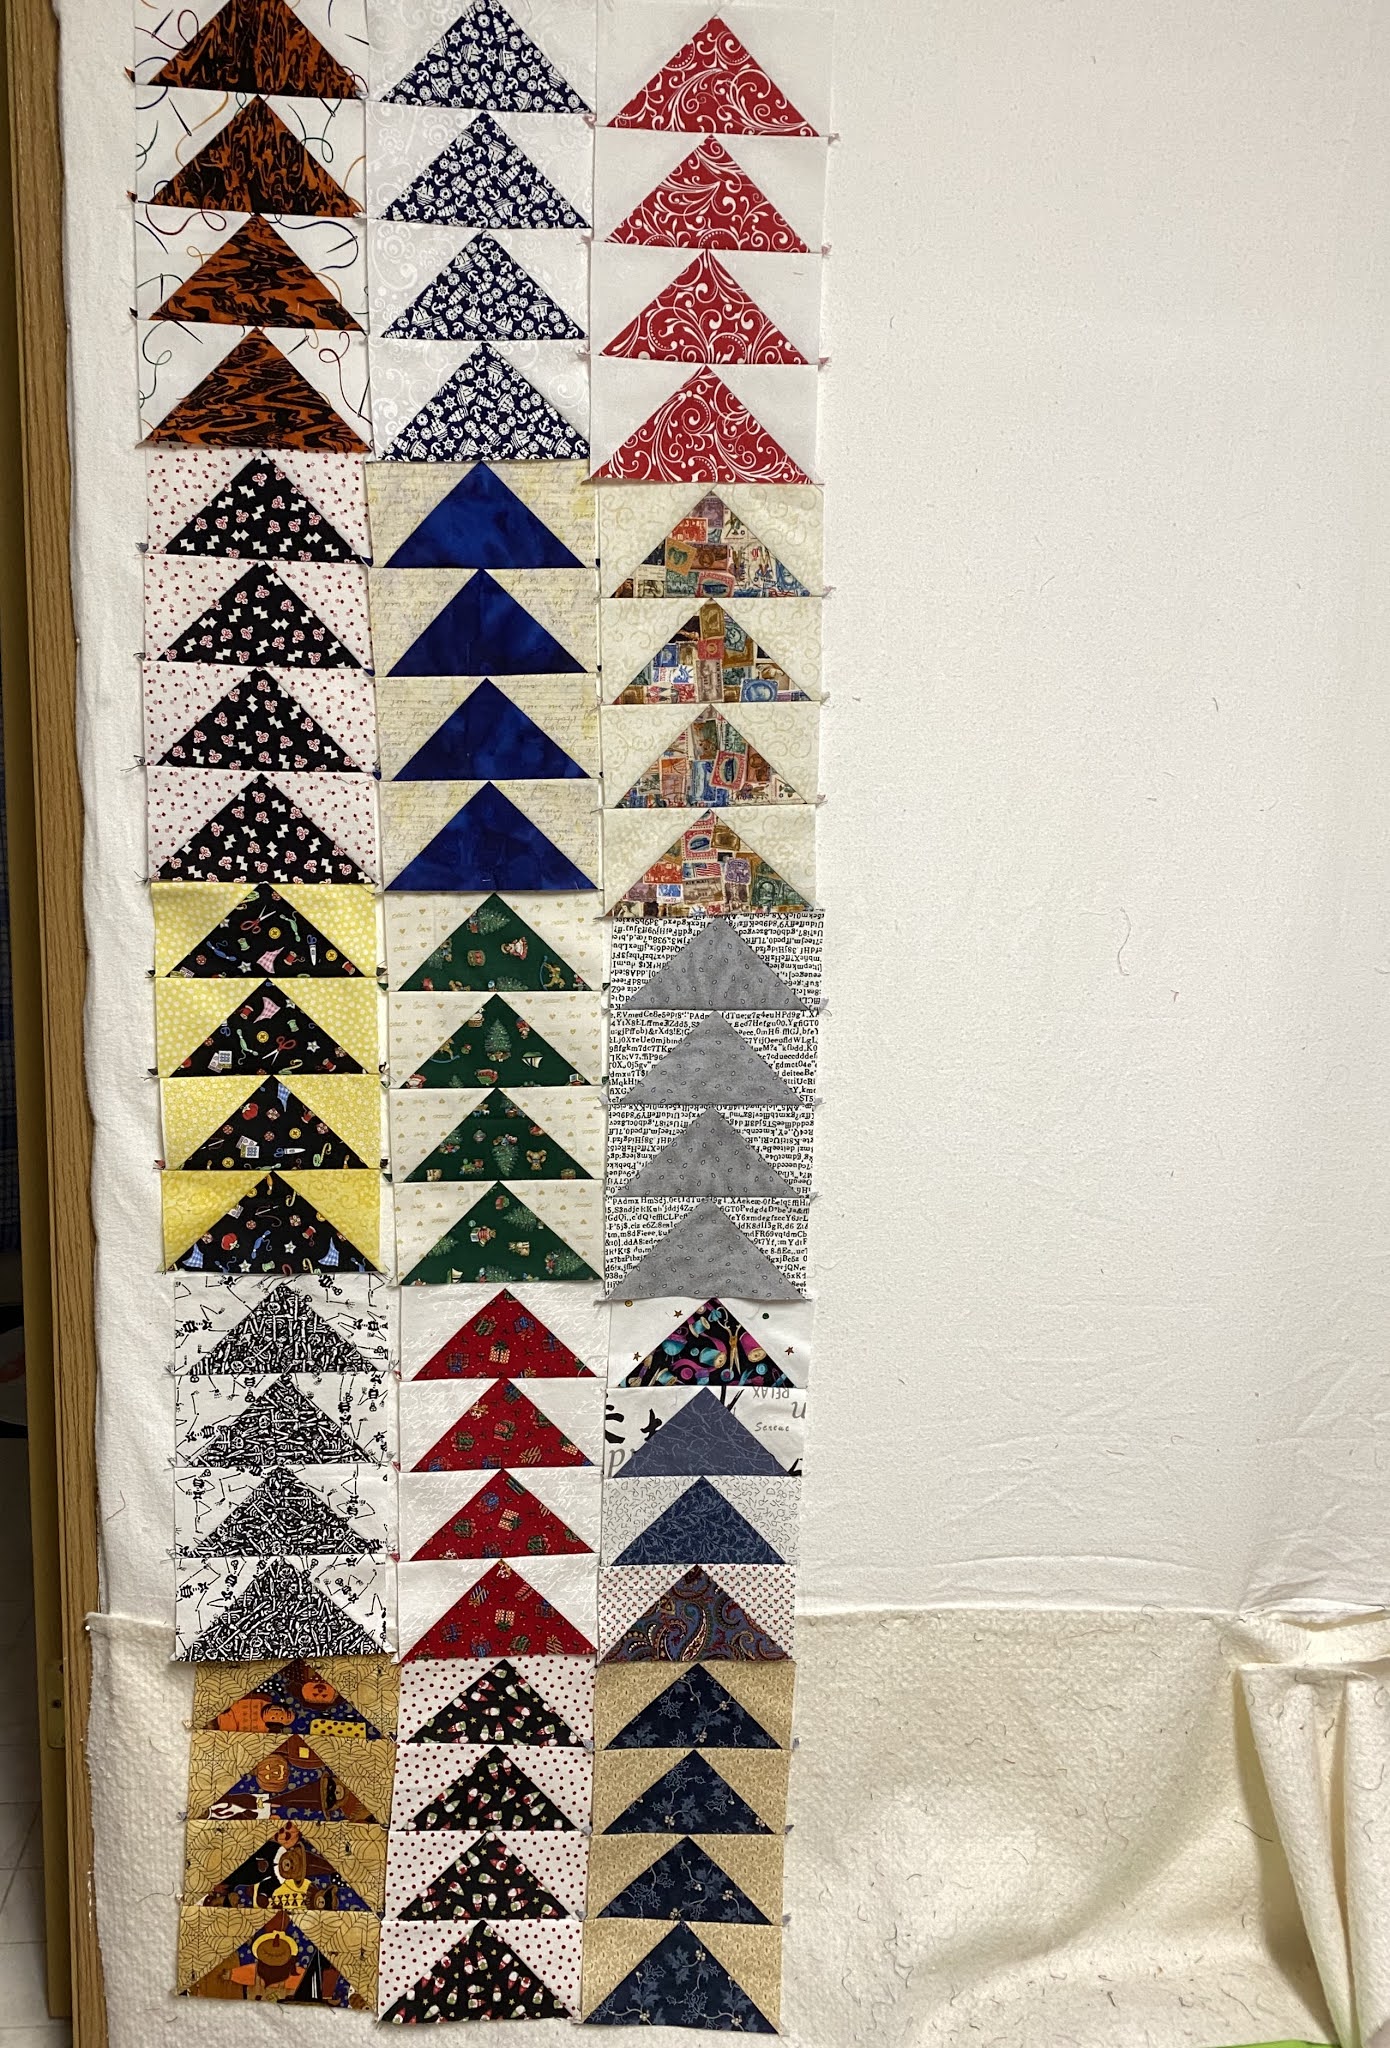
The first panel is plain muslin with no embellishments. I still don't have any spools or bobbins on which to wrap these scrolls so I left that plain in case I needed it in the future for mounting purposes. Then I went into full autumn mode with this panel:


For what it's worth, all of the pictures in this post were edited quickly on my phone. My intention is to fill the center of that flower I made of lazy daisy stitches with a button. The green sprigs are fly stitches, and I added some seed beads.

The next panel was created around Thanksgiving time (end of November). 


It's actually two scraps from a single print that I butted up against each other. I just used simple straight stitches around the two images and to accent the bush in the foreground of the house. Eventually some beads will probably go into that bit of eyelet lace at the top of the panel. That's a short strip of sari silk peeking out from underneath the lace to help it show up better.


Next up is a circle I fussy cut from one of the flannels I used to make pillowcases for one of our granddaughters this Christmas. It's appliqued onto a piece of wool with some more fly stitches. The roses next to it is a bit of another flannel I bought for a pillowcase cuff but didn't use. It was a good place to practice my feather stitching though. 😊


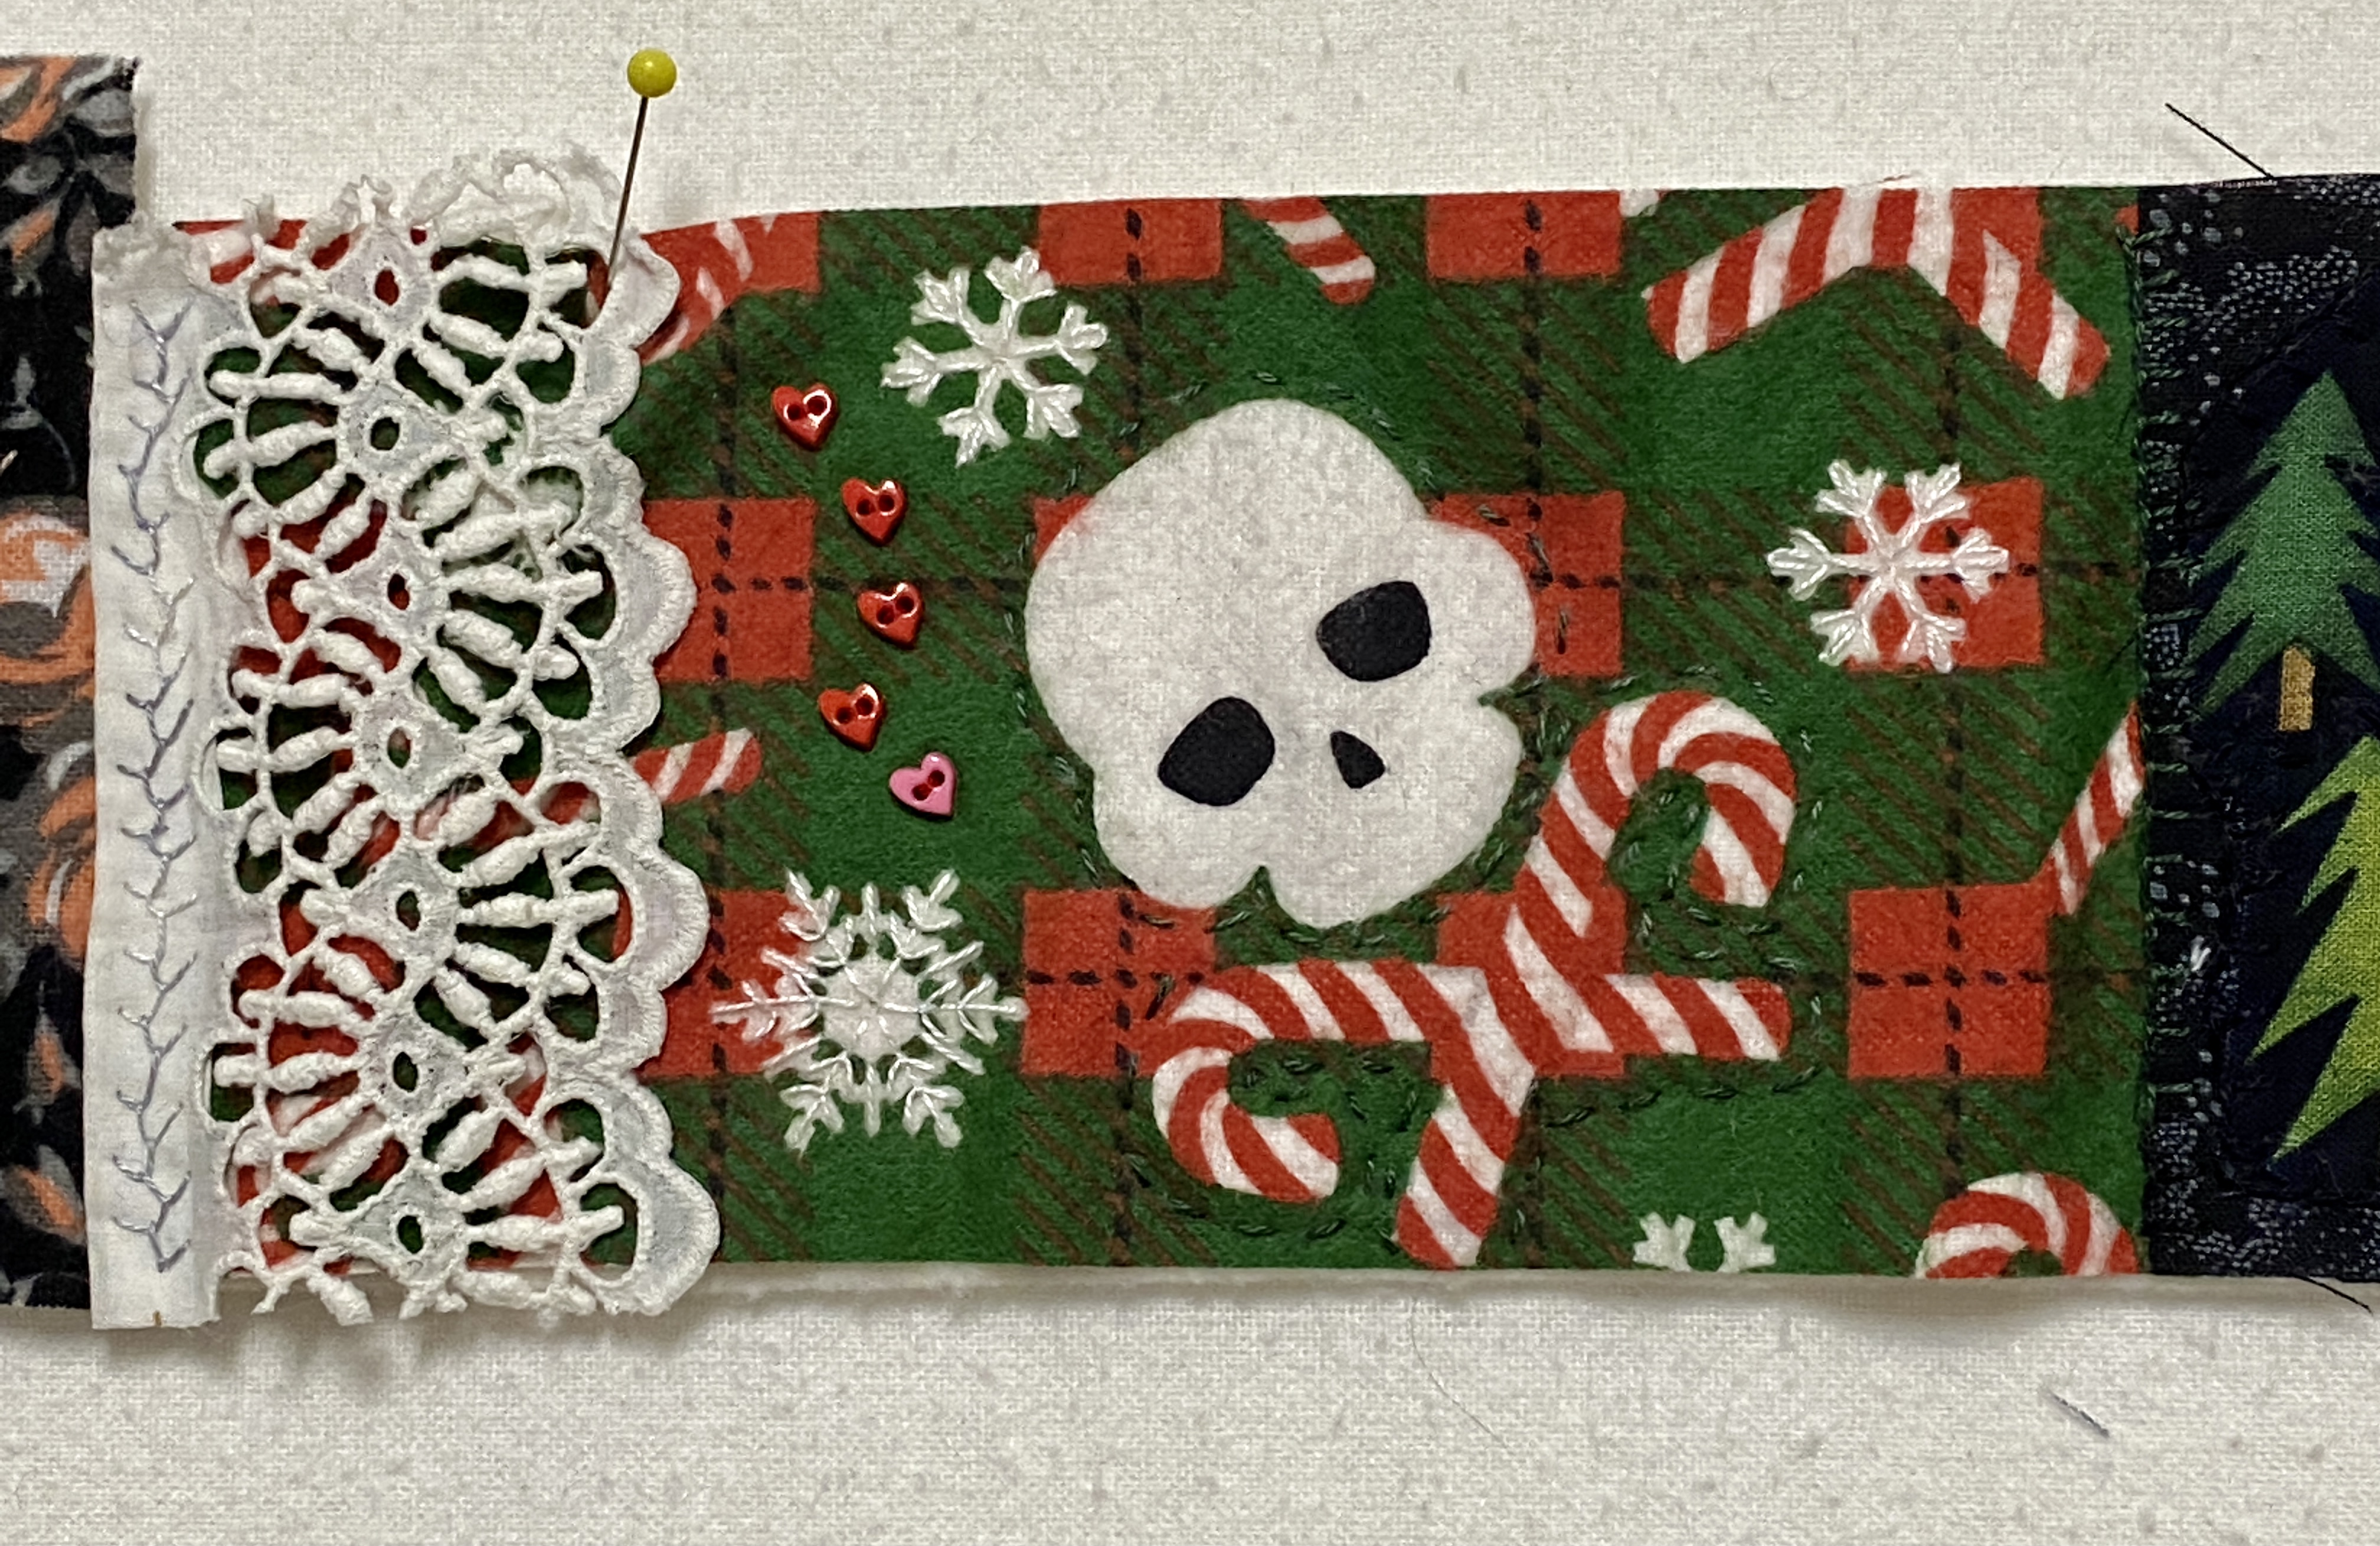
And still in pillowcase mode, the skelly and candy canes was yet another pillowcase (I made five for her in total). I really liked how the bit of vintage lace echoed the snowflakes in the print. I added the five little hearts to represent all the granddaughters, the pink standing in for the newest addition. There's just basic straight stitching outlining the skelly and canes in the green background and then some white on top of the snowflakes to highlight them. Not sure more will be done to that section.


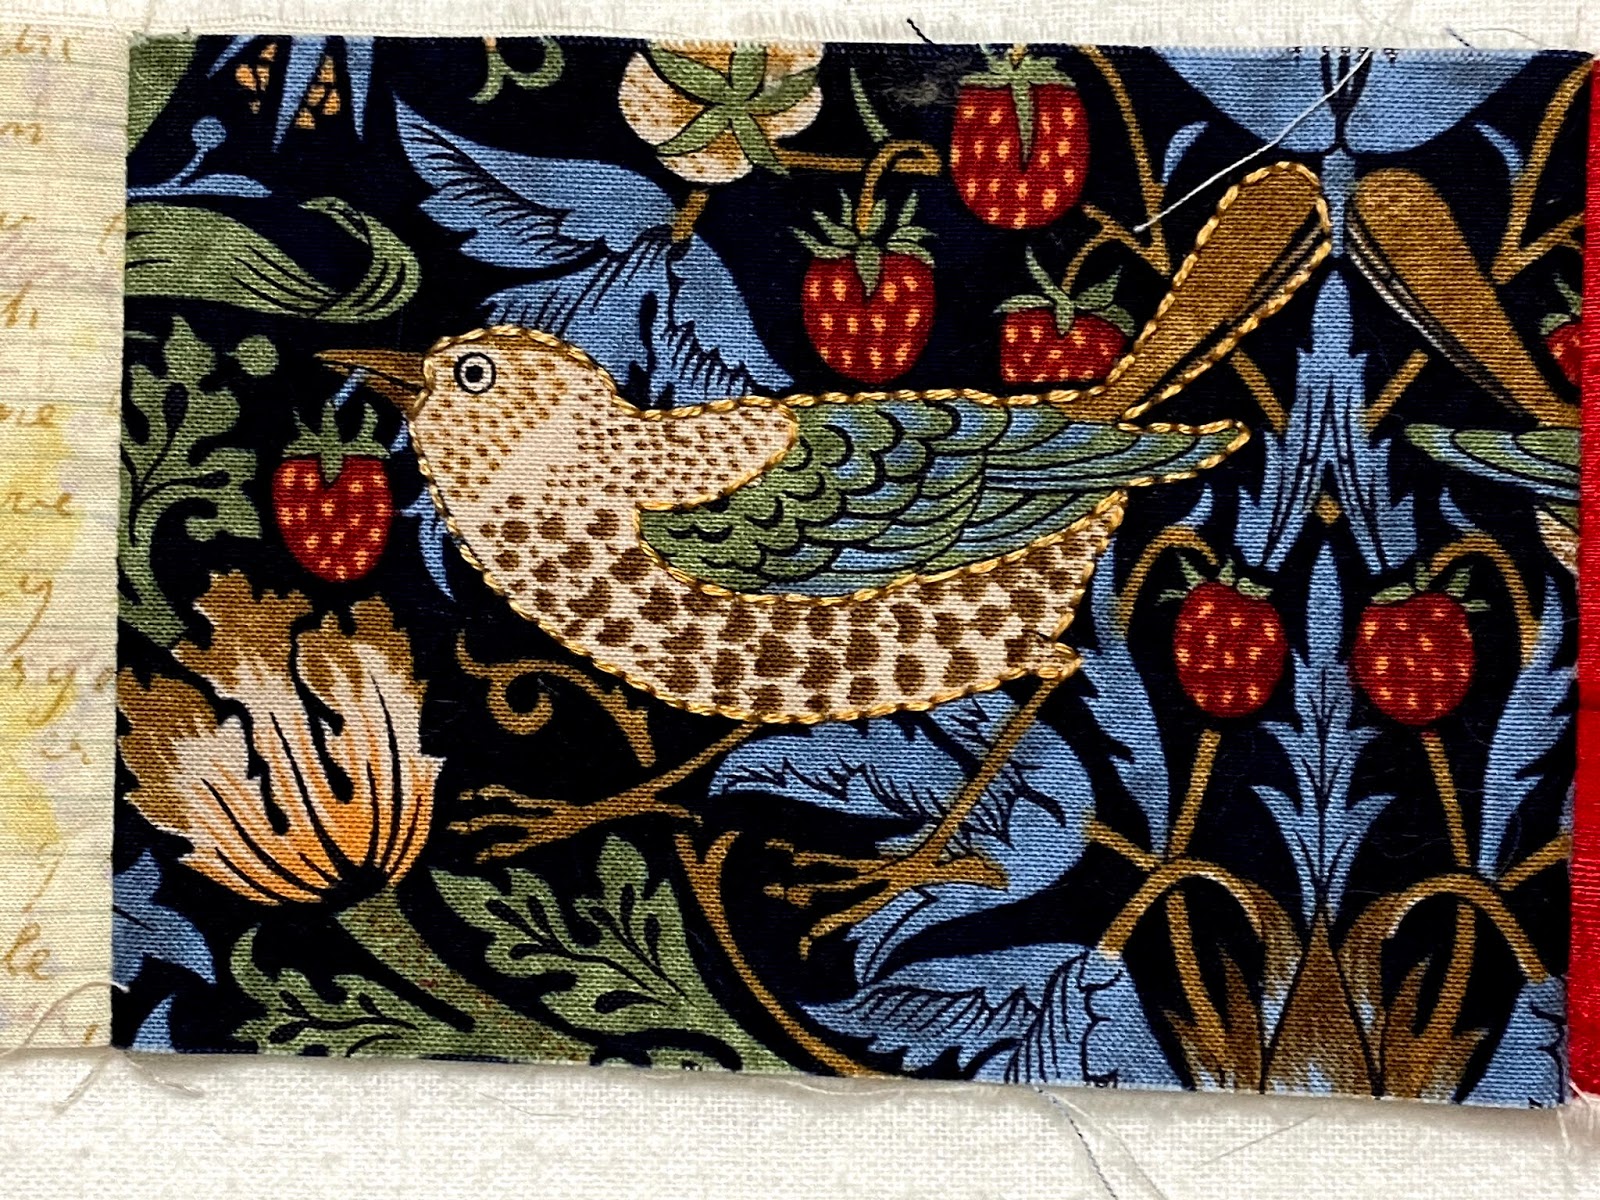
Next up is a scrap of a print to represent our acquisition of a Christmas tree on top of a print that represents the cloudy, stormy weather we had. Then I found a piece of black velvet onto which I stitched an assortment of beads leading to the star sequins. That's meant to represent the convergence of the two planets into what was known as the Christmas star. Below the star sequins I've attached two feathers my canary dropped recently just to fill the space without doing much to the velvet. 


Finally we have the latest additions to the scroll. I bought a packet of goodies from Tilly Rose some months back, and in it was the piece of fabric I've used to indicate the end of one year and the beginning of the new. It seemed perfect for the purpose as it's appropriately dark for 2020 and lightens up with hope for 2021. I've only just added all the white bits to the right of that. Anne has begun her #52tags project for 2021 (on Instagram and YouTube). Basically the plan is to do a little slow stitching and attach it to a regular shipping tag, one for each week of the year. I'm not participating in the strictest sense of the word but will be watching from the sidelines and probably incorporating many of her prompts in my own work one way or another. In this case, the prompt for the first tag was to restrict yourself to the use of white materials. Starting the new year with a clean slate as it were. I wanted to acknowledge the fact that the annual Tournament of Roses parade in Pasadena, CA had been cancelled this year due to Covid-19 so I inscribed that note on a strip of muslin to attach to my scroll. The muslin was so thin I decided to rip two strips to layer one on top of the other. At the time I thought I might stitch them together for stability. But I kind of liked the way they flutter. Then the insurrection of January 6 happened. Now that second strip of muslin will be inscribed to that effect. 


And underneath the two flags, more feather stitch practice. 


The rest of the stitching on the white section is just straight or tacking stitches. There are a couple of areas I want to do more on but this is as far as I've come as of this writing. 

Working this way has made me realize I've got more reorganizing of materials to do as the year progresses. That's one of those tasks I dread because you have to make a bigger mess than you already have before you can put things away more efficiently. Which takes time and energy that I'd rather spend actually stitching! 

Sunday, August 30, 2020

Bee, Myself & I in August

 I've been sewing down bindings on gift quilts so haven't had much to share this week. Bee, Myself and I is a forum for "selfish sewing," anything which is purely for pleasure and not for anyone else or to meet a deadline. Granny Maud's Girl came up with the idea originally. I tend to use these posts for the needlework I like to do. This time, however, I have an update on a quilt top that will have meaning only to me I suspect. 

I made a diary quilt a couple of years ago and enjoyed the process so much that I wanted to do it again. Last time I chose a 2.5" x 8.5" strip for each day of the year. 


Apparently I don't have - or just can't find - a picture of the finished quilt. One of these days... 😒

This time I've been sewing up "families" of flying geese units for each week of the year. I began at the end of October so only have about eight more weeks to do. The math works out to a personal size quilt, 60" in one direction and at least 72" in the other. I've not entirely decided how I will orient the geese yet. The first time I laid them out on the design wall I placed them all in one direction, vertically. 


Today I tried out a horizontal orientation.

The latest set of geese are in the upper right, and the first down on the bottom. Fortunately, I had the presence of mind right from the start to keep a physical diary describing what the geese are meant to represent. It would be very easy to get them out of order! I had to refer to it a couple of times today just to be sure I hadn't mixed them up.

That layout didn't really do anything for me so I had another go at columns rather than rows. 

This time I started with the oldest set of geese in the upper left corner and worked my way down and then up. So the week at the bottom of the first column is followed by the next week's geese at the bottom of the second column. I like this layout much better. I suspect this is the way the blocks will be put together in the end. 

Families of flying geese units have turned out to be great leaders and enders. I'm going to have to come up with another project in which to use them, and pretty soon too! 

Monday, June 29, 2020

Bee, Myself & I in June

I don't know if I've shared this project here previously. I've shown bits in a Facebook group but that doesn't mean it's been here as well. 😉

This is going to be a stitch wrap, a long piece of various textiles sewn together and embellished in whatever way the spirit moves me. Eventually the strip of textile art will be wrapped around a spool or bobbin of some kind. I haven't worked that part out yet. Some folks hand sew their scraps of fabric onto a base of muslin or batting. I chose to machine piece a few choice scraps together first, then use embroidery to secure them to a muslin strip. My strip is about 3.5" high by the width of the muslin.

Depending on how this progresses I may add more muslin so I can add more scraps and embroidery.

One of my goals was to feature at least a couple of the William Morris prints I was given at Christmas.


It's also a place where I can practice and play around with embroidery threads and stitches. To begin with I put the start date on one end, just freehand. The blanket stitch rainbow was also done freestyle. The rainbow and the paw prints are my nod to the covid pandemic.


I used fly stitches to secure the Wm. Morris charm square to the foundation. The two colors of pistil stitches on the extreme left came from one length of hand dyed floss. The daisies were stitched with a variegated silk thread from Treenway Silks.


For the time being my strawberry thief is simply outlined with a gold color cotton floss.


I've done a bit of mandala stitching recently too.


More fly stitches, some chain stitches, an attempt at herringbone, and a star in the middle. It's about 2.5" across. No purpose, just play. 😊 

Thursday, May 28, 2020

Sort of Selfish Sewing

Since completing a series of quilts destined for other folks it seems that most of my sewing of late has been speculative. I've wanted/needed to deal with the scraps those quilts generated and was inspired to make some log cabin style blocks. So these starts that you may have seen in my last post... 


Became these:

They will finish at six inches each unless I decide, down the road, to make them bigger. 

After I'd made that set I started another batch of log cabin/courthouse steps style blocks.


These will finish at eight inches each - unless I decide to build them up to twelve inches. 😉

Making these blocks has fulfilled the goal of using up scraps and satisfying my need for fairly mindless sewing, thus also fulfilling the objective for Bee, Myself and I selfish sewing. Except that all of these blocks will probably eventually end up in a quilt I give away in the end. Oh well, you can't win them all!

On a little more selfish note, about 18 months ago I started making Turkey Track blocks out of some of my more favorite prints with the intention of making a quilt for myself. Depending on how I decide to lay them out I either have enough or more than enough. The typical layout for these blocks does not appeal to me but so far I haven't been able to pin down anything I like better or am willing to attempt. I got them out the other day and tried once again to figure out what to do with them.


I did not succeed in creating a definite plan but I did find yardage I didn't have when I was making the blocks that might work for setting and/or borders.


So, progress by baby steps. 😊

To learn more about Bee, Myself and I you can click on the badge in the sidebar. 

Thursday, April 30, 2020

Bee, Myself & I in April

Bee, Myself & I was created by Carla over at Granny Maud's Girl as a way get in some sewing purely for her own pleasure, not out of a commitment of any kind. I'm finding it helpful to give structure to my calendar of projects.

This month I've used BM&I to get a top built out of blocks I've been making over the course of four years. Not that the blocks were all that difficult to make. On the contrary. They're probably my favorite block, and they're not hard at all. The traditional Churn Dash.


These happen to finish at 10." Usually I make a variation out of scraps that finishes at 6" and is called Hole in the Barn Door because the center square is larger and the side squares become rectangles. Another name for this version is Monkey Wrench. If you use your imagination you can see the head of one or more wrenches in the design.

Back when I started making these blocks it was to preserve in a quilt for myself some prints I was especially fond of that were in danger of being used up. Another goal I had was to float the blocks on a single background print. At the time I didn't have a clue what the end product would look like or how big it would be. I've had a name for it all along though: Final Wrenches.

When it occurred to me that I probably had enough - or more than enough - blocks for a personal quilt I got the box out of the Parts Department and counted them up. Sure enough, there were more than I needed for a 60" x 80" quilt top. But there were also those that didn't play well with the others when I tried arranging them on the design wall or featured prints I was no longer so in love with.

In some of my recent quilts I was able to create a rainbow effect with block placement or to graduate the colors across the surface of the quilt. I tried to do that with this one at the outset. It didn't work. This is a true scrap quilt in that the colors and prints cross a whole spectrum of values and styles. This is the arrangement I ended up with:


And now I know why so many of the old (and not so old) Churn Dash/Monkey Wrench quilts had whole cloth alternate squares or sashing. Sewing these blocks to each other was no picnic. Matching points doesn't normally bother me but some of the background patches must not have been cut precisely or something. Then there's the bulk created when two sets of half-square triangles come together. I lost track of how often I had to rip out part of a seam and try again. Halfway through I had to take a break. I also lowered my standards along the way.


Pressing seems to have been a big help. The points are matching better than I expected. I'm sure close inspection would reveal inconsistencies but at this point I don't care.


By the time this gets quilted I'm sure I'll be happier with it than I am at the moment.


And now I get to figure out what to do with those leftover blocks! Who knows, I might even figure out a way to include them on the back. 😊

Saturday, February 29, 2020

Bee,Myself & I in February

You didn't really expect me to be back in under a week after completing two flimsies did you? You should know better than that by now. 😉

Bee, Myself and I was instituted by Granny Maud's Girl as an excuse to work on a project for yourself that you might otherwise put off in favor of making something for someone else. I'm taking this opportunity to share with you a project I've begun for 2020. Actually, I started on it back at the end of October last year. This is just the first time I've shared it publicly.

Long-time readers may remember the diary quilt I created by cutting a strip a day for a year.

This is the flimsy. I can't find the picture of the completed quilt. 😒
I really liked having this ongoing project. It gave me a little something to sew, or at least cut, most every day. The strips worked well as leaders and enders too. However, I didn't want to do the same thing all over again.

Late last year I started making "families" of flying geese for a version of the Remixed Geese pattern and enjoyed that process.


They also work well as leaders and enders - the way I make them (the old fashioned way, by cutting a large square, quartering it, and using half-square triangles for the background patches). I have enough families of these geese now for a quilt top, I just haven't had the mental stamina to set the units together. But they helped me come up with the idea to make a family of geese for each week of the coming year. 😀

I started with Halloween (an especially favorite holiday of the year for me), followed by Dia de los Muertos. Most of the rest of the families represent projects I worked on during that week. This effort may go on for more than an exact year. I haven't been able to work out how many families I need or want or what size quilt I want in the end. I'm pretty sure I'll be setting them in long rows or columns though. I'm cutting 7.25" squares for the geese and 3.875" HST's for the backgrounds. That results in 6" x 3" flying geese units. The only other "rule" is to keep the background patches in light values and the geese dark. This is what I had at the end of last week:


The earliest family is the strip down in the lower left hand corner. I'm determined to keep them in chronological order one way or another. Unfortunately, this layout doesn't look very promising. I may do this instead:


But we have a long way to go before that decision really has to be made. In the meantime I had to find a way to keep the families corralled and in order. Hubby was given a pair of slippers at Christmas and happily, the box had not been recycled. It's the perfect size to accommodate the growing stack of stips of geese. I also have a little journal in which I'm recording the date and why I chose the prints I did for that week. I figure that will help me sort the families out if they get mixed up along the way.

And as they say on TV, "But wait! There's more!"


I have begun yet another flying geese quilt top. Same size geese, and no specific design plan yet. All I know for sure is that I'll need 240 of these units to begin with. Makes for great mindless sewing. 😊


Thursday, January 30, 2020

Bee, Myself & I in January

Bee, Myself & I was begun for the purpose of making time to work on something we want to do without the pressure of a deadline or pleasing anyone else's aesthetics. In recent months that has been needlepoint or embroidery for me. I still have needlepoint canvases that would fit the bill but this time around I decided to just keep working on the Parts Department Quilt I started for Scrap Happy Day. When last you saw it, it looked like this:


About 36" wide and 32" high. I decided to maintain the width while I added to the height. In the end I suspect this will be donated as a quilt for a child in Foster Care so the finished dimensions are flexible.

I found some strips that had been cut off the back of a previous quilt in preparation for binding application. There looked to be enough to use it for sashing to separate the horizontal rows I figured I'd be making. As it turned out, I was right!


I debated over whether to repeat the 6" Ship blocks above and below the sashing. The 8" stars looked better. I used scrap strips to space them evenly across the width. Another strip of sashing, and then the Ships again. First one end...


And then the other:


Now it's about 69" long/high. Unfortunately, it has also gained width due to my lack of attention. It's grown at least half an inch because I didn't cut the sashing strips to fit the width of the previous row of blocks. Oh well. This time I'm not going to stress over it. The next step will be to add a strip of sashing down each side. It will have to be a different print though as I've run out of that light blue-gray. After that I think I'm going to try to use some of my scrappy 6" Shoofly blocks down the sides. Then a whole cloth border of something to finish it off. At least, that's the plan. Of course, we all know what often happens to the best laid plans. 😉

Monday, December 30, 2019

Bee, Myself & I in December

Yup, I had time this month to stitch for my own pleasure - and healing. After exposures to toxic fumes I often end up in a zombie state. It's impossible to concentrate and often impossible to settle to any specific activity. It helps to have quilt binding to sew down or, in this case, an embroidery design ready to be stitched and colors chosen.

I'd traced off the main lines of this free design from Joy McDonald some time ago. In fact, I'd stitched the tree limb and swing a couple of months back. This month I polished off the details.


The leaves look a little puny to me now. I think the branch is a whipped or wrapped chain stitch, a couple of rows of chain stitches. Were I to do this over again I wouldn't make it quite so thick. Or I'd add some smaller branches for the leaves to sprout out of.

I do like the flowers growing out of the vines that support the swing though. 😊


I'm particularly pleased with the striped tabby I created.


The embroidery is done but I'm not sure what I'm going to do with it. One of my projects for 2020 may have to be turning my stitcheries into a quilt or something!

Saturday, November 30, 2019

Bee, Myself & I in November

I almost missed it! Got kind of distracted with finishing things and planning new things. 😉

Bee, Myself & I is for selfish sewing, created by Carla over at Granny Maud's Girl. It's an opportunity to be gently held accountable for any kind of sewing you want to do for yourself, not for someone else, and without any deadline other than one you might set for yourself. My selfish sewing tends to be of the needlework variety, embroidery or needlepoint. I've been filling in background around this Pumpkin Head design by Kirk & Bradley. I believe this is what it looked like at the end of October:


Now it looks like this:


Good progress! I've come to a point where I need to pay more attention so I can blend in a darker shade of purple. It's been very pleasant to pick this up and do patches of basketweave when I didn't feel like doing anything else. I probably won't get as much done in December between my sore sitter and Christmas preparations. But that's okay!

All of the cotton floss I used in this piece was hand dyed by Nancy Turner over at Victorian Motto Sampler Shoppe. The photos just don't do the subtle color variances justice. She'll be having a series of give aways to celebrate Christmas so if you haven't been over to visit her yet be sure to do so in the coming days. 😊

Wednesday, October 30, 2019

Boo! Bee, Myself and I in October

Bee, Myself and I is a forum for selfish sewing, instigated by Grannie Maud's Girl. For me that usually means some form of needlework. Although, technically, the Disappearing 9 Patch quilt I've been working on would qualify since it's going to be staying here in The Magpie's Nest. 😀


However, I have been doing some selfish stitching. Remember Pumpkin Jack?


I think this is what he looked like the last time you saw him. I'd just figured out how I was going to handle the background area. I want to create shadowy corners, at least at the top, with this dark purple from the Victorian Motto Sampler Shoppe. There isn't enough of that to cover all the background, plus it would be too dark up against the dark sections of Jack's hat. Now I have two skeins of lighter purples, also from VMSS. I've been using the two, sometimes one alone and sometimes blending strands from both of them.


I really like the random shading I'm getting. In fact, I've decided to include a strand or two of the darker purple as I approach the bottom edge of the background.


This is18 mesh canvas. I'm using four strands of cotton floss in the needle for the background. At the rate I've been stitching lately this may very well be done for the next Bee, Myself and I post at the end of November!

Monday, September 30, 2019

Bee, Myself & I in September

What happened to September?!! August seemed to last f-o-r-e-v-e-r. September has come and gone in a blink, or so it seems to me. Oh well, best to keep moving or October will also be gone before I know it. 😉

Bee, Myself & I is a forum for some selfish stitching. Something we want to do or make just to please ourselves. When I wasn't working on either of the two baby quilts I have underway I was doing some embroidery. I purchased these pre-stamped towels from Mary Corbet, through her website, a couple of months ago.


I also bought the ebook for guidance. I'm glad I did too. It saved me from having to make decisions when my brain wasn't equal to the task. I made my own color choices however. Some DMC, some of Nancy's hand dyed flosses.

I chose to begin with the smallest design, which kind of gets lost in a lower corner of the large white towel. I may have to trace the design off again on the opposite corner, and maybe come up with some kind of connecting border. That's if I get really ambitious!


I was familiar with most of the stitches used in executing the design. I did take the opportunity to learn how to begin threads without a knot though. I suspect I'll still have to think hard to pull it off in other situations.


I put Colonial knots in the centers of the daisies, and used a DMC variegated thread for the petals. The large flower petals are done with fishbone stitch. The center is filled with satin stitch and two rows of buttonhole, alternating direction. I used fly stitch to fill the leaves.

This little project was so satisfying it's got my mind working on ideas for other embroidery projects. Or I may just begin one of the other towels, with more stitching to do on them!

Friday, August 30, 2019

Bee, Myself and I in August

Between the heat and the headaches there hasn't been much going on here in The Magpie's Nest. I've done some needlepoint, which is what I do for myself lately. And that's the whole point of Bee, Myself and I. Instead of working on a gift or something that will eventually be donated somewhere B,M&I gives us an opportunity(or an excuse!) to spend time of a project we want to do for ourselves. For me that's been needlepoint.

I've finished up Jack in his party hat.


Well, except for the background. I've got a couple of skeins of Nancy's hand dyed floss on hand, I just have to figure out where I want to start. You can't tell by looking, even in person, but I used a DMC floss that's supposed to shimmer for the dots at the top of his hat. Maybe if the light hits 'em just right it'll show up.

I've also done quite a bit on my sugar skull cat:


The green parts of the eyes and other details are all that's left to do on this. And then the background of course. 😉

I've been reading and working on a jigsaw puzzle instead of stitching the last couple of days. Not sure I'll have something fresh to show for our Stitch Along post on Sunday.

There was some excitement here in The Magpie's Nest yesterday. It was time to do a thorough cleaning on Pippen's home.

Sorry, that's the best picture I could get!

When I separated the wired upper from the plastic bottom of the cage he slipped out and flew to the windowsill. He's not a strong flyer since he doesn't have much opportunity to practice. Still, there are a lot of places for him to hide or even get hurt in the studio. I quickly closed the hallway and bathroom doors so at least he wouldn't escape this one room. I kept an eye on him while I finished up cleaning the cage and put everything back the way it needed to be, leaving the cage door wide open so he could return easily.

Canaries are not trainable like parakeets or cockatiels. In the world of pet birds they're the cats rather than dogs. To encourage him to return to his cage I found a dowel I'd used for hanging small quilts and tried to get him to use it as a perch with the idea that I could ferry him back home without getting too close. It looked like it was going to work until I moved too quickly or something and he spooked. At least he was closer to the goal so I thought I'd leave the room and see if he could find his own way home.

When I returned I couldn't find him anywhere. I looked high and low, making sure he wasn't in trouble in the more dangerous places. No bird. I still don't have a clue where he was hiding. I left the room again, breathing deep to calm my nerves.The next time I returned to the studio I spotted him perched on my scrap basket on the floor. He's very nearly the same color as that basket! This time I grabbed a lightweight piece of fabric and threw it over him, wrapping him lightly in it so I could carry him over to his cage. Whew! That's the first time this bird has gotten away from me. Mr. Bingley got out a couple of times while he was with me. He was easier to find though, being that lovely bright yellow. 😊