Sunday, September 14, 2008

About That List...

It was a rough week, but I think I'm back. In fact, I couldn't believe how much I got done yesterday. I pin basted three quilts and made my postcard quilt for this month's Take It Further challenge!

You may recall that the concept challenge for this month was lists. Not being one to go for the obvious, I have a list 5 pages long of potential ideas ;- ) I even went so far as to toy with the idea of 'enlisting' Shakespeare's help with this challenge. The ghost of King Hamlet appears to his son (also named Hamlet) and says, "List, list, O list! If thou didst ever thy dear father love..." It would have been fun to portray the ghost and Hamlet on the parapet of the castle. A bit much for a 4" x 6" postcard quilt though.

Finally, the day before yesterday, I asked myself what Reilly's To Do list would look like.

I concluded that it would be pretty short, and fairly easy to illustrate:
1. Eat
2. Sleep
3. Play


Of course, 'play' includes things like barking at the neighbor kids, telling me it's time for a treat, snatching a dirty sock from the laundry basket and running off with it, and generally being a nuisance when I have other things to do. I figured dogs aren't into detailed lists, though, so this would suffice. This postcard was pieced from four different prints, then I did some hand embroidery to highlight certain elements and added the letter beads and the blue "ball" bead in the lower right corner. Now I can begin putting the ties in my Fungly quilt or tackle one of the other things on my To Do list!

Tuesday, September 9, 2008

Sew Far, Sew What

What if things don't turn out quite the way you thought they would? How often do they really?

As it turns out, I couldn't bring myself to cut the machine embroidered scrap any further. Nor could I even pretend it was pieced by putting in false seamlines. So this is what I have:


And this may be how it stays, at least for a little while.

I used embroidery floss to secure the rick-rack in place, stitching down the machine embroidered piece at the same time. At the top and bottom, under the rick-rack, is a torn strip of a vintage fabric I had in my stash. So I have lots of raw edges. I tried many buttons as potential embellishments but none of them seemed to belong. I have no interest in merely embroidering the printed design on the dresser scarf... We'll just have to let this simmer and see what happens.

I've had multiple exposures over the last couple of days in spite of the precautions I have in place. I spent yesterday on the couch, just letting my body recover. I will be glad when my enthusiasm and energy returns. There's a list of other What If's I want to experiment with in my studio journal, there's the Fungly quilt to assemble and tie, there's the Halloween quilt border to sort out, and there's the Take It Further challenge to fulfill for this month. Ironically, the theme of this month's challenge is lists! But we'll deal with that another day.

Sunday, September 7, 2008

What If-ing

Jude over at Spirit Cloth has a second blog called What If wherein she publicly explores the possibilities that open up when she applies the question of "what if I do this?" to her textile adventures. Recently she began considering crazy quilt blocks in this second blog of hers. The upshot is that she has created a collaborative project (and a montser apparently!) in which anyone who is interested can participate. I tried to resist, truly I did. In the end I fell down the rabbit hole after my friend Calamity Kim. Once you ask that question of "What If?" all sorts of things begin to happen...

My experience of crazy quilts and blocks is rooted in the traditional Victorian genre. At that time crazy quilts were for show, not function. They were a not-so-subtle display of a Victorian woman's wealth and needlework skills (which were valued more highly by the general public than is the case nowadays). So one of the first questions I asked myself was, "What if I use materials that are the direct opposite of what a Victorian woman would have used?" Instead of luxurious silks and velvets I would use vintage, thrifted, or salvaged textiles. In place of elaborate stitching I would keep my stitches and embellishments simple and humble. With that in mind I went through my stuff and unearthed this:


I think it must be some sort of dresser scarf. It's only about 11" x 15". I picked it up in a thrift store some time ago just because it appealed to me and it was cheap. I had no idea what I might do with it. (There's a goodly amount of that sort of thing in my closets and drawers.) My next 'what if' was, "What if I didn't cut this at all but used it as-is for the foundation of my block?" Seems reasonable; we'll give it a try.

Now, I don't particularly enjoy hand applique so I've never made a crazy quilt in the purely traditional style of appliqueing organic shapes onto a foundation. I'm all for rotary cut straight edges, especially if they're a bit wonky. So it will be a stretch for me to simply lay additional pieces of fabric on top of this foundation and stitch them down. I'm not planning to turn under any raw edges though. I want to experiment with raw edges and alternative seam treatments. Jude has come up with some wonderful ideas in her explorations that I want to try for myself.

So, here are my humble beginnings for a thrifted, salvaged, What If crazy quilt block (or quiltlet - who knows?): the dresser scarf, a machine embroidered scrap from a skirt I once owned, vintage rick-rack and embroidery floss. Stay tuned to see what else, if anything, makes it into my 21st century mini crazy quilt.

What if I began by cleaning up my work space so I have a little elbow room?!

Friday, September 5, 2008

Fungly Interrupted

When I went to layer the fungly top with batting and backing I discovered I did not have a piece of batting big enough. (Naturally.) I really thought I had something I could use, but the only big piece is reserved for another quilt-to-be and I was not willing to cut it down. While I waited for one of my guys to get some batting for me our temperatures dropped enough to make it feel autumnal around here. I was inspired to get out this UFO from last year:

Sometime between then and now I purchased a Halloween print, probably online, probably on sale. Turns out it would be perfect for borders for this top... except there wasn't enough to go all the way around (because it never occurs to me to buy big pieces for borders or backs; I'd rather have lots of small pieces for the same amount of money!). I put a flat piping on top of the orange and black stripe to ease the transition, then added the Halloween print to the left and right sides of the top.

Next I pieced some flying geese units, thinking I would make blocks to use in the corners where the borders would eventually come together.


The problem was that when I auditioned the blocks against the top they were both too big and too busy.

{Sigh} It felt like it took a long time to assemble four of these blocks. I have since taken them apart, into quarters, and have some new ideas to try out. We'll see how well they work...

Wednesday, September 3, 2008

First Birthday!

We're having a little grandma time in today's post :- )

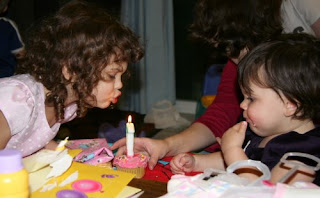
Baby Susan, who was accidently born at home last year, has been celebrating her first birthday. She's been in training to blow out her own candle but in the end required a little assistance from Big Sister.


She thoroughly enjoys birthday cake!


Well, don't we all?

Miss M gets to start preschool this week too. She first identified herself to her teacher as "Princess Margaret" but then changed her mind and decided she was "Barbie Margaret" thank you very much. By the time school actually starts she may be "Puppy Margaret" or "Kitty Margaret." Three is much too early to have to decide who or what you're going to be after all ;- )