Monday, December 13, 2010

A Little Sunshine on a Cloudy Day

After a rough weekend (from which I have not entirely recovered) I'm here to share with you another finish. Yippee! I'm delighted with how it turned out too.

Here's "Monkeyshines" in the process of being quilted. (Thanks to Michele for the inspiration for the quilt name!)


This is the stitch I used for the quilting. It seemed appropriate. Used up a lot of thread though!


There was enough of this bright green I'd bought on spec, on sale, to use for backing and binding.
Ta daa! The completed quilt on my kitchen floor:


It's now in a box, ready to be shipped off to its' final destination. My poor DS will be one of the many standing in line at the Post Office this week. We have quite a stack of packages to send off. Of course they aren't all ready to go just yet. Getting them ready is the order of the day. Before we do that we have to take Mr. Reilly over to the groomer. Busy, busy, busy!


Thursday, December 9, 2010

Flimsy Finish

Woohoo! I have finally brought my collection of black and white and pink friendship blocks from 2002 to the first stage of quilt completion. {big sigh} What a relief!

When you last saw this work in progress the blocks had just been set together. That was quite an ordeal in itself. Fun, but time consuming and just a tiny bit tedious at times.

At that point I honestly thought this would be another double bed quilt. It was nearly wide enough. But I was tired of working on it and slightly tired out by it. So I put it away and worked on other things. It hung around in the back of my mind though. A couple of weeks ago I decided to make finishing this top one of my goals for Finn's New Year's Eve UFO challenge. Another goal is to make a back for it, but that will be another project altogether.

When I got the top out again I was happy to discover that I could look at it with fresh eyes. After some journaling about it I managed to get past the idea of a bed quilt. The top is nearly square in the picture above; I decided to let that be the shape it would keep. In order to make it more squre I needed to add a narrow border to the two sides. The right side is shown below in the process of auditioning possibilities.


The left side is in the picture below, pinned together.


I had to pleat the flimsy on my design wall in order to see both sides at the same time and try to achieve some sort of overall balance.


It hung there for a few days while I did some beading to get my Bead Journal Project caught up for this year. Once I had those skinny borders on, however, I realized that I no longer wanted a frame of pink like I had originally planned. Further auditioning of various black and white prints for a final whole-cloth border revealed that a predominantly black border was not going to work either. But a white with black print seemed to magically do the trick. Here's the right half of the quilt top on my kitchen floor:

And the left half:

I think now that I will use a pink for the binding. Long-time readers may remember a pink stripe I bought; it should effectively bring all the different pinks together.

I had to do a bit of piecing to get the final border on this top. Out of the one yard cut I started with this is all I have left:

A slightly off-kilter 4.5" square and a width-of-fabric strip that varies from 3.5" to 4" in width.

And to cap off my accomplishment I have come up with an actual name/title for this quilt: "Play Group." No doubt that's due in part to all the nice compliments I received on my 'play' block that ended up in the cover quilt of Tonya's new book!

Tuesday, December 7, 2010

I Almost Missed It!

Couldn't let this day pass without a shout-out to Tonya Ricucci on the publication of her first book, Word Play Quilts.


I'm proud to say that one of the few word blocks I've made ended up on the cover of the book.

I haven't made many other word blocks. Almost put my newest granddaughters' names on their baby quilts but ran into difficulties and opted out. I'm not saying I'll never make any more words out of fabric but for the time being I'm content to enjoy all the other wonderful quilts being made using Tonya's tips (many of which can be seen on the blogs you'll find here). Once this book gets into the hands of quilters there are going to be a LOT more quilts featuring words and sayings!

Sunday, December 5, 2010

It's Starting to Look Like Christmas

We've had a relatively dry week. Yesterday we even had real sunshine, as opposed to the glare of sun through a thin layer of clouds. We took the opportunity to drive up to one of the verdant forests of trees in the area to pick out our tree for Christmas this year.

We usually have a Douglas Fir. For a change of pace this year we chose a spruce. Here's our personal lumberjack hauling it out of the forest for us:

Now all we have to do is dig out the Christmas decorations and get busy!

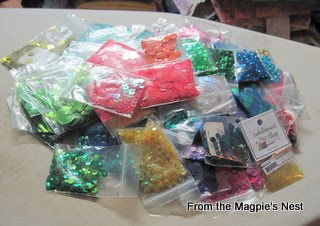
This past week I also made one last foray into the local sewing supply store that is closing. The owner is retiring for health reasons. That business is going to be sorely missed. I brought home a pile of sequins, a couple tubes of beads, half a dozen fat quarters, and some funky yarns. The sequins posed a storage problem.

Up until now I've just kept them, for the most part, in the same drawers I use for storing my beads. More than one of my bead drawers had become hard to open and close however. I made the decision to remove the sequins and see what kind of difference that would make.

It made a world of difference. Suddenly drawers that were all but overflowing now have all kinds of room for new beads! But where to put the sequins?

I had this cute animal crackers tin laying around, waiting to be used.

Not quite big enough. Hmm... what else?

Maybe if I dump these scraps out of this plastic shoebox... Ah, they all fit, with room for more. Perfect!

So far I've resisted the urge to sort them according to color. It might be more stimulating to have them all jumbled together.

Another perk is that this activity has sent me back to my Bead Journal Project ornaments. I was behind by about 5 ornaments when I brought those new sequins home. I'm happy to report that I am now almost up to date. Two ornaments have been embellished and are ready for backing and hanging loops, one is in the process of being embellished. Maybe I've miscounted - I'll have to go look. Near as I can figure though, I should only have December left to create to complete the collection for the year. Woohoo!

I wasn't sure I was going to sign up to participate in the BJP for 2011 because I had fallen so far behind this year. After spending some time catching up with other BJP bloggers I realized it's not the finishing of the individual ornaments that is the main thing. It's what you learn about yourself along the way that is the most valuable. And I've learned a lot. So I signed up again. If any of my readers are even remotely thinking about participating in the BJP for 2011 I would encourage you to do so and to hurry up! and register because registration closes this Wednesday, December 8.

Thursday, December 2, 2010

One Down, Three to Go!

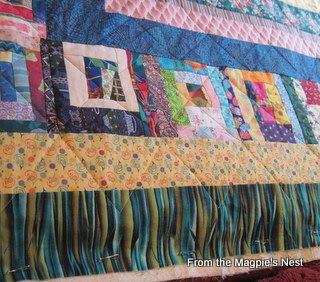
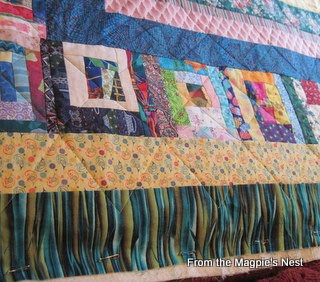
After that little bit of playtime to make the house block (see previous post) I buckled down to quilt "Cookies & Lemonade." It had been pin-basted before I signed up for the New Year's Eve Challenge but I wasn't really sure how I was going to to quilt it at the time. No brilliant answers came to me in the interim so I figured I'd just start in the middle and see how it developed. I eyeballed a diagonal line through the crumb blocks in the central panel of the quilt, stitching from corner to corner of each block. It wasn't always easy to find the corners, let me tell you!

Then I stitched a giant zigzag pattern in each successive ring of strips. All I used for marking were the corners of blocks or a ruler and straight pins.


I had a bit of a problem when I finished with the last ring because there were still the strips at the top and bottom that give the quilt its' length that needed to be quilted. Eventually I decided to just keep going with the zigzag pattern and was able to figure out spacing without too much trouble. In this case I chose to ignore the seam line between the two prints altogether to take my quilting closer to the perimeter of the quilt.

The next day I trimmed the quilt and made binding for it. I would have sworn that I'd measured and reckoned correctly but I came up short of binding as I was headed toward the home stretch. And of course I'd used up all of the print I'd chosen for the binding; there was no more to be had. It took some doing but I finally found something else altogether that at least blends in to cover that last 12" or so. I'd be interested to find out just how long it takes the quilt's new owner to discover the change in print. ;- )


So this quilt is officially done and can be checked off my New Year's Eve Challenge list. Woohoo!


This is not a wonderful picture of the finished quilt because it was taken in the living room under very poor light. We may have to try again before the quilt leaves for its' new home. It looks like we're having a bit of sunshine at the moment... but of course there aren't enough hands available and no place dry enough to take a picture outside. LOL - my inventive son just suggested we put the quilt on the roof of the house and then get a satellite image of it. I would love to see how well that would work!