Wednesday, February 8, 2023

Happy 9 Patches

 In my ongoing effort to reduce inventory here in The Magpie's Nest I pulled out all the blocks that would finish at nine inches. 

As you can see (top to bottom), there were Hole in the Barn Door blocks, Shoo-fly blocks, a few 9Patch blocks, and liberated or wonky stars. But not enough that I felt I could do anything useful with what I had. The obvious solution was to make more blocks of one sort or another. My tin of 3.5" scrap squares has been in danger of overflowing onto the floor for some time so I decided to make more 9Patch blocks. I was able to make so many that I had enough for a scrappy 9P quilt!

This flimsy at this stage would finish at 54" square. I chose to add a 3" border all the way around, bringing the top up to 60" square.

I was happy to find a use for this print that I love but that hadn't yet found a home. I think it ties everything together well. I was also a bit surprised to see how many other purples there were in the scrap blocks!

There were quite a number of juvenile/novelty prints in my scrap tin. They quickly became the focus of my efforts when choosing the patches for each block.

There are still plenty of 3.5" squares to use in another project or other blocks but at least I've made room for some new additions. And saved myself the task of tidying up the floor after a scrapalanche. 😉

I tried to build a back for this quilt out of yardage on hand. That didn't go so well. Why do I find it so easy to make blocks and build quilt tops but have such a struggle with creating the back for a quilt out of assorted pieces of yardage?! In the end I purchased a wide back in more purple. I figure this will go to a child somewhere, so I wanted to avoid lighter colors that would show dirt and wear more quickly. I expect there will be enough of the backing fabric to also bind the quilt. No doubt there will also be plenty of leftovers to cut into more scrap patches!


Monday, January 30, 2023

MAP for January

 When I set up my Monthly Art Project (MAP) I expected to make individual small projects, one a month. So far I've just kept adding to the scroll I began at the end of last year. I laid a strip of Tim Holtz's Eclectic Elements fabric over batting and have been hand stitching to secure and embellish the two layers. The red spiral was January's MAP element. I thought I would be adding the parrot stamp button from my box of elements in February.

Instead, I found myself stitching on the skeleton chart. And a very special piece of old lace.

I wish it were easier to photograph this long piece. You can see how it began in this post. I've done more stitching on the first section.

Now it's time to be thinking about what I might do in February. Add something more from the box of goodies or make an independent piece? Time will tell. 😉


Thursday, January 26, 2023

Three Quilts and a Flimsy

 I've been having issues with Blogger the past few days. You'd have been seeing these results sooner otherwise! 

You've seen all of these quilts previously but they have now been bound and laundered and are ready to head out of The Nest. First up, a quilt begun for a Scrap Happy Day effort, Scrappy Strips:

This was quilted by James with a neon green thread in a meandering path. It finished at 58" x 76 inches.

Next up is the yellow and black quilt. It finished at roughly 60" square.

James quilted with a large, open scroll in yellow thread.

The third quilt also finished at just under 60" square.

This one gave James the opportunity to do some outline quilting in the panels. That made for a nice change of pace for him. 😊

Can you even tell he outlined the birds on a branch?

 And the flimsy? It's the quilt I started for Scrap Happy Day this month. You may recall that I'd built seven rows from my Parts Department and just needed to sash them. That turned out to be a bit more challenging than I expected but I got there in the end. 

I was determined to use more scraps for the sashing. There were plenty, it was just the math that threw me off at times. (I tried to calculate strip lengths ahead of time. Turns out that didn't work so well.) There are top and bottom borders too, so the finished quilt will be about 60 by 80 inches. 

The completed quilts will eventually head to Europe to be distributed among refugees from Ukraine. The Parts Dept. Quilt will probably stay local, for a youth in foster care. ❤️

Sunday, January 15, 2023

Scrap Happy in January - Inventory Reduction Season

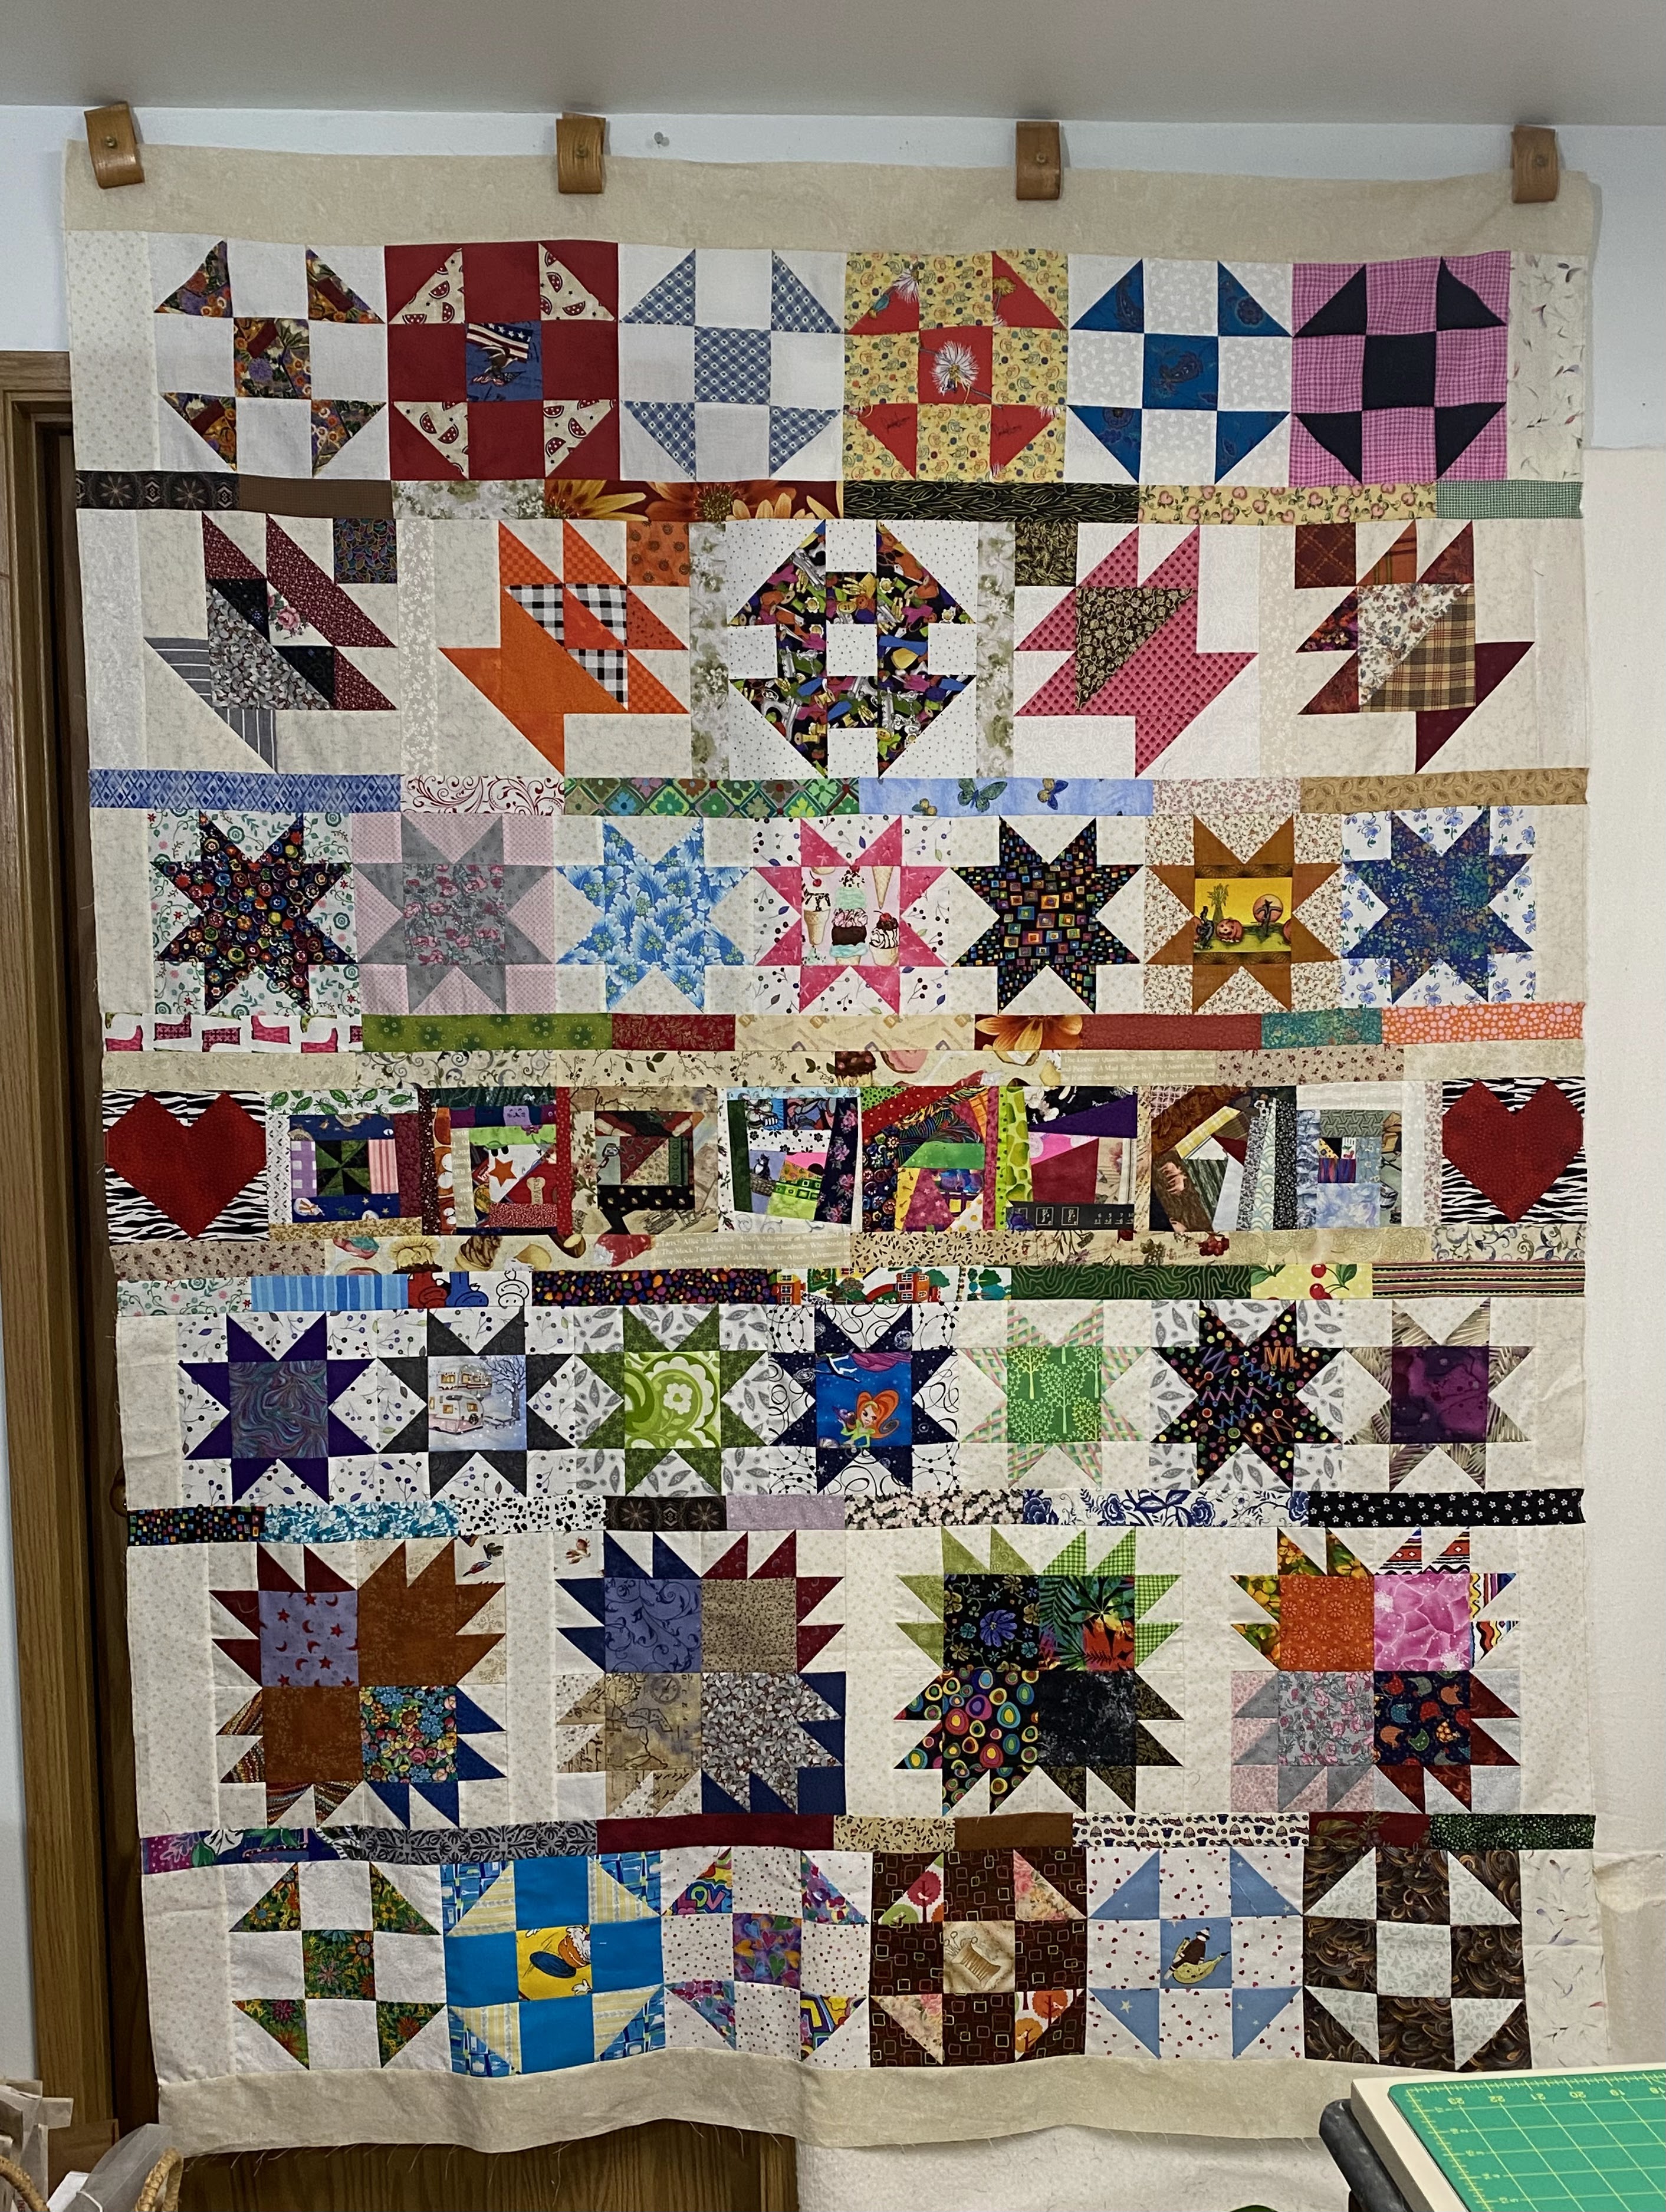
Perhaps under the influence of all the clearance sales offered by retailers at this time of the year (or, more likely, the fact that I could no longer close the Parts Dept. drawer without effort) I decided it was time to build another PDQ, a Parts Department Quilt. This time I was determined to avoid the square medallion format that recent quilts have developed. Just for a change of pace. A row-by-row quilt allows for a wide variety of block sizes to be included.

I like to begin with the biggest blocks in the Parts Dept. There actually wasn't much left to work with in the 12" block section. So I sewed together some 6" Bear Paw units into 12" blocks. With a few sashing strips and compensating strips at the ends I was able to get to a 60" width pretty easily. If you've been around here for long you know that I don't typically go any wider than 60" nor longer than about 80." I find 60" a very flexible dimension to work within. The next two rows were assembled from 8" Variable/Sawtooth star blocks, again with compensating strips at the ends. 

The next block size I tackled was ten inches. I couldn't keep to one block type for the whole row but I'm happy with the way the Wrench centers the Basket blocks that I made last month. There's only one Basket block left in inventory currently. There are more Wrenches, but they have a more rustic look to them.

 Next up were the 9" blocks. I was surprised at how many Sho-fly blocks I had in this size. These two rows made a good dent in that collection. 

I really felt like I wanted/needed a seventh row to balance things out over the body of the quilt top. This last row was probably the most challenging to create. Six inch blocks take up the most room in the Parts Dept. but it was a struggle to find the right ones for this project. Eventually I came across some crazy patch or liberated blocks I'd made a few years back. Oddly enough, they worked out really well. And now there aren't any left in inventory! 😊

I've already made that row taller by adding scrappy 1.5" strips along the top and bottom edges. So now it's also 9" overall. The seven rows together add up to 65" in length. But there needs to be sashing to separate the rows. According to my calculations I can use more scrappy 2" strips (1.5" finished) to go between the rows and then cap off the top and bottom with 3" strips to get to 80 inches.

At the moment this last step seems a bit daunting. I have plenty of scrap strips waiting to be used, but I need an organized way to approach this step. While I figure that out I invite you to visit these other bloggers who regularly find creative ways to use up scrap materials. Thanks to Kate and Gun for hosting this blog hop. ❤️

KateGun, Eva, Lynda,
Birthe, Turid, Susan, Cathy,  Tracy, 
Jill, Jan, Moira, Sandra, Chris, Alys,
Claire, Jean, Jon, Dawn, Jule, Gwen,
Sunny, Kjerstin, Sue L, Vera,
Nanette, Ann, Dawn 2, Carol,
Preeti, Debbierose, Nóilin and Viv


Monday, January 9, 2023

Yellow & Black

It seems a long time coming, but I've finally brought the yellow and black quilt top to a completed state. 

I began with 12" blocks I'd made some years ago. I surrounded them with 8" blocks from the Parts Dept. that fit the color scheme.

Then I set out to make additional blocks to bring the top up to a more useful size. You can read about that in this post. Once I had enough blocks to go the distance it was holiday season. Too many distractions to get much done then! I finally had the time and energy to audition block placements to create border sections the other day. Taa daa!

Those 10" blocks bring the top up to finish at about 60" square. The next step will be to create a back. 😊