Showing posts with label charity quilts. Show all posts

Sunday, September 15, 2019

Scrap Happy in September

Regular readers will be aware that I have supported Covered in Love in the past with contributions to block drives and even a quilt or two. I meant to contribute to the summer block drive of stars but it didn't happen. Thus it makes me very happy to have made four blocks for the current drive, a split 9 Patch design that utilizes scrap patches.


I made these in two sets of two on separate days. I have to tell you, it doesn't do me any good to try to sew after about 5 p.m. most days. I must have made the final block two times over one evening because I kept turning the half-square triangle patch the wrong way or sewed the wrong patch in the wrong place. It looks like such a simple block but there are SO many ways to screw it up! Still, it was a fun way (most of the time) to put my scraps to good use. Because that's what Scrap Happy Day is all about you know. ๐Ÿ˜‰

I finally put the bindings on two very scrappy quilts I built earlier in the year too. I called this first one Syncopated Strings. It was inspired by Sarah's scrap busting efforts over at Confessions of a Fabric Addict.

75.5" high x 58.5" wide
Just random strips of varying widths but all 8.5" long to make the columns. I didn't buy the border or binding fabric for this one, they were already in my stash, but I did purchase yardage for the back.

Confetti used up old yardage from my stash for the back as well as the front. It began as a Disappearing 9 Patch made entirely out of scrap patches. I had fun fussy cutting old prints to feature in the corners of the original 9 patch blocks.


Here's the end product:
70" high x 57" wide

And here's a portion of the back:


That white corner is a patch I add with the binding for labelling the quilt.

Scrap Happy Day is hosted by Kate and Gun on the 15th of each month. To see what they've been working on and what others have done just click on the links below. ๐Ÿ˜‹

Kate, Gun, Titti, Helรฉne, Eva, Nanette, Lynn, Lynda,
Birthe, Turid, Susan, Cathy, Debbierose, Tracy, Jill, Claire, Jan,
Moira, Sandra, Linda, Chris, Nancy, Alys, Kerry, Claire, Jean,
Joanne, Jon, Hayley, Dawn, Gwen, Connie, Bekki, Pauline and Sue L.


Saturday, January 19, 2019

Scrap Happy Follow-up

Remember those quilt parts and pieces I made for the stage play?


I haven't been given much hope of seeing the missing row of blocks anytime in the near future so I went ahead and finished the top at a smaller size than I originally intended. There were enough blocks already made, it was just a matter of rearranging what I had and framing up one or two more sawtooth stars to fill in the gaps.


Now I'm waiting for some yardage I hope will be appropriate for the back (and maybe the binding). I like my quilt backs to coordinate with the front in some way whenever I can manage it. ๐Ÿ˜Š

And that Disappearing 9 Patch I started for Scrap Happy Day?


I started out with a goal of making 20 blocks... then I cut some more patches from remnants and made a total of 25 blocks. That allowed me eleven rows of nine blocks each for a good size quilt top - with one single block leftover!


There was enough variety in the prints so that it was easier to resist the urge to tweak block placements. A person could go crazy trying to get an even distribution of colors and prints in a quilt like this. ๐Ÿ˜€


This quilt will finish at about 58" x 72." Now it's time to figure out what to do about a back...


I could also use a name for this piece. I have a terrible time coming up with monikers for my quilts - unless they have some distinguishing feature. About the only thing I've come up with for this one is Mulligan Stew!

1.21.18: Ah ha! I shall call thee "Confetti!"


Tuesday, January 15, 2019

Scrap Happy in January

Today is the day Kate and Gun host a blog hop for anyone who has made something new out of scraps. It began with quilters using fabric scraps but has since blossomed to include others who work in other media. I'll try to remember to include the links to all the blogs at the end of this post. ๐Ÿ˜€

I'm happy to report my elbow is feeling better these days. But of course, that means I have to be very careful not to overdo - which has been a distinct danger of late. Very few things motivate me the way a call for blocks or quilts does. I made a pair of foundation pieced half-log-cabin blocks for Covered in Love entirely out of scrap strips. Apparently I didn't get photos of them however. What really got my motor running was learning about WE CARE, a group in California who make quilts and pillowcases for middle and high school students. The quilts are presented in pillowcases tied with a bow as I understand it. As you can imagine, the recent wildfires in that state have increased the need for contributions. That made me mentally review the techniques I enjoy, and that sent me to my scraps and remnants. The Disappearing 9 Patch process is my current favorite for a quick quilt and it's perfect for using up scraps. Or so I hope! 

I've been cutting 5" squares from scraps since last summer when I made my first D9P quilts. The first thing I did after reading about WE CARE's effort was to pull them out and make as many 9 Patch blocks as I could.


For those who may be unaware, this process involves making traditional 9 Patch blocks and then quartering them. The quarters are then arranged according to the maker's desire. I'm hoping that the mix of colors and prints will create a pleasing whole in the end. I'm also hoping for a gender neutral quilt.


I've made and quartered ten blocks so far. My plan is to make 22 blocks so I'll have plenty of quartered units to mix up and end up with a good size quilt. Kathy Biggi, the coordinator of WE CARE, is asking for quilts at least 42" x 54." And pillowcases! They are getting commitments for quilts but don't have enough pillowcases to keep up with their standards for presentation. So I'll make a couple of pillowcases when the time comes too. It's almost easier to make two or more than just one. I'm going to set up a new page on this blog with the information I have for WE CARE. They don't have a web site and the need will continue on for some time. 

I try to keep scrap blocks ready to sew between seams. I've managed to sew up a few of those as well.


As promised, here are the links for others who may have something to show made out of scraps:

Kate, Gun, Titti, Helรฉne, Eva, Nanette, Lynn, Lynda,Birthe, Turid, Susan, Cathy, Debbierose, 
Tracy, Jill, Claire, Jan, Karen, Moira, Sandra, Linda, Chris, Nancy, 
Alys, Kerry, Claire, Jean, Johanna,
Joanne, Jon, Hayley, Dawn, Gwen and Connie 

Happy scrapping!

Thursday, November 15, 2018

Scrap Happy in November - for a Good Cause

It's time to share something we've done with scraps. After last month's post I made up a couple of postage stamp stars. Then the other day I sewed up one more 4" postage stamp block.


What really got me rolling was the call for blocks for a quilt drive for those whose homes were destroyed by Hurricane Florence.


I've been avoiding patchwork in an effort to give my left elbow a chance to heal. Precut scrap patches to the rescue! I was able to make up four of the prescribed 12" blocks out of my scrap tins.


Then I had some fun rearranging the four blocks...


This is one versatile block!

While I was working on these four blocks I sewed scrap strips together between seams. Then I just kept going...


 I also sewed up some other scrap blocks I'd prepared last month.


Next thing I knew one of the gals from my local guild asked for a 12" crazy patch block for her friendship quilt. Perfect for scraps!


So in spite of not sewing for about three weeks I got a lot done in a few days!

Scrap Happy Day is hosted by Kate in Australia and Gun in Sweden. To see what others are doing/have done with their scraps you can hop over to either of their blogs. There will be a lot to see, I promise you!

Friday, December 1, 2017

The Tortoise Finishes Another Race

Slowly, slowly, I've been working on this blue Patience Corner quilt. The blocks were made by my friends in my local quilt guild. I set 36 of them 6 x 6.


Then I framed them up to make an 84" top. (I also moved one block to get that X in yellow through the center of the quilt!)


It sat for a while before James got around to quilting it. As usual, he did a lovely job for me. ๐Ÿ˜Š


He used a simple overall design he calls 'water' through the body of the quilt, then these circles in the inner border and waves in the outer border. All freehand I might add!

It's too wet and windy to go outside for a proper photograph and I don't feel like wrestling with it to hang it in the studio for a portrait. Here it is draped over the long-arm, minutes after I finished sewing down the binding:


Since that picture was taken I've washed the quilt and now need to ink the label. My intention is to donate this to our local women's shelter. How they choose to use it is up to them. I've adapted the fast corner triangle technique Ami Simms advocated for hanging small art quilts to make labels for my bigger quilts.


For a quilt this size I cut a 5" square of my label fabric and fold it in half diagonally once. The raw edges of the label are then lined up with the raw edges in one corner of the quilt (before I apply the binding). I sew it in place with a narrower seam allowance than I will use for the binding. After the binding is applied by machine and then sewn down - which I do by hand as a personal preference - I celebrate by blind stitching the single folded edge of the label patch. The quilt is laundered before I inscribe the label with my Pigma Micron pens. As long as I don't try to rush the process, stretch and hold each section of the label with my left hand while I'm writing on it with my right, I don't have too much trouble writing on the fabric. You just have to go slowly and let the ink settle into the fibers. In addition to who made the quilt, where or why and when, I'm usually able to include simple laundering instructions on these labels. You know, something like "machine wash/dry, gentle cycles, low heat." And away we go!


Monday, May 22, 2017

Hands 2 Help 2017

This year's Hands2Help quilt drive is coming to a close. I actually had my quilt top finished early this time around. Which was a good thing because it took more time to get the binding on and stitched down than I would have expected. But the quilt was laundered and labelled and sent on its' way last week. Woohoo!

Of the three official charities in the program this year I chose to make a quilt for the International Institute of St. Louis. These folks help immigrants and their families become productive new Americans. I was grateful for an opportunity to show my support for those fleeing dangerous or poverty stricken areas of the world. Of course the first thing I did was to rummage about in my Parts Department to see what blocks jumped out at me, eager to be put to good use.

I figure everyone can use an extra chicken in their pot (or basket, as the case may be).


From there I pulled out other blocks with chicken prints or in warm tones. I began with a medallion setting in mind...


...but eventually turned it into more of a strippy set with long sashing between three primary columns.


James did simple allover quilting with loops.


After making a binding that turned out to be a poor color choice I found a better, darker tone and put that on. I'm very happy with the way this turned out, and even happier to have beat the deadline with time to spare!


You can see the other quilts that have been made for this year's H2H quilt drive over at Confessions of a Fabric Addict. If you ever need inspiration for a new project the link party will be a great place to look. :- )

Thursday, May 4, 2017

Flimsies, A Finish, and More Binding

Once again life and my body got the better of me. I hadn't realized how much I'd accomplished and not put on my blog until this morning. The batik friendship blocks were put away temporarily while I worked on the blocks for the quilt I intend to send to Covered in Love. When all twenty blocks were complete I put them on the wall in my fallback arrangement:


It actually looks better on the computer than it did in person. I went for a different arrangement however.


The back's been made and it's in the queue for quilting. It will be about 60" wide and 75" long when it's done.

Remember how I put bindings on four quilts last month? The first one was the wedding quilt, which has been sent and received and appreciated. :- ) The second was my F2F2 quilt, which I showed you here. The next one I tackled was the quilt I've decided to call Precious Gems because it features hand-dyes and batiks I only had a little of or didn't want to part with entirely. Taa daa:

60" x 78" (w x h)

I've begun to stitch down the binding on my Macabre Medallion but will have to set it aside to get the binding on the quilt for the Hands2Help quilt drive this year. I had a binding made but when I went to put it on the quilt I couldn't live with the discrepancy between the color of the binding and the border print.  I don't remember now where I acquired that fabric for the binding but I know I bought it specifically for that quilt. My color sense doesn't fail me very often but it sure did this time! Now I'm going to have to hurry a bit to meet the deadline {sigh}.

Another recent accomplishment was the assembly of my Diary Quilt top, my version of the Quilty 365 projects. I had 13 columns that needed to be set together. It took a while to find the right color/print to fulfill that purpose but I'm very happy with this yellow with tiny random orange dots.


I have a back made for this too, out of a couple of random prints from my stash, and it's also in the quilting queue. This will finish at my standard size at 80" wide and 60" high.The binding has already been made out of the same yellow I used to border the strips. At least that was an easy choice!


Wednesday, April 5, 2017

Batik Trips

After putting so much mental effort into the wedding quilt I wanted something easy and relatively mindless to work on next. Last year I learned about Covered in Love during the annual Hands2Help quilt drive. I only sent one quilt to them but have wanted to do more ever since. So I went through my stash and found some batiks that would work together in Scrappy Trip blocks.


Some quilters get hooked on log cabin blocks because of the ease of construction and variety of designs that can be achieved with them. Those are the very reasons I keep making scrappy trip blocks!


I tend to use the trip-around-the-world setting most often, at least when I'm making the blocks and putting them up on the design wall. ;- ) 


When I have more blocks made I'll try other setting options. I don't have quite enough of any one of these batiks for all 20 blocks so it will be a challenge to distribute prints evenly or at least in a pleasing arrangement. I confess to going out today to try to find more greens and golds to blend in with what I've already used. I wasn't as successful as I'd have liked but I think I have enough to be getting on with now. And James has just brought in the wedding quilt, ready to be bound. That will be a job for tomorrow (or maybe the next day!). 


Saturday, August 2, 2014

A Quilt From the The Parts Department

Gwen Marston and Freddy Moran changed my life when they introduced the concept of a Parts Department in their collaborative quilt books. My favorite part of quilt making is probably making blocks. Well, that and the challenge of using what's on hand rather than buying fabric specifically for a project.

As a result I now have a drawer chock full of blocks and units in various sizes. I also have strips of varying widths and lengths, most of which are hanging in my studio closet. Not too long ago I spent some time making six inch liberated log cabin blocks out of the shortest of the 2.5" strips.


I put them up on the design wall as I trimmed them to size but wasn't moved to do more with them at the time. They ended up in the Parts Drawer.


Meanwhile, the shortest two inch scrap strips continued to accumulate in their little basket until it was mounded and dripping. So I finally sat down with them to make twelve inch "Lego" blocks using the Jelly Roll Race technique. Now look at the basket!


There might be enough bits left for one more 12" block but I don't need one more right now. FYI, I sewed the two inch strips together end to end until I had a single strip just over 100" long and then folded that strip over and sewed it to itself three times (to make 8 rows per block) to get a square large enough to comfortably trim to 12.5."

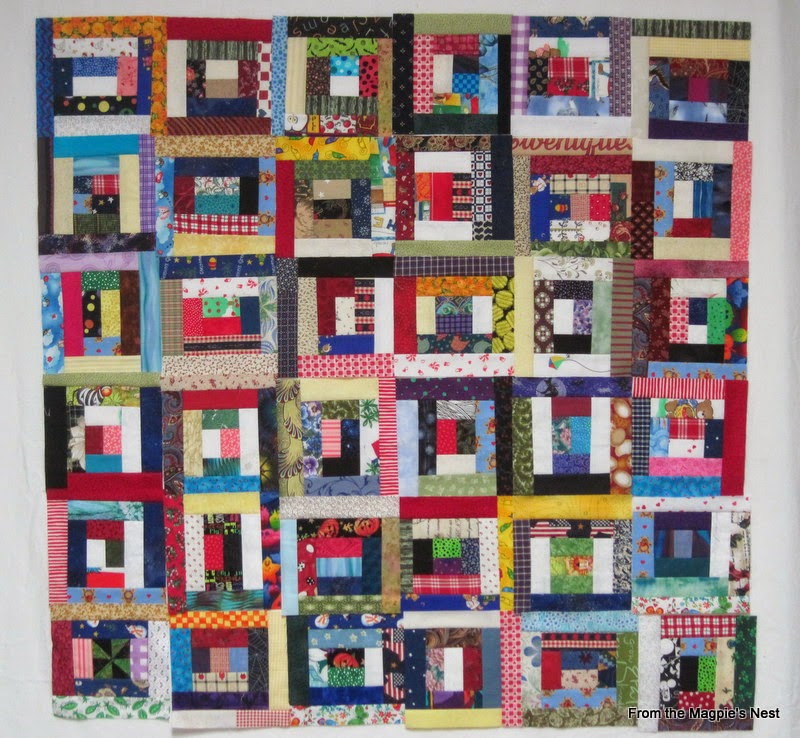
These are the blocks as they were finished, also haphazard on the design wall:


This batch of blocks and the wildfires burning homes to the ground in eastern Washington have motivated me to begin a new quilt to donate to someone who now has nothing to call their own. I will be donating the finished product through Jean over at Layers of Hope Quilting 911. I'm shooting for a double/full size top. These blocks will get me halfway there!

Tuesday, November 19, 2013

Quick Baby Quilts

When I read about Debra Spinic's efforts to provide baby quilts for Bambi House I was inspired to dig around in my stash to see what I could whip up and contribute to the cause. Since she is a long arm quilter and was offering to do the quilting all I had to do was make a small quilt top. Great! That's my favorite part!

I found this panel (which I didn't remember even acquiring!):


I was able to cut narrow strips off the length to put on the sides for width. Then I added simple strips of yellow and a blue printed with stars for the outer border. It doesn't get much easier than that! This quilt will be about 40" x 44" when finished.


Since Debra was working with panels featuring teddy bears I paid special attention to the bear prints in my stash. I found some scraps from back in the day and was able to make  enough Four Patch blocks for this top:


Half of these bears are in a library, reading, and the border print is scattered letters. The patches finished at four inches each and the quilt will be 36" x 44" when it's done.

By this time I was thinking of all the other 4.5" patches I've cut from scraps. Sure enough, when I sorted through them there were enough of the juvenile print variety to make another whole baby quilt top. Below you can see fairies and monkeys and bugs.


Here you can see the only polar bear in the quilt and a couple of seasonal prints:


I have teddy bear fairies in one patch here. The border print is the same one I used around the panel in the first top.


And here's the whole thing:


The patches were assembled in Four Patch blocks and then arranged on my design wall. I had the idea to put them up in this rainbow of color and only did a tiny bit of tweaking before sewing the blocks together. It will be 40" square when finished.

This was so much fun, and used up old scraps and yardage that had been around far too long. I'm really grateful for the opportunity to participate. :- )