It's time for the giant link party where everyone can show the quilts they've made for this year's Hands2Help quilt drive. The link list began on Sunday. As I write this there are 86 blog posts linked to Sarah's main post! She shares quilts made by those who do not have blogs too. Talk about eye candy!!!
I've shown these quilts previously, as tops and then probably before they were laundered. They are fresh out of the dryer now. 😀
I made two that will be going to the Little Lambs Foundation as soon as I can get someone to go to the post office for me. This Teddy Bear's Picnic is about 35" square, made with 15" single trip-around-the-world blocks.
I didn't realize the sun was shining so brightly on that upper corner of the quilt when the picture was taken. For what it's worth, here it is before it was laundered:
Spring in the Garden is about 42" square.
I also completed this quilt out of the Parts Department that will go to our local foster care organization. It's about 57" wide by 72" long.
And this is one reason I wash my quilts before I send them out into the world:
One of the white prints picked up some color in spite of the color catchers I put in the load. This has happened before. I might try washing it again to see if the color will come out. I think it has at least once in the past. But there are other quilts with white-on-white prints in them that have been washed repeatedly and the tint remains. I suspect those WoW prints are treated differently during the manufacturing process somehow. Everything that comes into my house gets treated the same way so I know it's not me. 😉 I just don't want the recipient to have an unhappy surprise the first time they wash and dry the quilt.
If you ever need some inspiration for a quilt project the link party is a great resource. Many of the quilts made are scrappy but not all if that's not your style. The best part is that every single quilt is destined to provide beauty and comfort to someone who can use it. 💖
Being (mostly) an account of the creative endeavors of an artist and collector whose wings have been clipped by hypersensitivity to the chemicals in our everyday environment.
Showing posts with label H2H. Show all posts
Wednesday, June 3, 2020
Wednesday, May 6, 2020
Happy Birthday Paula!
Back in February the quilt world lost a kind and giving spirit, Paula Budinger. Today would have been her 79th birthday. Cyber friends of hers have organized a posthumus birthday party in the form of a virtual quilt show and blog hop in her honor. I'm delighted to be participating. 😊
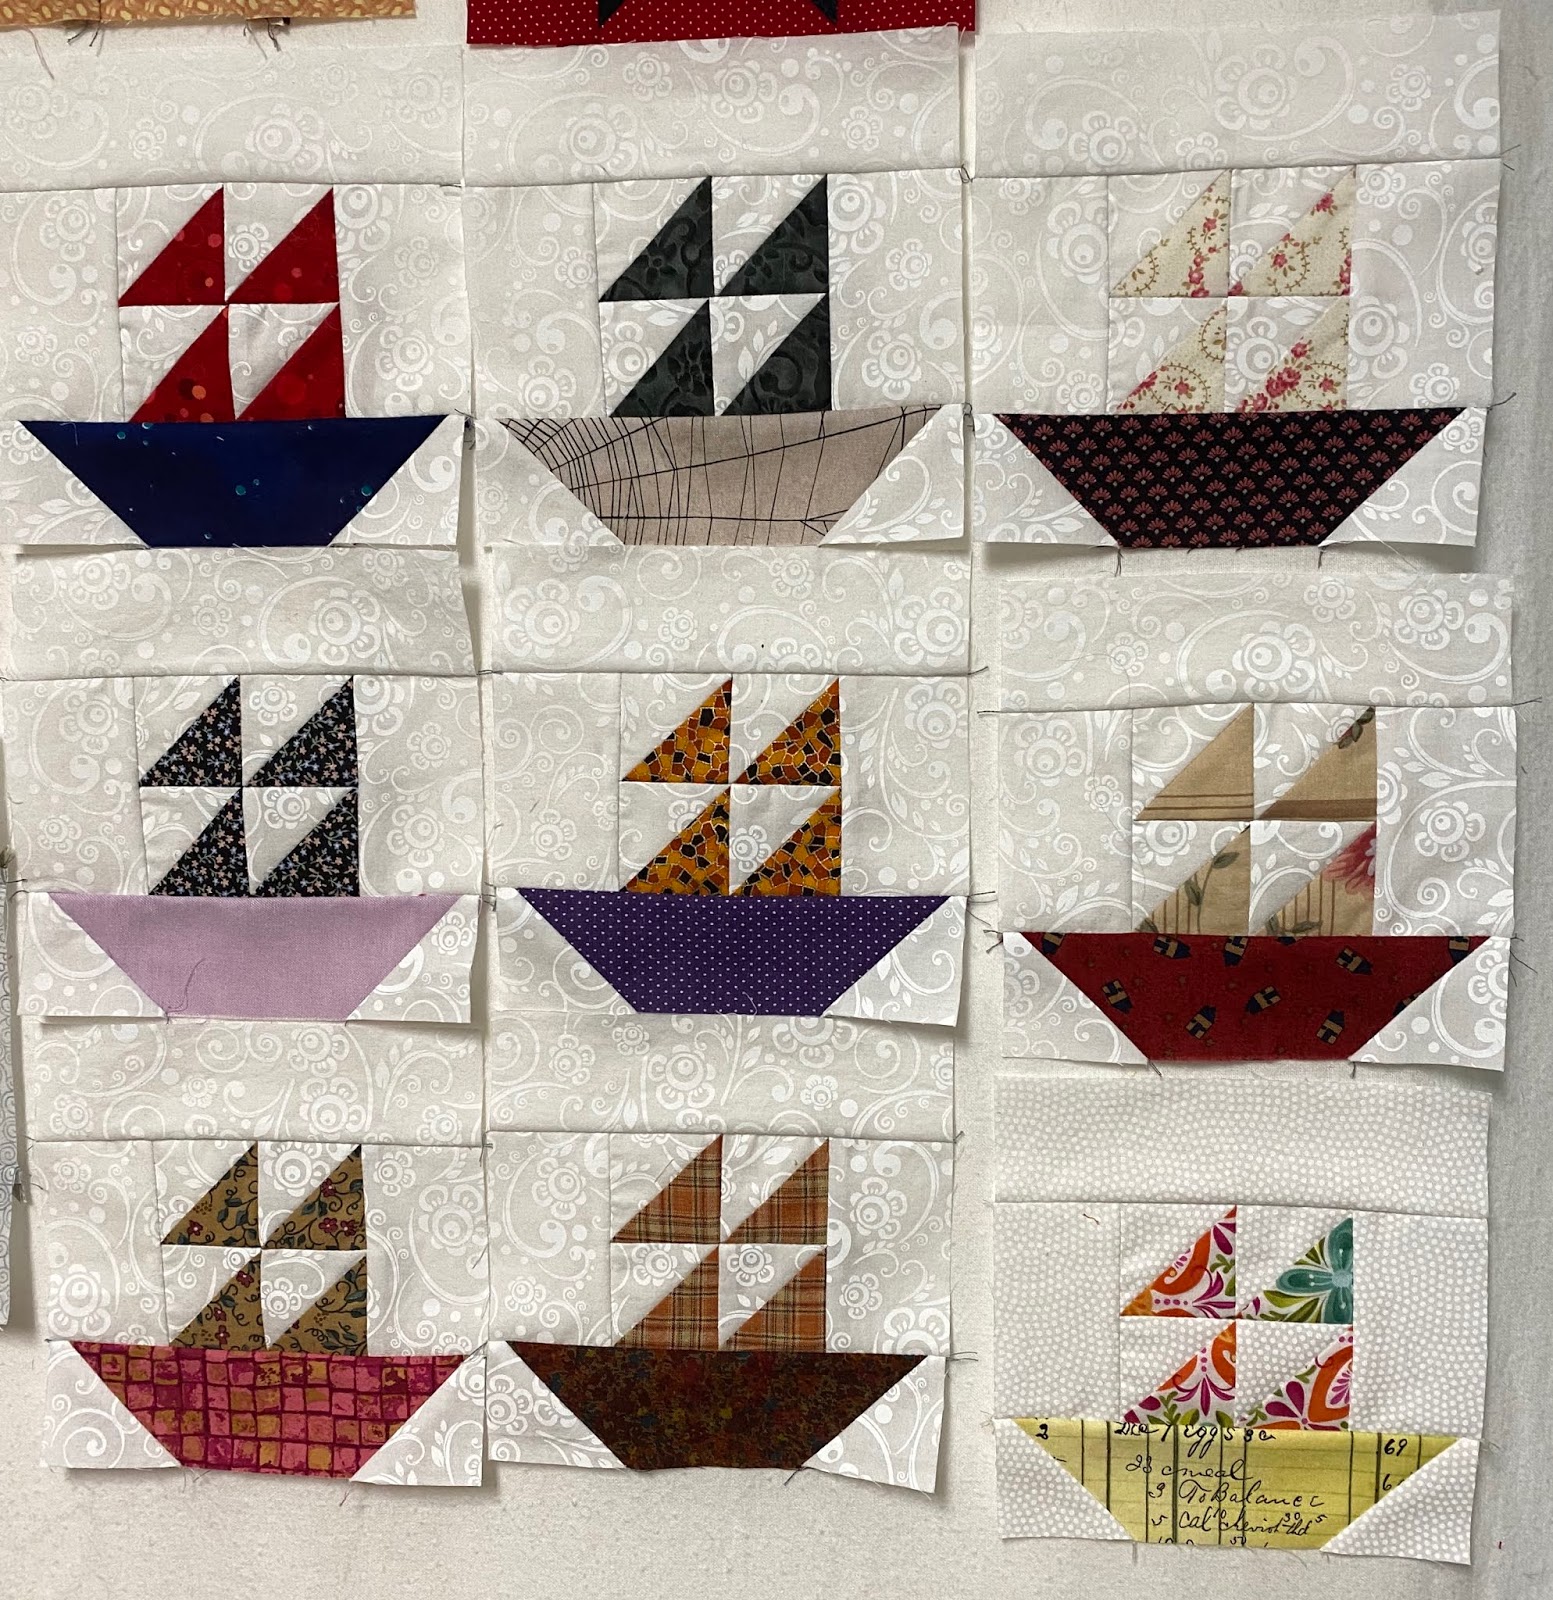
I got to know Paula through the Rainbow Scrap Challenge. We were both actively using our scraps per the monthly color cues for a few years. Paula continued on after I slacked off. As with most things, one quilter inspired another. It was Paula's little boat blocks that got me started making my 6" Ships.
Paula collected vintage doll quilts and sometimes shared what she knew about them on her blog. Mostly her blog posts were about the blocks she was making in conjunction with the RSC or little quilts she might be putting together to donate to Project Linus and others. In her honor I've assembled some postage stamp stars I made for the RSC into this child's quilt:
I've also made a couple of small quilts that will be donated through the Hands2Help quilt drive this year. I believe Paula also participated in H2H. This first one will be going to the Little Lambs Foundation.
This one will be donated to a child in Foster Care.
Janice has organized this quilt show and blog hop. "Door prizes" (birthday presents? 😉) have also been donated! For each comment you leave on any of the participating blogs between now and 15 May your name will be entered in a drawing for one of the prizes. Unfortunately, overseas commenters will only qualify for gift certificates or pattern prizes due to the cost of postage.
Here's the list of blogs posting today:
I got to know Paula through the Rainbow Scrap Challenge. We were both actively using our scraps per the monthly color cues for a few years. Paula continued on after I slacked off. As with most things, one quilter inspired another. It was Paula's little boat blocks that got me started making my 6" Ships.
Paula collected vintage doll quilts and sometimes shared what she knew about them on her blog. Mostly her blog posts were about the blocks she was making in conjunction with the RSC or little quilts she might be putting together to donate to Project Linus and others. In her honor I've assembled some postage stamp stars I made for the RSC into this child's quilt:
I've also made a couple of small quilts that will be donated through the Hands2Help quilt drive this year. I believe Paula also participated in H2H. This first one will be going to the Little Lambs Foundation.
![]() |
| The binding is in place but still needs to be sewn down. |
This one will be donated to a child in Foster Care.
Janice has organized this quilt show and blog hop. "Door prizes" (birthday presents? 😉) have also been donated! For each comment you leave on any of the participating blogs between now and 15 May your name will be entered in a drawing for one of the prizes. Unfortunately, overseas commenters will only qualify for gift certificates or pattern prizes due to the cost of postage.
Here's the list of blogs posting today:
These bloggers will be posting on Thursday, 7 May:
And these ladies will post on Friday, 8 May:
These are the gifts that have been donated:
Lorna, Sew Fresh Quilts, $50 gift certificate for her pattern shop.
Yvonne Quilting Jetgirl, 2 PDF patterns of choice.
Bernie Needle and Foot, $25 certificate for her shop.
A fat quarter bundle from Figo Fabrics
A set of quilty gift cards from Initial Thought by DMF Note cards set 1
A pattern of choice from Karen, Sugar Free Quilts
A $30 gift certificate for Doris, Cactus Queen Quilt Co
A PDF pattern of choice from Joanne, www.etsy.com/shop/CanuckQuilterDesigns
$25 gift certificate courtesy of Janice to Fat Quarter Shop
Paula was a very special lady, a nurse before she retired and one who continued to seek out ways to help others ever after. I'm sure she is dearly missed. Her good works are not forgotten.
Sunday, April 26, 2020
Checking In - H2H 2020
Sarah over at Confessions of a Fabric Addict has set up a linky party for us to share the quilts we're working on for Hands2Help this year. I'm doing better than in years past at this point! It helps that my focus this time around has been on baby quilts for the Little Lambs Foundation. I'd have three for them now if it weren't for the fact that I decided to send one to a niece who is having her first child in May. 😊
This one has been quilted...
Just with a simple meander. It's about 40" square. This top is next to be quilted:
It's a bit bigger at about 45" square.
I've just finished the binding on this quilt out of my Parts Department:
An exact destination hasn't been determined yet. It may go to our local foster care program. It's roughly 58" wide and 75" long. I was delighted to be able to use an old blue fabric printed with gold metallic swirls that sort of mimic the swirls James used to quilt it.
It was one of those prints I'd never found an appropriate use for. Now it's nearly all gone and I don't have to deal with it anymore. Except in scraps of course. 😉I do need to spend some time cutting scrap patches. Several quilts have been trimmed and bound lately, which means I have cuttings from the backs that have accumulated. At the same time my stack of scrap blocks to sew between seams (i.e. leaders and enders) has diminished to one, and it's partly assembled already. Might be time to break out a new blade for the rotary cutter too!
The link party is here in case you'd like to see what others have been working on for Hands2Help this year. 💜
This one has been quilted...
Just with a simple meander. It's about 40" square. This top is next to be quilted:
It's a bit bigger at about 45" square.
I've just finished the binding on this quilt out of my Parts Department:
An exact destination hasn't been determined yet. It may go to our local foster care program. It's roughly 58" wide and 75" long. I was delighted to be able to use an old blue fabric printed with gold metallic swirls that sort of mimic the swirls James used to quilt it.
It was one of those prints I'd never found an appropriate use for. Now it's nearly all gone and I don't have to deal with it anymore. Except in scraps of course. 😉I do need to spend some time cutting scrap patches. Several quilts have been trimmed and bound lately, which means I have cuttings from the backs that have accumulated. At the same time my stack of scrap blocks to sew between seams (i.e. leaders and enders) has diminished to one, and it's partly assembled already. Might be time to break out a new blade for the rotary cutter too!
The link party is here in case you'd like to see what others have been working on for Hands2Help this year. 💜
Tuesday, April 7, 2020
Spring in the Garden
I mentioned another baby quilt I was working on behind the scenes. I'm calling it Spring in the Garden for what I hope you will see are obvious reasons. This will be going to the Little Lambs Foundation in conjunction with the Hands2Help quilt drive this year.
It began with a handful of scrappy Shoofly blocks from my Parts Department that all had green background patches.
Then I found a set of fussy-cut frogs, also on a green ground!
I decided to frame them up Courthouse Steps style with more greens to use them as alternate blocks between the Shooflies.
That gave me a 24" medallion once I'd sewn them together. I had a wide border stripe print that was just big enough to allow me to frame the medallion.
I have a companion print from which I was able to fussy cut the cornerstones. Then it sat for a couple of days while I tried to figure out what to do next and recovered from a toxic exposure.
I had to audition quite a range of prints before I settled on an orange polka dot for a narrow inner border.
Once I had that in place I almost wished I'd made it wider and left it for the final outer border. I wanted the quilt to be bigger though so another round of auditions was held, no easier or quicker than the first. Finally I settled on a sort of tropical print, mostly because it had the right colors in it.
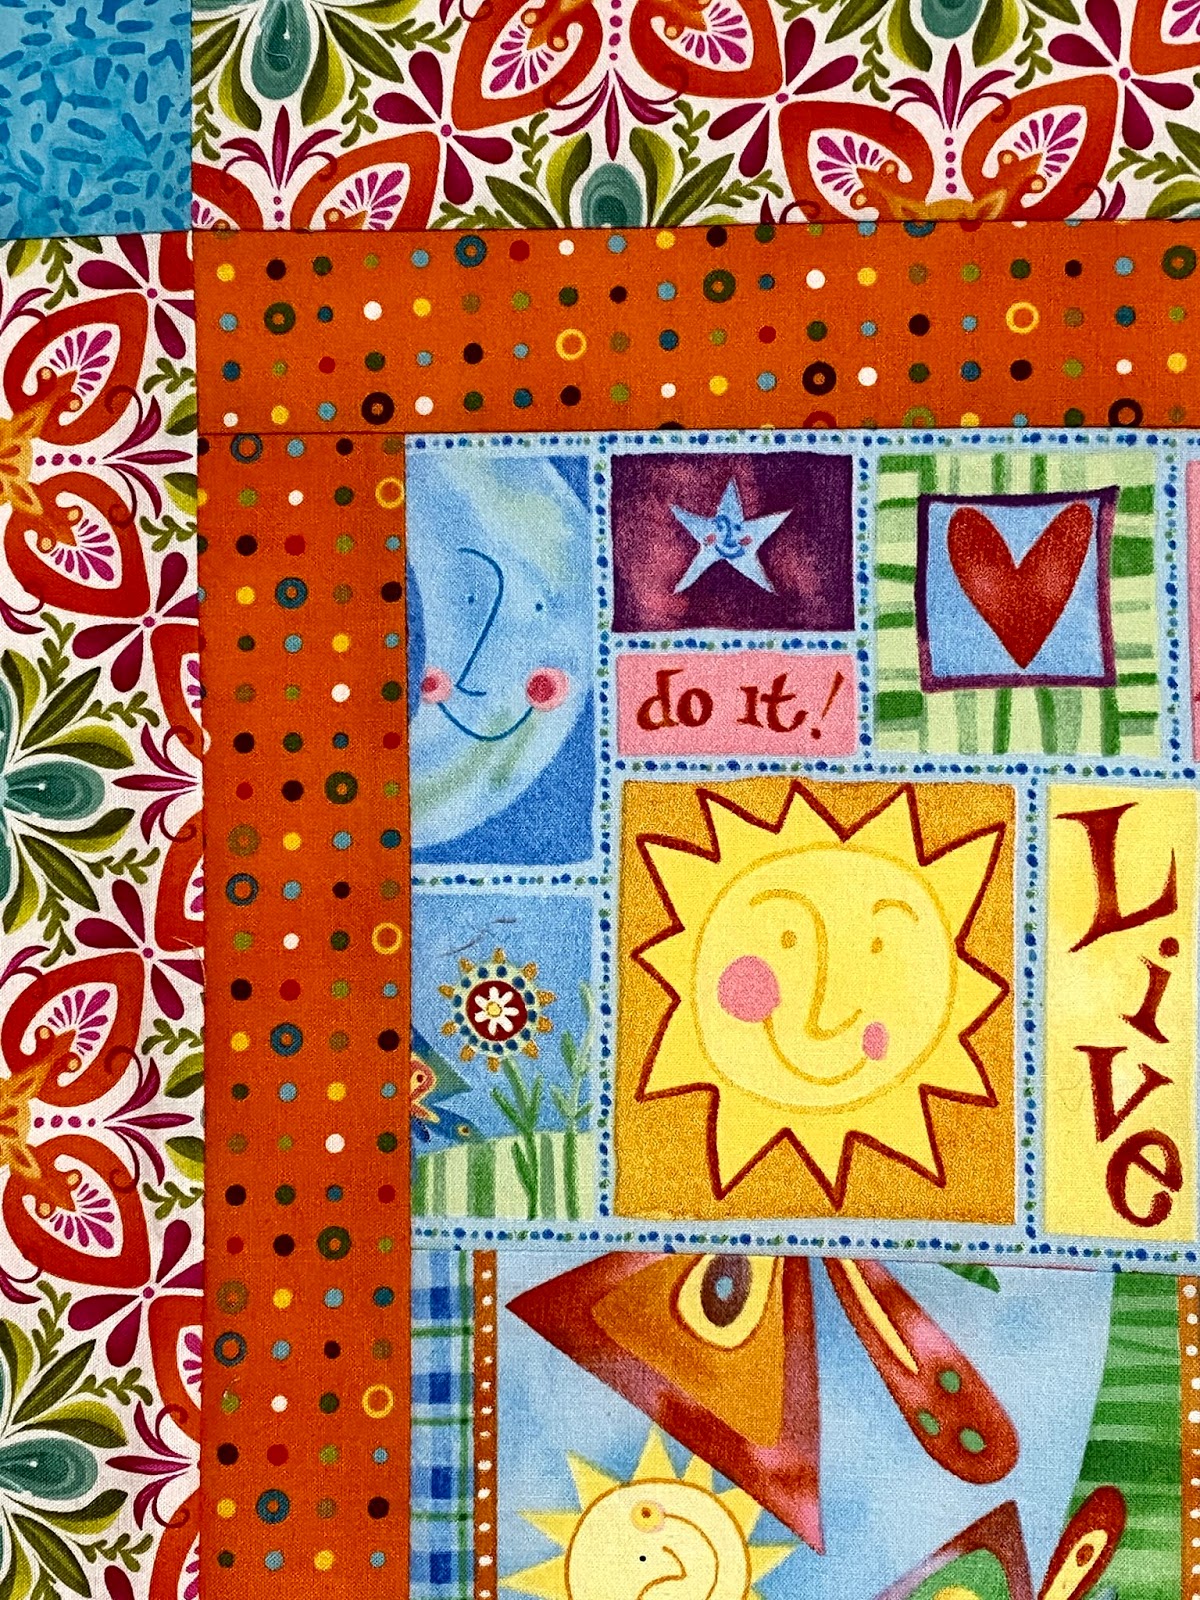
This will finish at about 45" square. Here's a close up shot for a better look:
Not that the colors in the picture are true to life but you get the idea.
I've already made the back for it too! The turquoise is a simple hibiscus print and the black and white is a large leafy print.
Now, on to the next one!
It began with a handful of scrappy Shoofly blocks from my Parts Department that all had green background patches.
I decided to frame them up Courthouse Steps style with more greens to use them as alternate blocks between the Shooflies.
That gave me a 24" medallion once I'd sewn them together. I had a wide border stripe print that was just big enough to allow me to frame the medallion.
I have a companion print from which I was able to fussy cut the cornerstones. Then it sat for a couple of days while I tried to figure out what to do next and recovered from a toxic exposure.
I had to audition quite a range of prints before I settled on an orange polka dot for a narrow inner border.
Once I had that in place I almost wished I'd made it wider and left it for the final outer border. I wanted the quilt to be bigger though so another round of auditions was held, no easier or quicker than the first. Finally I settled on a sort of tropical print, mostly because it had the right colors in it.
This will finish at about 45" square. Here's a close up shot for a better look:
Not that the colors in the picture are true to life but you get the idea.
I've already made the back for it too! The turquoise is a simple hibiscus print and the black and white is a large leafy print.
Now, on to the next one!
Sunday, March 22, 2020
A Belated National Quilt Day Observance
Since I've been unable to attend my local quilt guild meetings for over a decade now I've sort of lost touch with some of the goings-on in the universal quilt community. I see blog posts about National Sewing Day or Craft Month or whatever but I'm never quite prepared to participate or comment here as they occur. As my mother used to say, always a day late and a dollar short. In any event, 21 March was National Quilting Day.
But! One day this past week I was inspired to look through the single Trip Around the World blocks I've been making out of my 3" scrap bin. In addition to this block I showed in our last Scrap Happy Day post...
I found three others that sort of worked with that one.
Three of the four blocks feature teddy bears in one or more patches. The fourth block carries on with the yellow found in two other blocks. And who doesn't love a baby elephant?! I found another teddy bear patch in the scrap bin to use for a cornerstone in sashing between the blocks. And then I found scrap strips that worked for sashing - at least to my eyes. It might be too busy for some.
To top is all off, I found the leftovers of another baby quilt to use for the final, outer border.
Used that all up. 😃This would totally qualify for a Scrap Happy Day project but I didn't want to wait that long to share it with you. And besides that, it's already been quilted and is ready to be bound!
James used a variegated thread and a large meander. It probably took him longer to mount it on the long arm than it did to do the quilting. He said the quilting only took about ten minutes. I have a happy red binding all set to finish this off.
This little quilt (about 39" square) will be my first quilt for this year's Hands2Help quilt drive. It will go to the Little Lambs Foundation in Utah. From start to finish this was such a quick project, only a matter of a couple of days. (Well, disregarding the binding process of course.) Might have to make another one next week!
But! One day this past week I was inspired to look through the single Trip Around the World blocks I've been making out of my 3" scrap bin. In addition to this block I showed in our last Scrap Happy Day post...
I found three others that sort of worked with that one.
Three of the four blocks feature teddy bears in one or more patches. The fourth block carries on with the yellow found in two other blocks. And who doesn't love a baby elephant?! I found another teddy bear patch in the scrap bin to use for a cornerstone in sashing between the blocks. And then I found scrap strips that worked for sashing - at least to my eyes. It might be too busy for some.
To top is all off, I found the leftovers of another baby quilt to use for the final, outer border.
Used that all up. 😃This would totally qualify for a Scrap Happy Day project but I didn't want to wait that long to share it with you. And besides that, it's already been quilted and is ready to be bound!
James used a variegated thread and a large meander. It probably took him longer to mount it on the long arm than it did to do the quilting. He said the quilting only took about ten minutes. I have a happy red binding all set to finish this off.
This little quilt (about 39" square) will be my first quilt for this year's Hands2Help quilt drive. It will go to the Little Lambs Foundation in Utah. From start to finish this was such a quick project, only a matter of a couple of days. (Well, disregarding the binding process of course.) Might have to make another one next week!
Monday, June 3, 2019
First Flimsy of 2019!
In January, shortly after I'd injured my shoulder but before I realized how serious the injury was, I'd sewn a bunch of scrap strips into rough blocks. The intention was to create a quilt for the Hands2Help quilt drive this year.
And then I had to set everything aside to allow my shoulder to heal.
I've not been completely inactive but I haven't been able to build a quilt top for a good six months. Lately my shoulder has been feeling almost normal again. Hurray! I figured the easiest, safest thing to do would be to get out those string blocks and piece them into columns.
They all turned out too long in the beginning so there was some reverse sewing involved before I had a flimsy the size and shape I wanted. The most stressful part of this assembly job was tacking those long columns up on the design wall so I could judge for color and print balance. I really have to stretch to reach the top of my design wall, even without a compromised shoulder joint. Eventually I got all the columns to the same approximate length. I wanted a whole cloth border to finish it off visually and to keep all of those seam ends from coming apart when it was mounted on the long arm.
![]() |
| About 60" wide x 80" long |
I feel like I lucked out when I found the black print in my stash. It has other colors in it but is dark enough to corral the colors and prints in the strings. Of course, getting those borders on wasn't without a hitch. I cut 2.5" wide strips and began piecing them together end-to-end for length. Then, without thinking, I went to the ironing board and started pressing them in half as if I were making a binding! Rather than undo all that work I went back to the yardage and cut new strips. There was just enough left to get all the way around the top. I doubt there's enough of the false-start binding to use when the time comes but that would be really helpful. I typically cut my binding strips only two and a quarter inches wide though, so I'll have to deal with that issue too. First up is to create a back for this top. A big ole piece of yardage would be the simplest way to go obviously. It would also be the easiest on my shoulder. I know I don't have anything like that on hand however, and there's still old yardage waiting to be used up somehow. That's a problem for another day. Right now I'm just going to bask in the glow of having finally completed another quilt top! 😁
Wednesday, May 22, 2019
Hands2Help 2019
My life and the schedule for Hands2Help haven't coincided very well this year. Mostly that's due to the shoulder injury. However, I have managed to get a couple of small quilts bound over the last couple of months. They were both built last year, before I hurt myself. They still need to be laundered to fluff them up but I like to save that step for the very last to get - and keep - as much dog hair as possible off of them. I've already sent one of my big quilts to the Carolina Hurricane Quilt Project. Specifically, my F2F quilt.
That will be happening one day very soon!
It was just too big to use comfortably on our bed. It was a wrench to part with, believe me.
Both of the most recent quilts were made with the intention of donating them to our local Hospice organization for their clients. That's basically the same mission as Mercyful Quilts so I'll be donating here in my own town instead of shipping them. I've christened this first one Pink Twinklers.
![]() |
| About 48" x 60" |
Plenty there to keep someone distracted! James quilted this with one of his loose overall designs.
The second has a more masculine look. I think of it as a Farmer's Wife Churn Dash.
![]() |
| About 50" x 60" |
James used a large feather pattern to quilt this one.
That will be happening one day very soon!
Wednesday, January 23, 2019
The Evolution of a Scrap Busting System
Maybe you've heard how you can't find your voice as an artist unless you make a lot of art. The same applies to quilt making. You try a lot of techniques, play with a lot of different types of prints, and - at least if you're like me - eventually settle into a style and/or rhythm that works for you. Having said that, I've discovered what I enjoy most is the challenge of taking a bunch of uncoordinated prints and making them into a pleasing composition. The more prints the merrier!
A year or two ago I set a loose goal for myself to make a dent in the stash I'd built up over two decades. To that end I followed someone else's example and cut a bunch of prints up into strips of varying widths, from 3.5" down to 1.5." What I've learned since then is that I don't naturally gravitate to using strips in my quit making. Or at least not in the way some people do. I'll make the occasional log cabin block for example, but I get bored going around the same central patch over and over again. What I seem to enjoy the most is building blocks out of squares and triangles. Some of those strips can be cut into patches to use in blocks but I had an awful backlog of strips in my closet.
My solution for storing the strips was to clip color families together and then hang them from what was meant to hold ties or belts or something.
One thing I have discovered is that I do enjoy using 3" strips to make Scrappy Trip blocks. But you need at least 19" in length to make a 15" block so I separated those strips by length as well as width.
Two inch strips have proven to be very useful for making 12" Lego blocks and the hulls of 6" boats. Other than that I would only occasionally get into the closet for strips. So in the back of my mind I've been on the lookout for a way to utilize those strips that have been languishing. Cue Confessions of a Fabric Addict!
Sarah makes a ton of quilts and therefore generates a lot of scraps. She recently posted about how she put some of them to good use with minimal fuss. The lightbulb went off in my head as I read that post. Since then I've thinned out my collection of strips significantly. 😀
Now I have a box overfull with strips 8.5" long in varying widths.
These will provide for some wonderful mindless sewing. The trick is going to be finding a way to use the wider strips that are at the bottom of the box as well as the narrower ones on top. I want to keep them handy and I'd like to keep them from wrinkling as much as possible. It may just be a matter of finding a little bit bigger container for them. I had no idea I would fill Amazon.com's A1 box past it's capacity when I began!
Sarah is also working on the plans for this year's Hands2Help effort. There will be tutorials for quilts featuring rectangles (which I suppose are just large strips) along with guest bloggers and door prizes. I'm curious to see which organizations will be the beneficiaries of this year's quilts. 😊
A year or two ago I set a loose goal for myself to make a dent in the stash I'd built up over two decades. To that end I followed someone else's example and cut a bunch of prints up into strips of varying widths, from 3.5" down to 1.5." What I've learned since then is that I don't naturally gravitate to using strips in my quit making. Or at least not in the way some people do. I'll make the occasional log cabin block for example, but I get bored going around the same central patch over and over again. What I seem to enjoy the most is building blocks out of squares and triangles. Some of those strips can be cut into patches to use in blocks but I had an awful backlog of strips in my closet.
My solution for storing the strips was to clip color families together and then hang them from what was meant to hold ties or belts or something.
One thing I have discovered is that I do enjoy using 3" strips to make Scrappy Trip blocks. But you need at least 19" in length to make a 15" block so I separated those strips by length as well as width.
Two inch strips have proven to be very useful for making 12" Lego blocks and the hulls of 6" boats. Other than that I would only occasionally get into the closet for strips. So in the back of my mind I've been on the lookout for a way to utilize those strips that have been languishing. Cue Confessions of a Fabric Addict!
Sarah makes a ton of quilts and therefore generates a lot of scraps. She recently posted about how she put some of them to good use with minimal fuss. The lightbulb went off in my head as I read that post. Since then I've thinned out my collection of strips significantly. 😀
Now I have a box overfull with strips 8.5" long in varying widths.
These will provide for some wonderful mindless sewing. The trick is going to be finding a way to use the wider strips that are at the bottom of the box as well as the narrower ones on top. I want to keep them handy and I'd like to keep them from wrinkling as much as possible. It may just be a matter of finding a little bit bigger container for them. I had no idea I would fill Amazon.com's A1 box past it's capacity when I began!
Sarah is also working on the plans for this year's Hands2Help effort. There will be tutorials for quilts featuring rectangles (which I suppose are just large strips) along with guest bloggers and door prizes. I'm curious to see which organizations will be the beneficiaries of this year's quilts. 😊
Monday, May 22, 2017
Hands 2 Help 2017
This year's Hands2Help quilt drive is coming to a close. I actually had my quilt top finished early this time around. Which was a good thing because it took more time to get the binding on and stitched down than I would have expected. But the quilt was laundered and labelled and sent on its' way last week. Woohoo!
Of the three official charities in the program this year I chose to make a quilt for the International Institute of St. Louis. These folks help immigrants and their families become productive new Americans. I was grateful for an opportunity to show my support for those fleeing dangerous or poverty stricken areas of the world. Of course the first thing I did was to rummage about in my Parts Department to see what blocks jumped out at me, eager to be put to good use.
I figure everyone can use an extra chicken in their pot (or basket, as the case may be).
From there I pulled out other blocks with chicken prints or in warm tones. I began with a medallion setting in mind...
...but eventually turned it into more of a strippy set with long sashing between three primary columns.
James did simple allover quilting with loops.
After making a binding that turned out to be a poor color choice I found a better, darker tone and put that on. I'm very happy with the way this turned out, and even happier to have beat the deadline with time to spare!
You can see the other quilts that have been made for this year's H2H quilt drive over at Confessions of a Fabric Addict. If you ever need inspiration for a new project the link party will be a great place to look. :- )
Of the three official charities in the program this year I chose to make a quilt for the International Institute of St. Louis. These folks help immigrants and their families become productive new Americans. I was grateful for an opportunity to show my support for those fleeing dangerous or poverty stricken areas of the world. Of course the first thing I did was to rummage about in my Parts Department to see what blocks jumped out at me, eager to be put to good use.
I figure everyone can use an extra chicken in their pot (or basket, as the case may be).
From there I pulled out other blocks with chicken prints or in warm tones. I began with a medallion setting in mind...
...but eventually turned it into more of a strippy set with long sashing between three primary columns.
James did simple allover quilting with loops.
After making a binding that turned out to be a poor color choice I found a better, darker tone and put that on. I'm very happy with the way this turned out, and even happier to have beat the deadline with time to spare!
You can see the other quilts that have been made for this year's H2H quilt drive over at Confessions of a Fabric Addict. If you ever need inspiration for a new project the link party will be a great place to look. :- )
Labels:
charity quilts,
creative process,
finish,
H2H,
orphan blocks,
Parts Dept.
Sunday, May 7, 2017
Hands2Help 2017
It's a good thing I got an early start on my quilt for the Hands2Help quilt drive this year! The top was begun mid-February and complete by the end of the month. Then there was the wedding quilt and a baby quilt and all sorts of other projects while it waited for it's turn to be quilted. We won't mention all the time lost to recovery from toxic exposures and other health issues (so frustrating!). It sat, folded up, for some time after it had been quilted too. I'm afraid that shows in this picture I took a couple of days ago.
I have binding made for it now in a better color than I'd originally chosen (see previous post). It's very close to the dark color of the vertical sashes and border strips. I hope to get that on during the coming week. That should insure this gets shipped before the June 2 deadline!
For those who may be visiting here for the first time you can read about how this quilt was built out of my Parts Department in this post. I'm linking up with some of the other quilters participating in H2H over at Confessions of a Fabric Addict today. Guest blogger Laura has shared a nifty quickie quilt pattern too. Looks like a candidate for stash busting to me. ;- )
![]() |
| 65" x 88" |
I have binding made for it now in a better color than I'd originally chosen (see previous post). It's very close to the dark color of the vertical sashes and border strips. I hope to get that on during the coming week. That should insure this gets shipped before the June 2 deadline!
For those who may be visiting here for the first time you can read about how this quilt was built out of my Parts Department in this post. I'm linking up with some of the other quilters participating in H2H over at Confessions of a Fabric Addict today. Guest blogger Laura has shared a nifty quickie quilt pattern too. Looks like a candidate for stash busting to me. ;- )
Thursday, May 4, 2017
Flimsies, A Finish, and More Binding
Once again life and my body got the better of me. I hadn't realized how much I'd accomplished and not put on my blog until this morning. The batik friendship blocks were put away temporarily while I worked on the blocks for the quilt I intend to send to Covered in Love. When all twenty blocks were complete I put them on the wall in my fallback arrangement:
It actually looks better on the computer than it did in person. I went for a different arrangement however.
The back's been made and it's in the queue for quilting. It will be about 60" wide and 75" long when it's done.
Remember how I put bindings on four quilts last month? The first one was the wedding quilt, which has been sent and received and appreciated. :- ) The second was my F2F2 quilt, which I showed you here. The next one I tackled was the quilt I've decided to call Precious Gems because it features hand-dyes and batiks I only had a little of or didn't want to part with entirely. Taa daa:
I've begun to stitch down the binding on my Macabre Medallion but will have to set it aside to get the binding on the quilt for the Hands2Help quilt drive this year. I had a binding made but when I went to put it on the quilt I couldn't live with the discrepancy between the color of the binding and the border print. I don't remember now where I acquired that fabric for the binding but I know I bought it specifically for that quilt. My color sense doesn't fail me very often but it sure did this time! Now I'm going to have to hurry a bit to meet the deadline {sigh}.
Another recent accomplishment was the assembly of my Diary Quilt top, my version of the Quilty 365 projects. I had 13 columns that needed to be set together. It took a while to find the right color/print to fulfill that purpose but I'm very happy with this yellow with tiny random orange dots.
I have a back made for this too, out of a couple of random prints from my stash, and it's also in the quilting queue. This will finish at my standard size at 80" wide and 60" high.The binding has already been made out of the same yellow I used to border the strips. At least that was an easy choice!
It actually looks better on the computer than it did in person. I went for a different arrangement however.
The back's been made and it's in the queue for quilting. It will be about 60" wide and 75" long when it's done.
Remember how I put bindings on four quilts last month? The first one was the wedding quilt, which has been sent and received and appreciated. :- ) The second was my F2F2 quilt, which I showed you here. The next one I tackled was the quilt I've decided to call Precious Gems because it features hand-dyes and batiks I only had a little of or didn't want to part with entirely. Taa daa:
![]() |
| 60" x 78" (w x h) |
I've begun to stitch down the binding on my Macabre Medallion but will have to set it aside to get the binding on the quilt for the Hands2Help quilt drive this year. I had a binding made but when I went to put it on the quilt I couldn't live with the discrepancy between the color of the binding and the border print. I don't remember now where I acquired that fabric for the binding but I know I bought it specifically for that quilt. My color sense doesn't fail me very often but it sure did this time! Now I'm going to have to hurry a bit to meet the deadline {sigh}.
Another recent accomplishment was the assembly of my Diary Quilt top, my version of the Quilty 365 projects. I had 13 columns that needed to be set together. It took a while to find the right color/print to fulfill that purpose but I'm very happy with this yellow with tiny random orange dots.
I have a back made for this too, out of a couple of random prints from my stash, and it's also in the quilting queue. This will finish at my standard size at 80" wide and 60" high.The binding has already been made out of the same yellow I used to border the strips. At least that was an easy choice!
Subscribe to:
Posts (Atom)